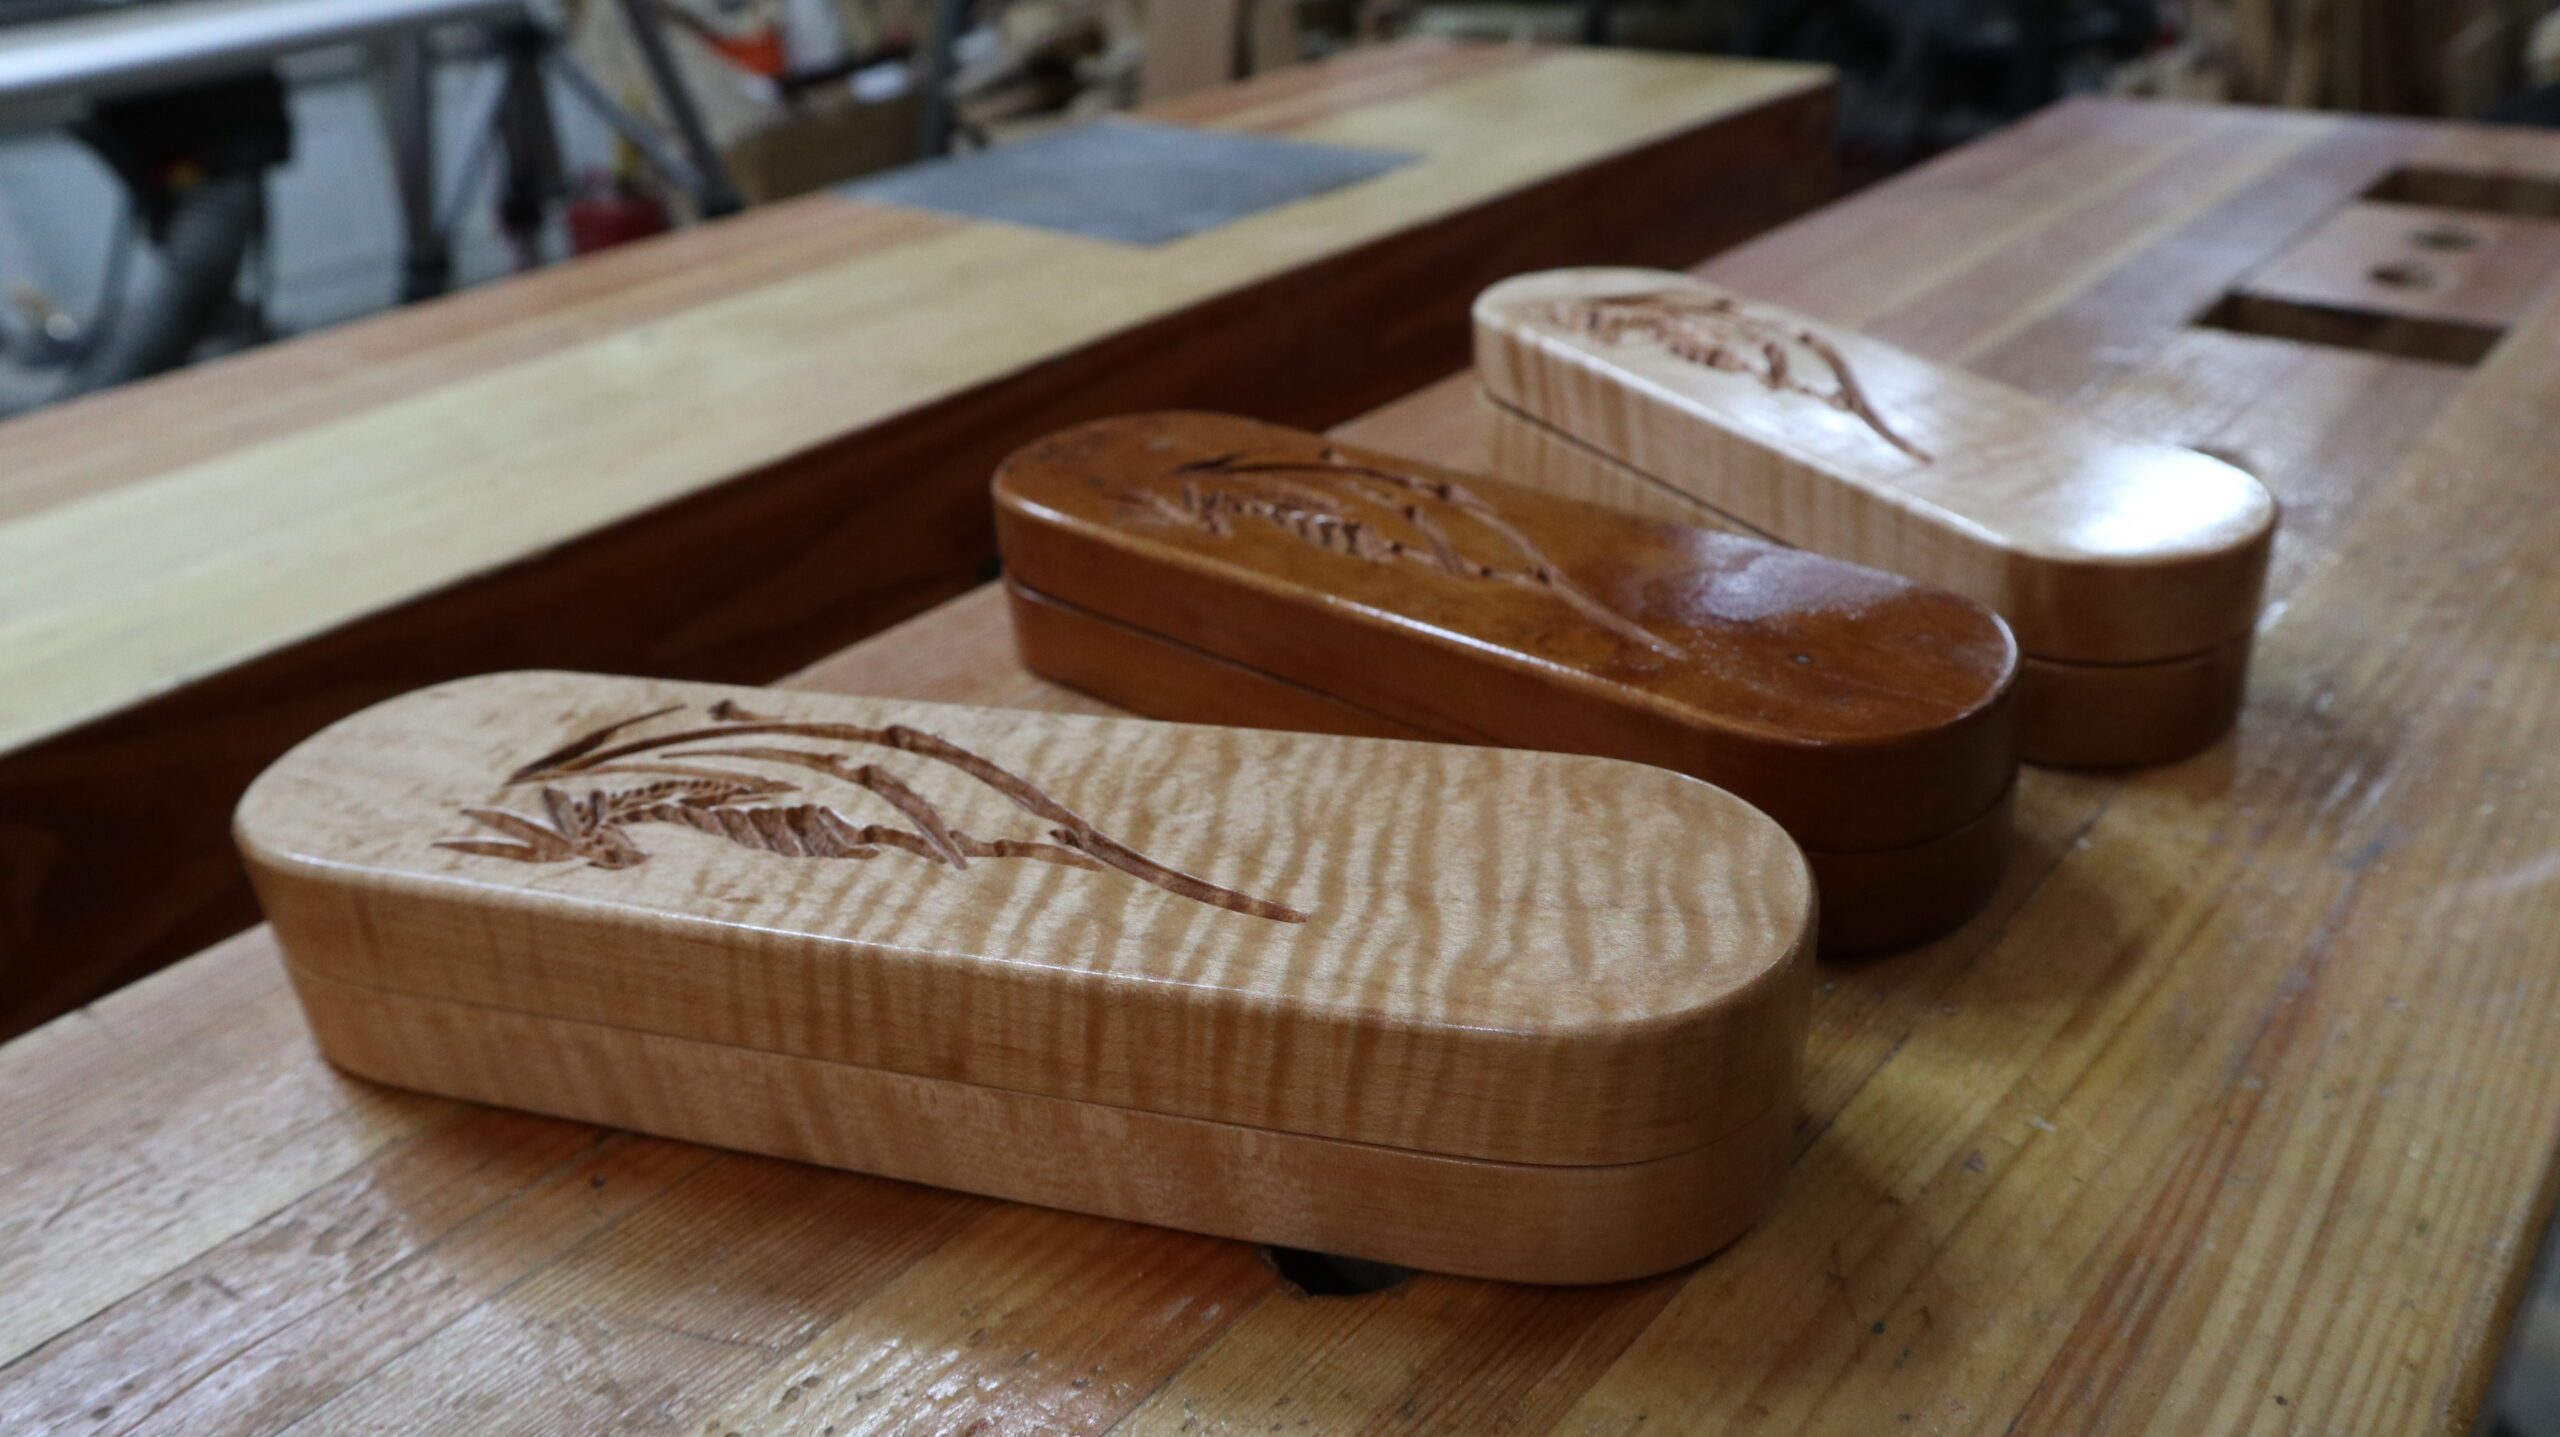

I want to show you how to create an easy D&D dice vault. This is a useful, fun, and fairly fast project. When you get done you’ll have something to show all your friends and if you’re making it for your son or daughter I’m pretty sure they’ll appreciate it.
My son has several braces of 12 dice plus a 13th oversize D20. He was looking for something other than the little plastic box that came in and, of course, Wyrmwood is at the top of the gaming accessories list. But seeing those I thought I’d make dice vault for him.
Materials and tools
This does take a few special tools but the materials are very straightforward. I chose curly Maple. You could use Walnut, Cherry, Purple Heart, Brazilian Cherry or Mahogany. The tools you will need are going to be a square, a saw, a router, belt sander, a 1-1/8 inch core box bit, and an 8 millimeter drill bit. You will also need four 8 millimeter by 3 millimeter N55 magnets .


Milling and layout
Start by cutting two pieces of your material 8 inches long by 2 1/2 inches wide. They should be 3/4 of an inch thick. Next mark a centerline down the center and a centerline across the width. To put the radius in at the ends you can use a compass or use the cap off a spray can.

Cutting
Next, you will need to cut the radius at both ends of your dice vault. I used bandsaw but you can use a jigsaw, or a chop saw and then file the end until it’s round. I suggest that you use two face tape to tape the two pieces together. That will ensure the radius for the top and the bottom will match.

Faring the curves
Depending on your jigsaw or bandsaw work you may have to do some filing or sanding to fare the curves. Faring is nothing more than blending the curves around the radius. You can achieve this with sandpaper and a file however I used an Oscillating Belt Sander. The Oscillating Belt Sander made short work of the process and guaranteed an even radius. To ensure that both top and bottom halves were the same radius I left the pieces taped together.

Making the jig
The jig is easy to make and pretty fast. You’ll need a piece of 3/4 inch plywood that is 10 inches long by 4 inches wide. Mark a center line down the length and mark the center line across the width. Next from the center out to the edge mark 3/4 of an inch on both sides. And along the long length mark 3 inches each way. This will give you a box that is 1-1/2 inches wide by 6 inches long. With your drill and a 3/8 inch bit drill a hole and the inside of the box. Next use a jigsaw to cut out the center. Follow the lines closely and be as accurate as possible. Then with a file to straighten up the edges.
The rails are nothing more than two 10 inch long pieces of ¾ x ¾ inch Plywood or scrap. Glue these on flush with the outside and clamp. If you did everything right you will have a 2 1/2 inch space between these two. You can screw or nail these down just be sure the screws or nails are below the surface. I just used glue. Once the glue is dry your jig is done.
Last, you will need to mark center lines down the insides of the cut-out area. This will allow you to align the center lines of your part with the jig.


Routing
I used a 1-1/4 inch core box bit. Because you have the jig you can use something smaller. A smaller bit is much easier to handle and requires a smaller router. I chucked mine in a 13 AMP Freud fixed base router. I’d actually suggest you use a plunge router because it is safer and easier.
Use two face tape to tape you’re piece into the jig. Make sure you have the center lines aligned before you press down on the part to engage the tape.
You will make three passes of 1/8 of an inch each so set your router to the thickness of the jig plus 1/8 and begin routing.
Safety Note 1: be very careful when starting the router and getting it into the Jig.
Safety Note 2: be sure to unplug the router while you’re setting the depth.
Make your pass, then remove any built-up wood chips. Set your depth for an additional 1/8 inch and make your second pass and then repeat for a third pass. This will give you a 3/8 inch deep depression to hold the dice.
Now repeat this process for the other half. The result will be a depression of 3/8 in each piece giving you a total depth of 3/4 of an inch.

CNC
If you’re using CNC to cut in a design then position your part appropriately and fire up your machine. I would advise running a test piece, however, just to make sure everything is set.

Edge routing
I used a DeWalt compact router with a 1/8 inch round over bit to ease the edges of the dice vault. This made very short work of it but you can use sandpaper to achieve the same thing.

Sanding
Sanding is pretty easy. I used 220 grit to remove any hard edges left by the round over bit and then went to 320 grit and sanded everything else.

Staining and finishing
Depending on the wood you chose you may or may not need to stain. I used quilted Maple which is a very white wood and needed stain to really bring out the quilting. To do that I used a minwax golden pecan stain which both gave it color and made the quilting pop. This was nothing more than a wipe on stain and wipe off. I allowed four hours to dry.

The last step in your project is to apply finish. You have lots of choices from waxes, oils, polyurethanes, or lacquers. I chose a lacquer because this it’s an indoor project and I wanted a nice smooth finish. I applied four coats of a spray on lacquer by minwax. The four coats are fairly thin but this is not a project that you need to have a thick film coat like that produced by a polyurethane. I did sand after the first coat with 320 grit sandpaper just remove any imperfections. The last three coats were applied with about a 15 minute wait time in between.

Congratulations
Hopefully you had a chance to think about this project and do it. It is really fast and easy and you can impress your friends with your awesome woodworking skills.

If you did make this project, congratulations on a job well done. And post it on my Facebook page. I’d love to see your work.
Hope you got something out of this and if you did, do me a favor, hit like and subscribe. I’d appreciate that a lot.
Thanks for reading and until next time Good Making!
Bill
Visit my Etsy Store at www.etsy.com/shop/30MinuteWoodshop
Facebook https://www.facebook.com/30MinuteWoodshop
Links to my Videos and Blogs
Create Your Own Dice Vault
DIY Whiskey and Cigar Butler https://30minutewoodshop.com/?p=550
Farmhouse Key Rack https://youtu.be/I65FGq4dKYY
Create Your Own Lazy Susan https://30minutewoodshop.com/?p=491
Tools and Materials you may need
8mm x 3mm Magnets https://amzn.to/3HEdWuU
DEWALT Drill and Driver Combo https://amzn.to/42yybmy
DEWALT Router Plunge Base Kit https://amzn.to/3LKkJEK
Amana Tool Bowl Bit 1-1/8 Dia https://amzn.to/43i4pD6
Ridgid Oscillating Belt Sander https://amzn.to/45C3rTK
Freud 1-1/2″ Forstner Bit https://amzn.to/3W3sjiT
Narex Scratch Awl https://amzn.to/3O8sM
DEWALT Router Fixed/Plunge Base Kit https://amzn.to/34TeXzp
Milwaukee M18 Jig Saw Kit https://amzn.to/3FAWXsS
BOSCH Compound Miter Saw https://amzn.to/421A1vl
Minwax Fast Drying Polyurethane https://amzn.to/3V5h0pO
PPE Gear
3M N95 PPE Mask https://amzn.to/3x4NGEu
ISOtunes Bluetooth Earmuffs https://amzn.to/3lpj1iA