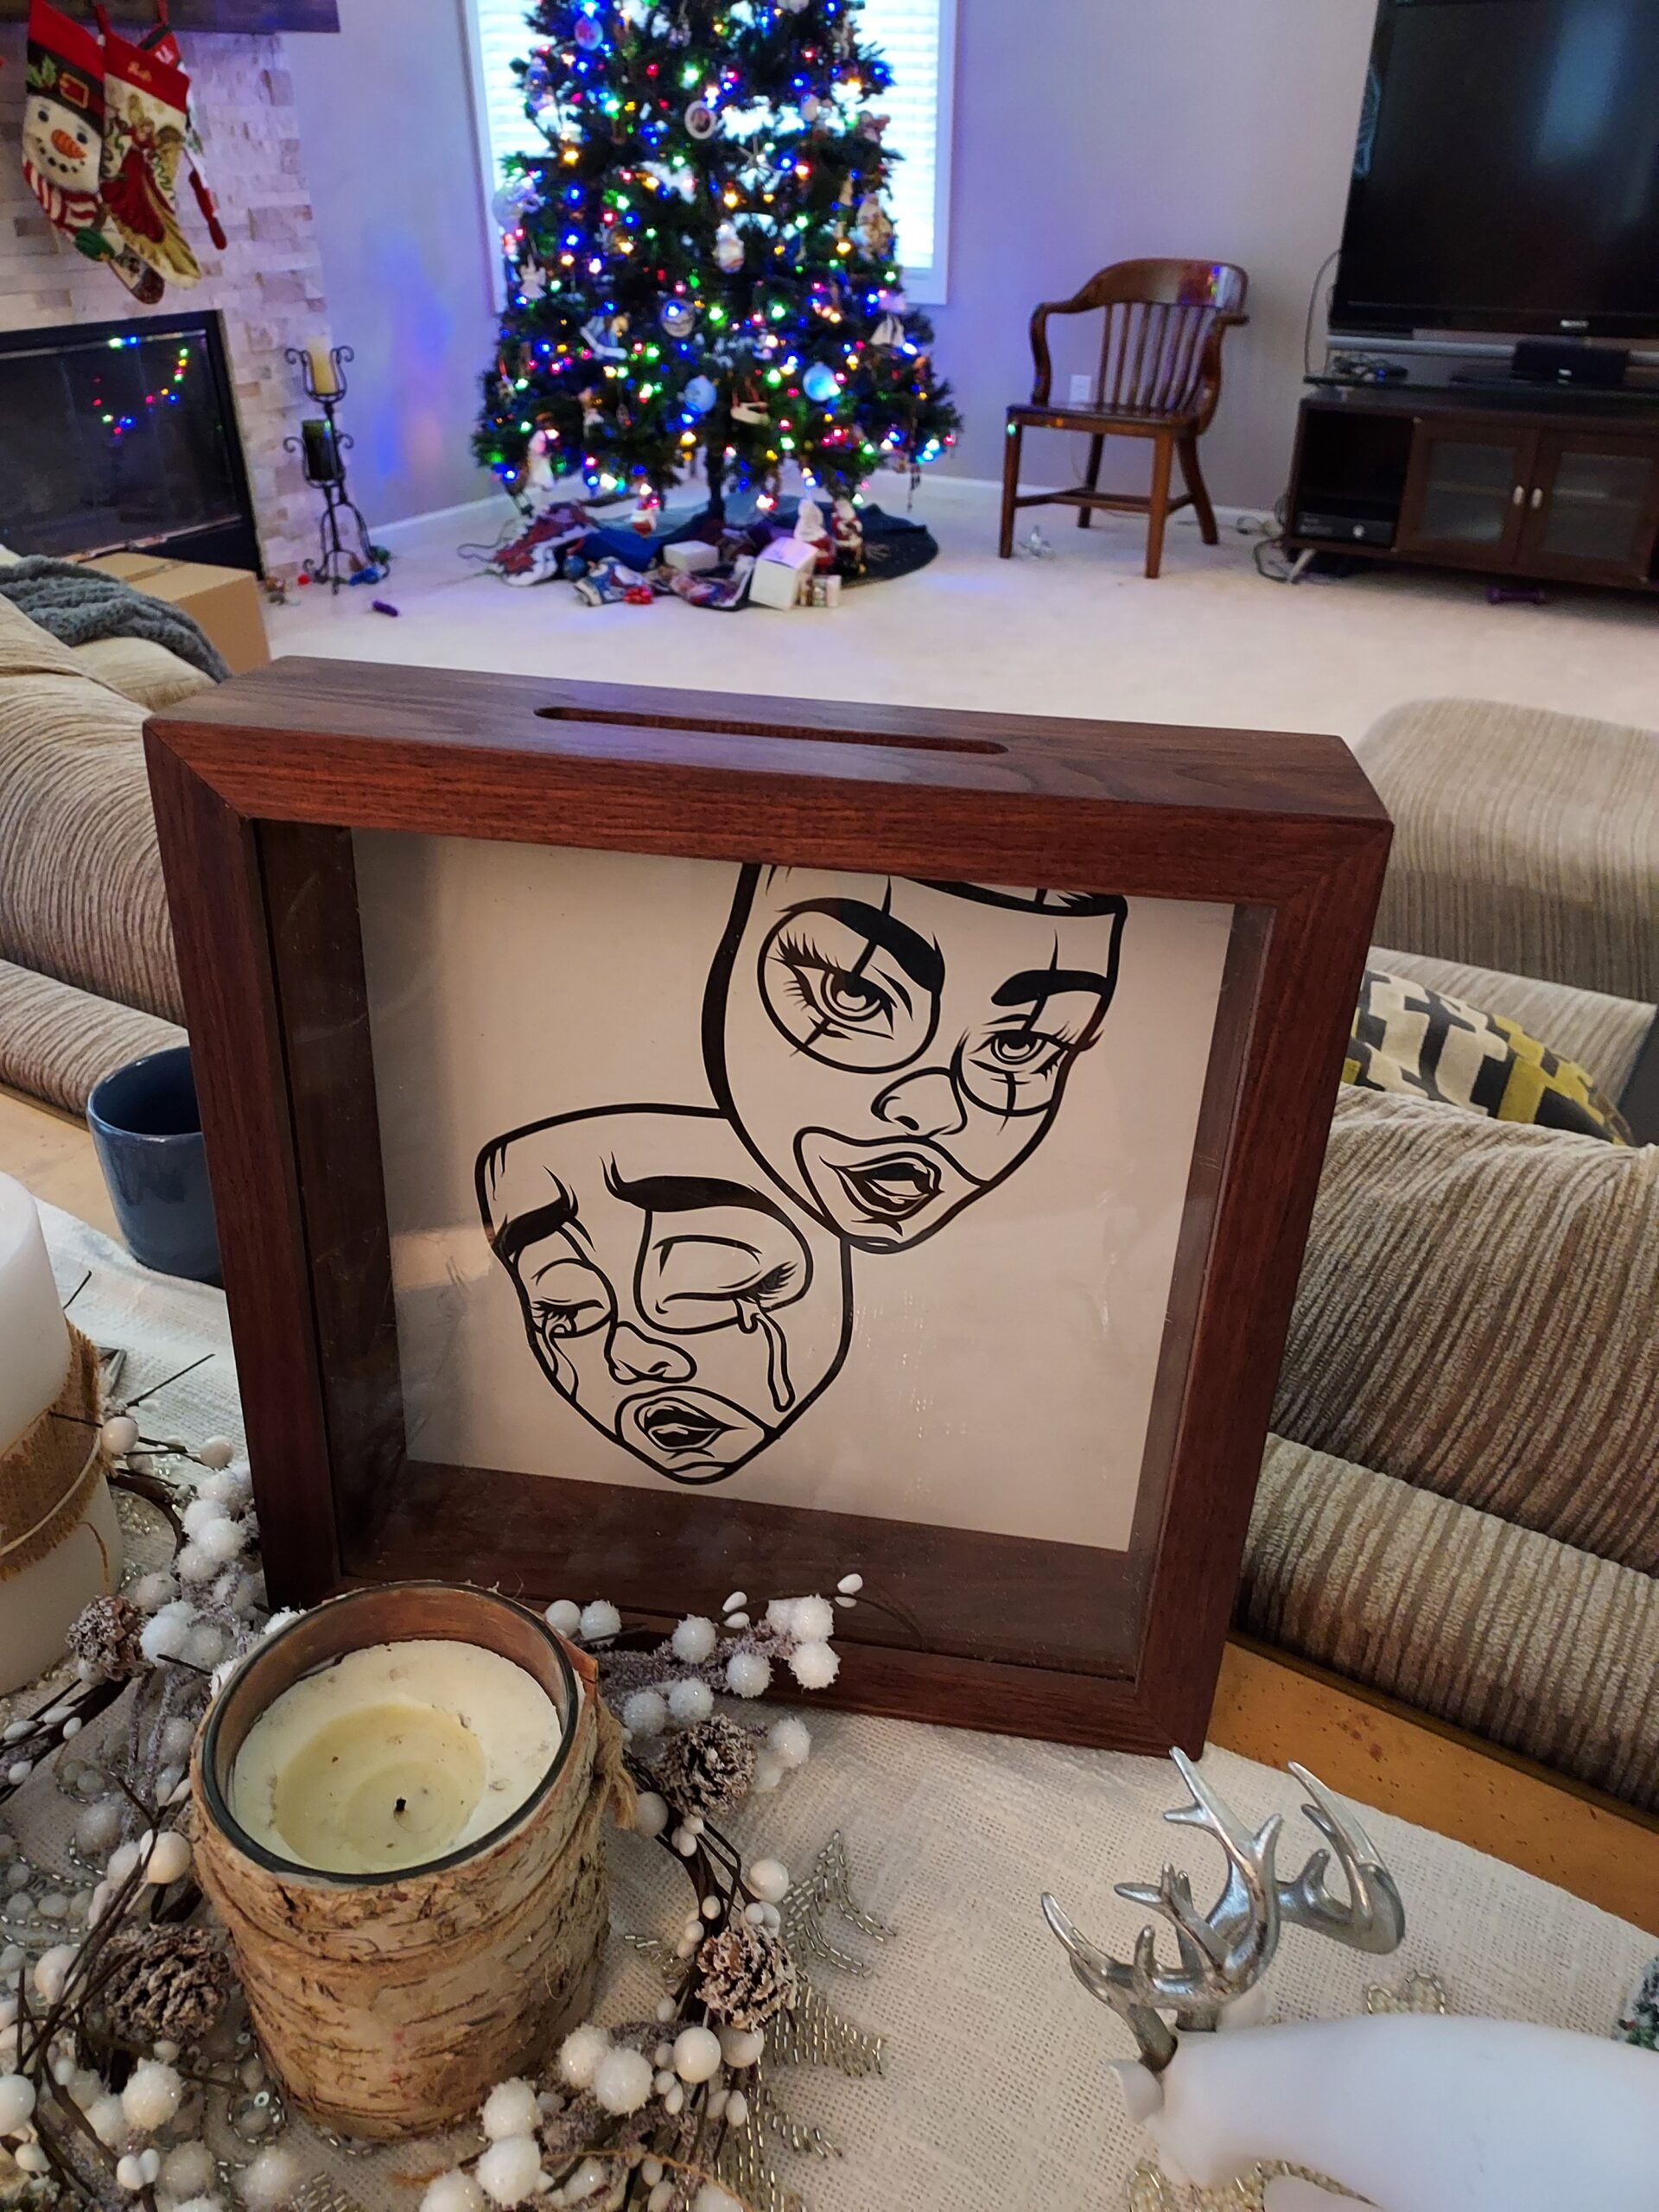
Having some place to put your memorabilia so you can see it is a really nice option. This ticket shadow box is just the thing to store and show off your concert, hockey, and play tickets and even your playbills. I made this one in walnut and it is fairly easy to build. It does require a few tools that you may not have. Links for those are in the bottom. This is one of those projects that I think you’ll have a good time building and really enjoy it once it’s done.
By the way, if you change the slot on the top to a 1-3/4 inch hole this can become a nice wine cork shadow box. It is great if you attend after glows, tailgate parties, or dinner theaters.

Tools and Materials
The materials needed for this shadow box are straightforward. You’ll need a board of walnut about 50 inches long, 3-1/2 inches wide, and about an inch thick. Maple, Oak, Elm, or Cherry, are other great options for this project.

You will also need a piece of plexiglass that’s about 12 inches by 12 inches we’ll be cutting that down later. And a piece of 1/2 inch plywood that’s about 12 by 12 also we’ll cut that to size later.
While you could build this shadow box with hand tools you will need to be fairly skilled. And it will take you some time to make this. I used power tools. I recommend a table saw, a Wixey digital angle meter and a Wixey digital protractor. These last two tools are needed for precision set up of the table saw. They will help guarantee tight fitting 90° miters. You will also need a jigsaw or router to create the slot.

Sizing the Wood and Planing
The approach to this shadow box project is a little bit different. We’re going to size and plane the board, cut the groove and dado, and apply the finish before we actually size the parts to length. The first thing you want to do is to cut the wood to the correct width which is 3-1/8 inch.

With that out of the way it’s a good time to plane the wood if you need to. If you’re using rough stock this will be required. Personally, I would take off the minimum amount of wood needed to get a smooth surface. This should leave you with a piece that’s about 7/8 of an inch thick.

Cutting the Glass Groove
The first groove you need to cut will be the glass groove. It’s going to be inset 1/4 of an inch from the front face and be 1/4 inch deep and the thickness all the plexiglass you chose to use. I used 1/4 inch plexiglass.
Set your saw so the blade is 1/4 inch above the table and the inside edge is 1/4 inch from the fence. The easy way to do this is to use a set of brass setup blocks. These will ensure a perfect cut. Run your piece through and you will probably have to make two passes. Be sure you test fit the plexiglass.
Cutting the Dado
The next step is to cut the dado for the back. As we are using 1/2 inch thick plywood for the back the data will be 1/2 inch deep. The drawing calls for using 3/4 inch material for the box so the dado will need to be 1/4 inch wide. Be sure you check that the plywood is flush or 1/32 inch sub-flush.
Routing the Edges
The next step is to route the edges. I suggest using an 1/8 inch round over bit Just to break the edge. You’ll do that both on the front edges and the back edge.
Sanding
At this point you’re ready to sand. Use 220 grit sandpaper an orbital Sander and it will make short work of both sides of the board. I would also suggest moving to 320 grit sandpaper just to smooth the feel of the board. The edges do the same thing with the hand Sander 220 grit and 320 grit. Be sure you dust the edges that you have rounded.
Finishing
This shadow box is a perfect project to finish before assembly. I would suggest using either boiled linseed oil or a wipe on varnish as a preferred finish. Depending on the kind of wood you’re using you may choose something different. Whatever finish you choose allow it to dry thoroughly.
Cutting the Pieces to Length
This is the final cut. Going to require precision miters. So the first thing you do is to use your Wixey digital protractor to set your miter gauge fence to an exact 90° relative to the sawblade. Run several test cuts to verify that it actually is 90°. This is extremely important to ensure the box goes together easily.

Next use your Wixey digital angle meter to set your table saw blade to an exact 45° angle. This may take a little bit of time and effort to dial it in but it’s worth the time. Be sure to run several test cuts to verify the accuracy of your 45° angles.
With these two angles dialed in you need to set the stop on your miter fence. This needs to be set to 12 inches.
Once you’ve dialed in the angles and the distance you could begin cutting as this is a square box all four sides will be 12 inches. The beauty of this is if it is a little over or a little under that’s OK. All the parts will be identical and so the box will be slightly larger or slightly smaller than 12 inches no big deal. Cut all four pieces and set them aside.

Routing the Top Slot
To cut the slot in the top piece I used a router with a straight bit you can use a drill and a jigsaw to accomplish the same thing however you do it you want to make sure that it is centered front to back and left to right. I did this by setting stop blocks on my router table and ensuring that my fence was set to exactly halfway across the piece. The dimension I used was 1-9/16 inches to the center line.
This is a great time also to choose whether you want to put in a hole for wine corks. I would do this before you create the slot by drilling a 1-3/4 quarter inch hole centered in the piece. Putting the hole in first gives you a spot for your router bit to cut the slot. It’s also kind of cool if you attend things like after glows, tailgate parties, or dinner theaters.
Routing this slot can be a bit painstaking so take it slow and don’t try to hog out too much material in one pass. Cutting this slot efficiently requires several passes, raising the bit by 1/16 or an 1/8 inch each time. This is much easier on both the router bit and the router and there’s less chance of making a serious mistake.

Once the slots have been routed, take some sandpaper and smooth all the edges of the slot. This is where your fingers might be so you want to make sure that it feels good to the touch.
Apply a small amount if finish at the slot edges and inside the slot.
Cutting the Plexiglass and Plywood to Size
Now is the time to size both the plexiglass and the plywood back. The drawing shows these to be 11 inches on each side. You will need to make sure this dimension is correct for your build. Most likely you will need to trim off a 16th of an inch on two of the sides of the plexiglass. And possibly trim off a 1/32 inch from two sides of the back. The back needs to fit snugly but not tight. The plexiglass can be a little bit looser but not much. You don’t want either one to interfere with the assembly.
Cut these off on the table saw making them square.

Finishing the Back
OK, your back needs to be finished depending on your wood selection and your plywood selection, it may only require some varnish. Mine, however, required paint. I painted the inside with rattle can white and I painted the back or outside with rattle can black. This was perfect for my application, but you may want to do something like staying in varnish to match. The beauty of doing the white is that if you don’t someone with a cricket then they can do some artwork and apply it and it looks pretty cool.

Dry Fitting
With all the parts cut it’s time to do a quick dry fit. Put the plexiglass in place and put the sides around it. You should be able to close up all four corners with the plexiglass in place. If it’s not closing up take a close look at the plexiglass because you may need to remove a 1/32 inch from two sides. And you may need to do this one or two times. Take your time getting everything to fit correctly.
Reinforcing the Corners
Gluing the corners of this box together is end grain to end grain which is not a very strong joint. So we want to find a way to reinforce the corners. I used a biscuit joiner with #20 biscuits. You can choose anyone of a number of other ways I’ll leave that to you. I like biscuits because they’re hidden easy and clean. In my case I used a Porter Cable biscuit joiner which has been with me for many years. It happens to be an excellent tool but there are many others out there that do the same thing.

Assembly
Well we are at final assembly of the shadow box. If the dry fit was good and the biscuit slots are cut all you need to do now is to apply glue to each of the biscuits and the corners slide the plexiglass in place and squeeze everything tight. The best tool to use for this assembly process is a band or strap clamp. All it is is a nylon band with a ratchet that you can tighten evenly around the entire box. While you’re tightening the band clamp be sure all the edges are tight and flush. Once you’ve got the joints are tight and flush and the clamp is tight let the assembly sit for several hours so the glue can thoroughly set. Be sure to wipe up any excess glue that has squeezed out.

Finishing
Well, we’ve already finished all the parts and hopefully wiped all the excess glue off, there shouldn’t be much else to do at this point. But, go over the box thoroughly and if there’s any rough spots or bad spots hand sand with 320 grit sandpaper and you may have to do a little bit of touch up with the varnish.
Attaching the Back
Wow, we are almost done with this shadow box project. The last step is to attach the back. Position the back and drill and counter sink one hole in each side one in the top and one in the bottom for a total of 4 countersunk holes. I used number six screws it doesn’t take much to hold it back on. Screw the back in place and your project is done.
By the way don’t forget to sign your work with either a sharpie or a paint pen it’s always good to mark your work so folks in the future know who did it.

Hope you got something out of this and if you did, do me a favor, hit like and subscribe. I’d appreciate that a lot.
Thanks for reading and until next time Good Making!
Bill
Visit my Etsy Store at www.etsy.com/shop/30MinuteWoodshop
Facebook https://www.facebook.com/30MinuteWoodshop
Links to my Videos and Blogs
Create Your Own Dice Vault https://30minutewoodshop.com/?p=1226
DIY Whiskey and Cigar Butler https://30minutewoodshop.com/?p=550
Farmhouse Key Rack https://youtu.be/I65FGq4dKYY
Tools and Materials you may need
Walnut Lumber https://amzn.to/48UzaQO
12″ x 12″ Plywood https://amzn.to/42cKGF8
Plexiglass 12″ x 12″ https://amzn.to/3HsWdGB
DEWALT Drill and Driver Combo https://amzn.to/42yybmy
DEWALT Router Plunge Base Kit https://amzn.to/3LKkJEK
Starrett Combination Square https://amzn.to/3XpbrDN
Wixey Digital Angle Gauge https://amzn.to/3U5aUav
Wixey Digital Protractor https://amzn.to/490yoll
WoodRiver Band Clamp https://amzn.to/3Oc8QJY
WoodRiver Low Angle Block Plane https://amzn.to/3pkNvos
Milwaukee M18 Jig Saw Kit https://amzn.to/3FAWXsS
BOSCH Compound Miter Saw https://amzn.to/421A1vl
Minwax Fast Drying Polyurethane https://amzn.to/3V5h0pO
PPE Gear
3M N95 PPE Mask https://amzn.to/3x4NGEu
ISOtunes Bluetooth Earmuffs https://amzn.to/3lpj1iA