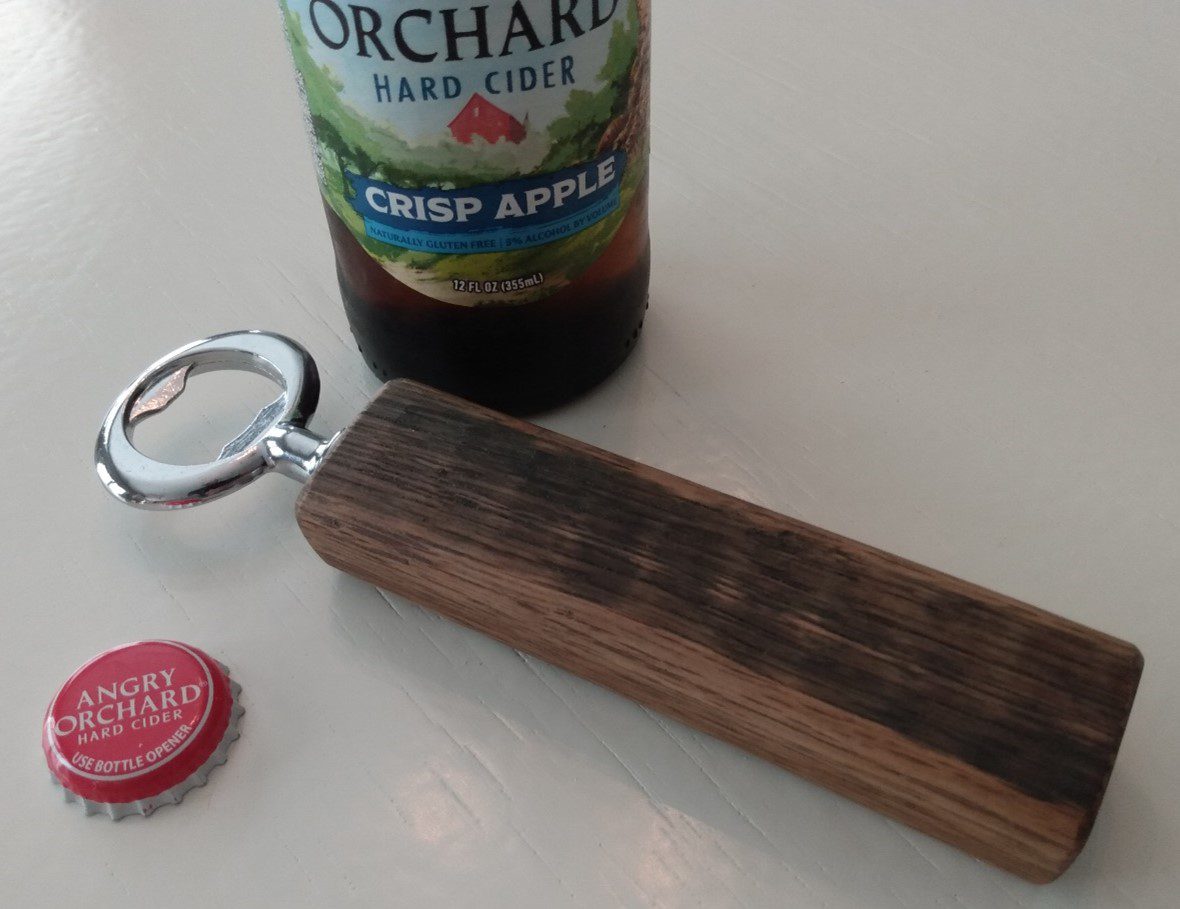

This easy to make Barrel Stave Bottle Opener project is a great Christmas or birthday gift and one that you can easily make at the last minute (ok you do need time for the finish to dry…).
If you are like me since the introduction of craft beer I am always looking for a bottle opener. And while I do have a few commercial ones around they seem too cold and clinical. Hence, I am usually on the lookout for a better alternative. Well, the Barrel Stave Bottle Opener fits the bill and will impress your friends with its simplicity and warmth.
Tools and Materials
For the project you only need a few tools. A saw, a drill with a 5/16” (assuming you use the same hardware I did), and possibly a handplane for rounding the edges – though you could use a file and sandpaper.)

With respect to materials you will need the opener hardware (link below) and a 6’ to 7” chunk of barrel stave. I recommend Skull Creek Designs in Midland Michigan as a good source for barrel staves and parts (link below.) If you are just making these, I would ask for 1” staves. They will be less work to shape to final size.
If you are using a piece of stave leftover from the previous project then the inside char has been cleaned off and sealed. If not, refer to my Whiskey and Cigar Butler video, time hack 1:30, for the “how to.”

Layout and Cutting
Your first step is to layout a piece or pieces about 1” to 1-1/4” wide and about 6” to 7” long. Cut one or several depending on how many you want to make. Be careful doing these cuts and make sure you piece is fully supported.

Drilling the Hole
First you will need to mark the center of the piece. This is a challenge because you part will probably look like a wonky trapezoid. You will need ot eyeball the approximate center and use and awl to mark it for the drill point. The hardware I’m using mic’d at 0.3380 inches. A 5/16” hole will be a perfect fit. Mark your drill with masking tape at a depth about ¼” deeper than the length of the threaded portion of the part. Then drill your hole and test fit the metal opener.

Planing and Contouring Edges
At this point you need to contour the edges of the handle to make it a comfortable fit. There are several ways to make this happen, sandpaper and a file is the old school way. You can use a handplane. Or you can try a router.
***Only try a router if you can safely secure the piece.
Because of the curves, I could not find a way to safely route the edges. I chose to use a plane as a fast, safe, and easy way to round the edges and achieve the level of comfort I wanted.

Sanding
The Barrel Stave Bottle Opener handle does require some sanding. The outside usually has a lot of dirt and grime and Hopefully you knocked off the char and sealed the inside when you started. Use 80 grit sandpaper on the outside and edges then work your way through the grits to 220 or 320 and sand out any unevenness left by the plane. Be sure you sand and chamfer the ends too. White Oak is hard and the corners are fairly sharp. Don’t sand the char remaining on the inside.

Finishing
With sanding complete, wipe the dust off the handle and grab some stain I chose a Minwax Dark Walnut because I wanted that dark antique look to simulate an old barrel and to complement the inside char. A quick wipe on and wipe off then some dry time. Once your stain is dry you can apply your finish. I chose a satin poly and applied three moderately heavy coats with about four hours of drying in between. This helped fill in and stabilize any remaining char and will protect the handle through many years of use.

Assembly
Ok last step for our Barrel Stave Bottle Opener project. We need to epoxy the opener into the handle. So I us JB Weld 5 Minute Epoxy, you can choose your own. Mix according to the direction – mine was 1:1 and apply it to the threads. You shouldn’t need much as (in my case) it is a tight fit. Screw the opener into the handle and pay close attention to the orientation of the opener relative to the handle. Try have a “kind of” square handle so orient the opener for ease of use. Once you’ve got it screwed in and positioned slap on a coat of paste wax as a final layer of protection.

Congratulations
Wahoo – you are done!! Be sure to show off this project at your next party or BBQ and let EVERYONE know you made it. Oh, and tell them they can have one too for $15!

Thanks for reading and until next time Good Making!
Bill
How to Make a Barrel Stave Bottle Opener Video https://youtu.be/745gLTT5KKA
Easy DIY Whiskey and Cigar Butler Video https://youtu.be/PR0C5dOrO2E
Create a Whisky and Cigar Butler Blog https://30minutewoodshop.com/?p=550
Materials you may need
Barrel parts at Skull Creek Designs https://www.etsy.com/shop/SkullCreekDesigns
Bottle Opener Inserts Hardware https://amzn.to/3ORalKY
Quick-Cure 5Min Epoxy https://amzn.to/3vvXuXI


