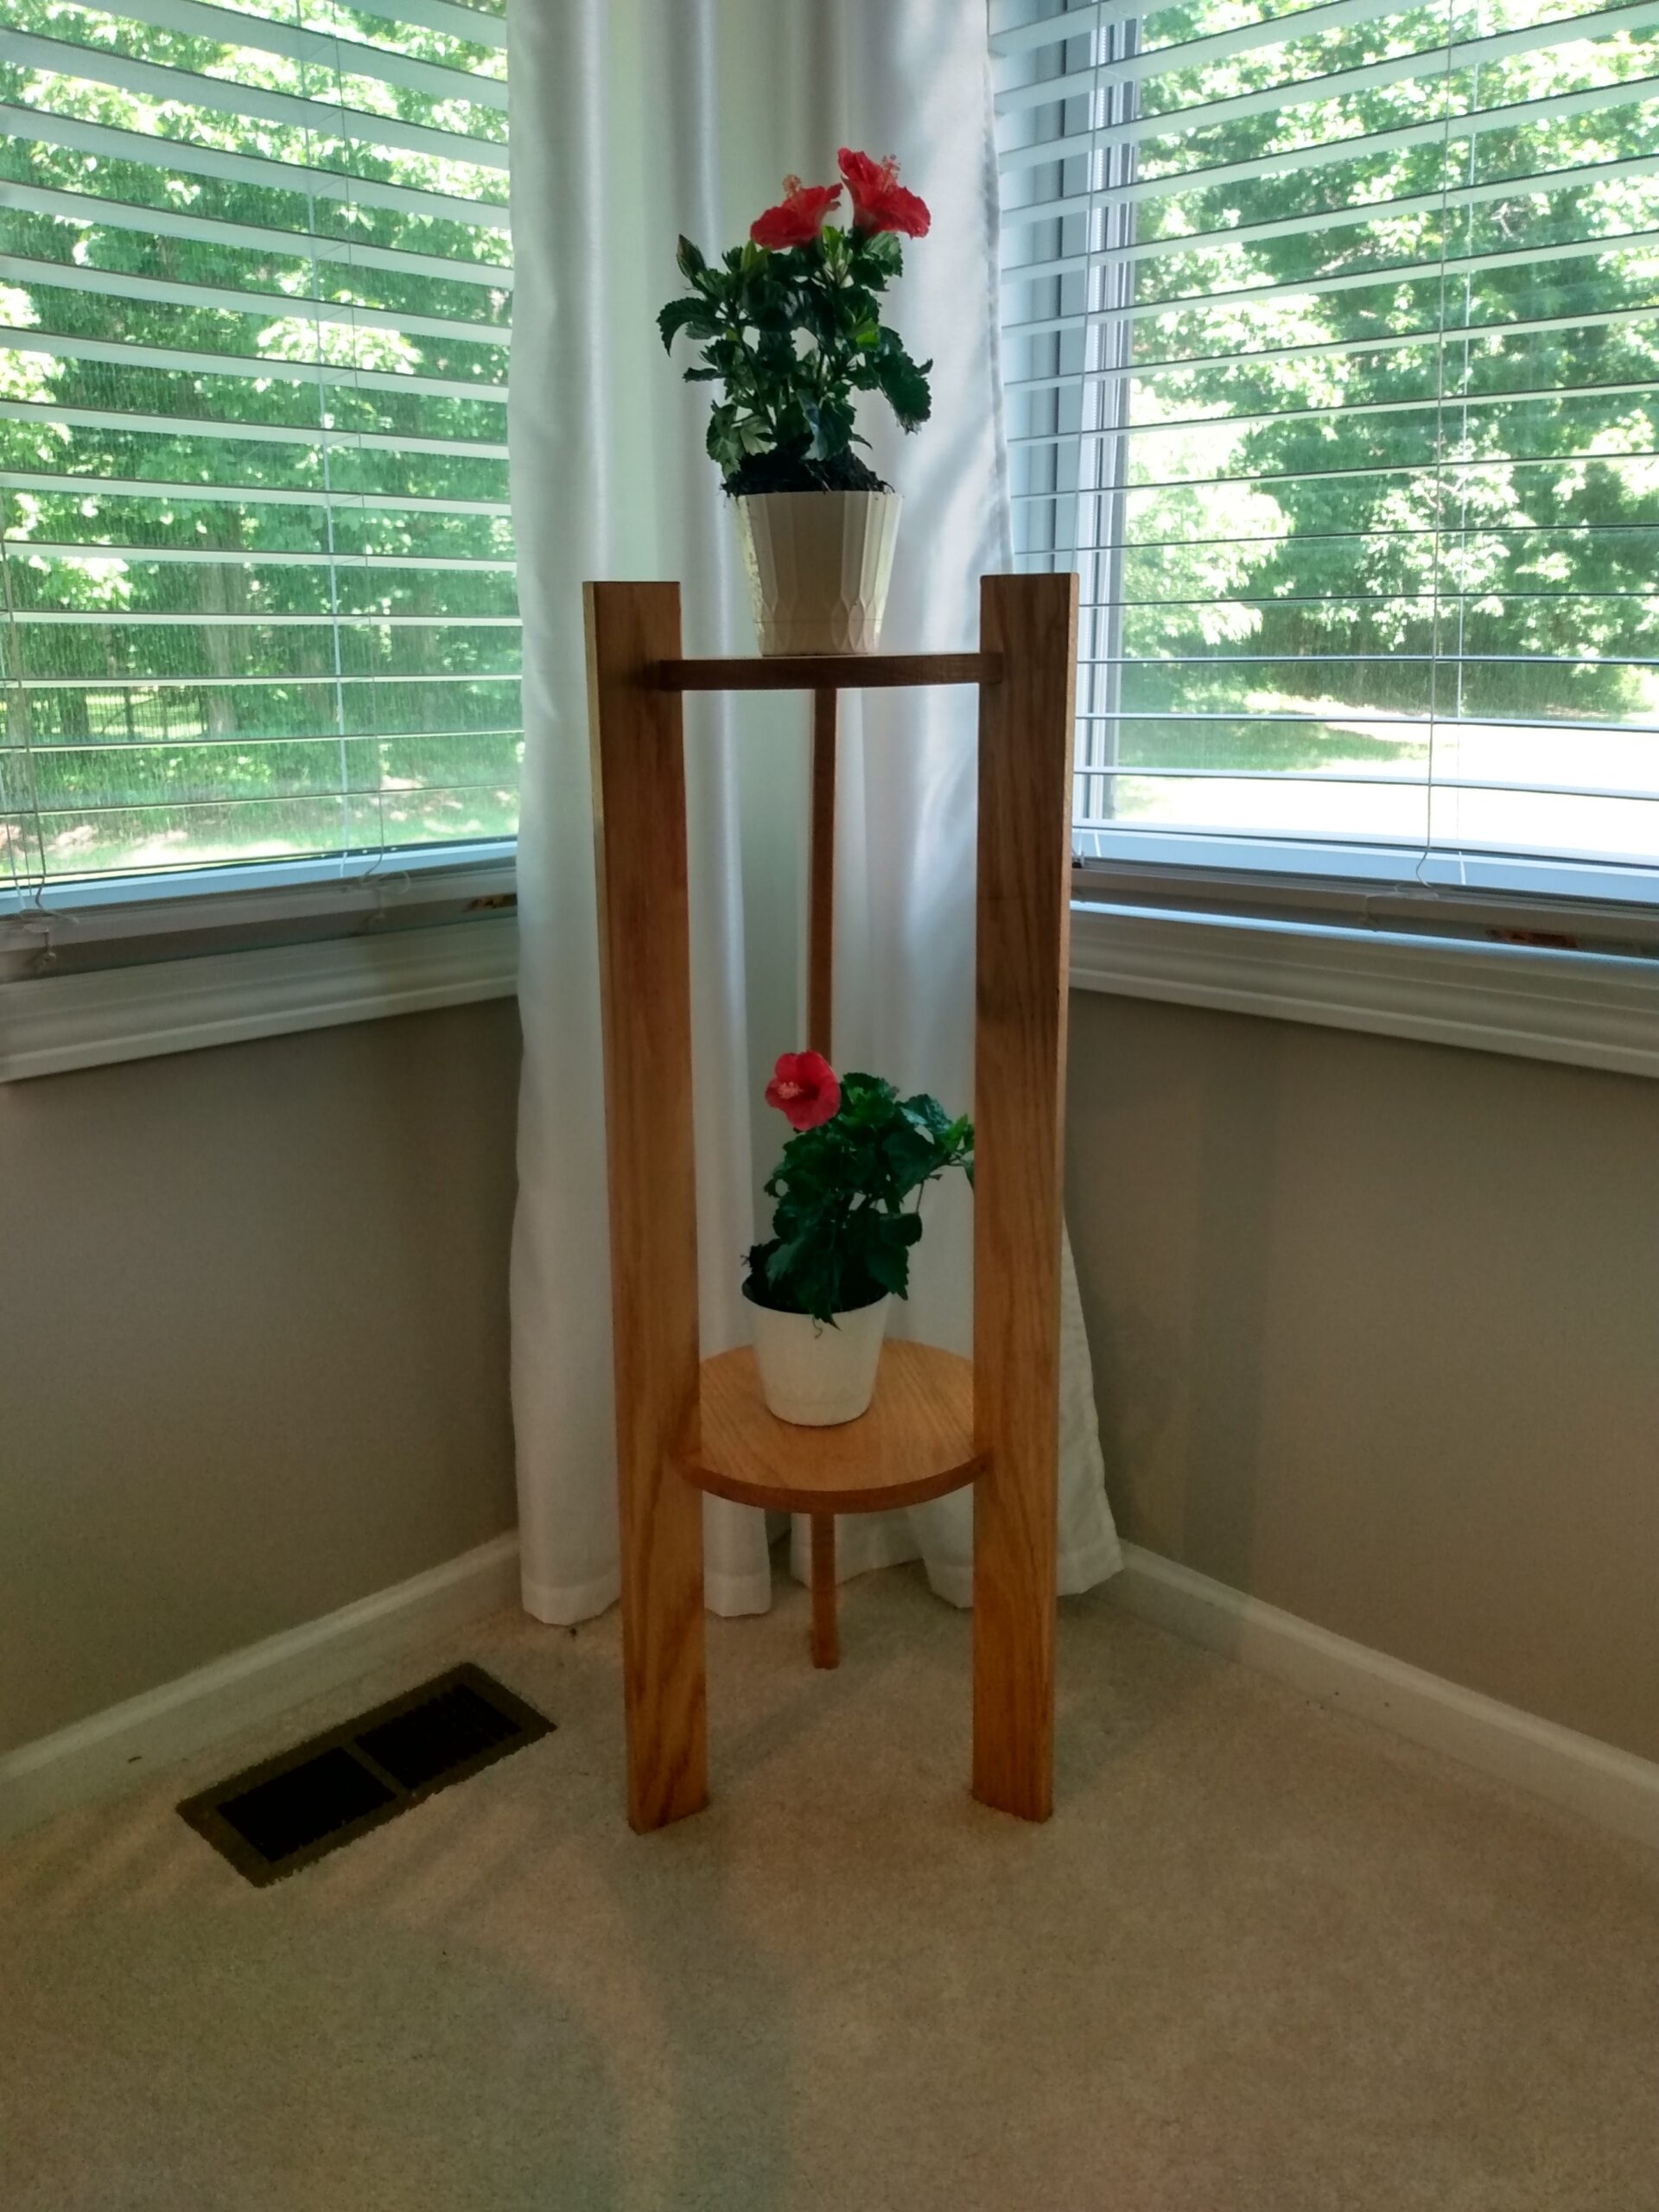
If or you, or your spouse/partner is a plant person then making a Mid-Century Modern plant stand is a project for you. This is a fast and easy project that is a great way to build your woodworking skills and confidence. And it gives you a pathway to building fine furniture.
And follow this link to my Video to see how it is done. VIDEO LINK
Tools & Materials
I built my Mid-Century Modern Plant Stand using stock Red Oak from a big box store. Using stock material is the only way to go as long as you stick to Red Oak, Hard Maple, Poplar, and Cherry. Most big box stores and local lumber yards have standard sizes, though a lot of older, established woodworkers will complain bitterly at the cost. If you are not really doing a LOT of strange and exotic woods your really can’t beat the price though. Especially when you consider the cost of the tools, maintenance, and floor space needed. I can buy a lot of board feet of S4S (Surfaced Four Sides) before I come close to the cost of a jointer and planer. Btw I do have all the tools and do mill lumber from rough.
You will need 2 feet of 1×12 Red Oak. Nominal dimensions will be ¾” thick by 11-1/4” wide. You will also need about 10 feet of 1×4 Red Oak which will be ¾” thick by 3-1/2” wide.
Nothing too special in the way of tools. You will need a table saw, really good blade, and though I did not use it in the video but you could really use a dado blade to cut the notches for the shelves. While set up is a bit longer your accuracy is far better. You can dial the notches into the precise width you need. I have a link to a Freud 8” Professional Dado Stack below which is what normally I use and is a superb piece of equipment. A compact router and orbital sander are good too. I also used a Kreg Jig to ensure the legs are permanently attached to the shelves. More tool links below.
Layout & Initial Cutting
Layout the wide piece so you have two square pieces after cutting. These will be 11-1/4” x11-1/4”. Next crosscut the 1×4 into three pieces that are 38” long each. Finally, you will need to rip these into 2” wide pieces.
Ok, the video deviates from the sketch – I used 1-1/2” material. You can use the 1×4 as is and not rip it, go with 2” or just buy 1-1/2”. These are your design decisions. Note: as the legs get narrower the piece get more unstable.
When you are done you will have
Shelf Blanks 2 pc 11-14” x 11-1/4” x 3/4”
Legs 3pc 38” x 2” x 3/4”
Cutting the Shelves
You need to cut the shelf blanks into 11-1/4” diameter circles. I have a simple (very simple) jig and a bandsaw. If you don’t have one you can use a jigsaw or a router with a circle jig. I recommend the router circle jig by Micro Fence (https://microfence.com/). It’s expensive but dang is it good – super repeatable and dead on every time. I have links in the bottom.
For me, I just drew lines from corner to corner which gave me a big “X” in the exact center then I dropped in a 1/8” hole for the pivot of my bandsaw circle jig. I use this “X” later to lay in my pocket holes.

Once you’ve found the center and marked your circle, you can cut away. I just dropped shelf blank on the pin and cut the circle. Super easy.
Subscribe to my blog and my YouTube channel and I will be showing you how to make one in the coming weeks.

Below is a dimensioned sketch of the mid-century two tier plant stand you can use.

Pocket Holes
Next, Layout your pocket hole locations in the shelves. First, pick your “show side” – it’s the side you want people to see. Usually it has interesting grain, no blemishes, and is easy on the eyes. Mine was the side without the circle jig pinhole.

Next, on the back side, you will find the center and mark two line at 90 degrees. Choose your “baseline” and mark one line at 90 deg out to the edge. Second step is to set your protractor at the center and mark 30 degrees and 120 degrees opposite the 90. You should end up with three lines at 120 degrees from each other. BE SURE YOU CHECK THESE.
Set up your pocket hole jig and align the layout lines to sink 3 pocket holes in each shelf.

Notching the Legs
Notching the legs is again a simple task. I’d suggest you use a good dado blade to achieve a precision fit. Follow the sketch for the notch locations and I’d suggest that you gang cut them. As in use two face tape to hold all three together then cut them all at the same time.
SAFETY NOTE: Be sure to read and follow the directions that came with the Dado Blade.
I did not use my dado. I used a “nibbling” technique. It is not as accurate as a dado and can be finnicky if you have not done a lot of this type of work. You can mess it up really fast. So use a dado blade.

Route and Sand
For the Mid-Century look you will need crisps edges. But you really don’t want them sharp. A sharp edge is prone to damage, feels bad to the hand, and cannot hold a finish. So hit all the edges with a 1/8” round over bit in your router. This will give a nice feel and some area to allow the finish to adhere.

Next, sand everything. As you are using S4s lumber you really only need to sand with 220 grit.

Raising the Grain
I do suggest that after your first sanding use a damp rag to wet the surfaces and let it dry. This will raise the grain meaning that the water will cause the wood fibers to stand up. Then sand again with 320 grit. When you finish your surface will be very smooth.
Assembly
Assembly is the next step as we head to the finish line (pun intended). Dry fit the parts first. If you did it right, then you should have snug joints. You will not on the video that I mention having to add some shims to the top shelf on mine. Yes, the “nibbling” technique failed me and it took more time to custom fit and install 3/64” shims than the time I “saved” by NOT installing my dado blade. Lesson learned… again!
Pull the dry fit apart and apply glue to the joints. I suggest that you do one leg first top and bottom and screw then down securely with your pocket hole screws. Then move on the then next leg. Make sure the leg being install is parallel to the 120-degree line and not twisted as you drive the screws. Continue around the piece until all screws are in place.

Staining and Finishing
We are in the home stretch. You will need to choose a stain (or not?). I like the darker look of Craftsman style fumed Oak so I picked a Minwax Dark Walnut Stain. Minwax is a very reliable stain and I go out of my way to get and use it. I have to get mine at the local ACE hardware store.
The stain is wiped on and ragged off then let dry. Second and third coats are and option if you want something darker. Or you can mix and match with say a Mahogany undercoat and Special Walnut topcoat to bring out the reds.

Once dry apply your final finish. As this is going to see water off and on I chose an Oil Based Polyurethane. I have found that these seem to hold up better over the long haul where water is present. A Spar Varnish would be a good choice too. I applied three coats to the tops of the shelves and two coats everywhere else with a 320 grit sanding in between. This left a very smooth finish. As a final coat I rubbed in some Johnson’s Paste Wax to allow water to just roll off.

Congratulations
Well, I hope you found this interesting and it inspires you to give this project a try and if you do, post a pic on my FB Page (Link Below). As I said at the beginning, using stock S4S lumber make the project a whole lot easier and faster.

Thanks for reading and until next time Good Making!
Bill
Facebook https://www.facebook.com/30MinuteWoodshop
Mid-Century Modern Two Tier Plant Stand Video https://youtu.be/kmgkzB6utZA
Bourbon/Whiskey Shelf Video https://youtu.be/ggMIH50ggAY
DIY Cigar and Whiskey Butler Video https://youtu.be/PR0C5dOrO2E
Barrel Stave Whiskey Shelf Blog https://30minutewoodshop.com/barrel-stave-whiskey-shelf-you-can-make/
Easy DIY Whisky and Cigar Butler https://30minutewoodshop.com/easy-diy-whisky-and-cigar-butler/


