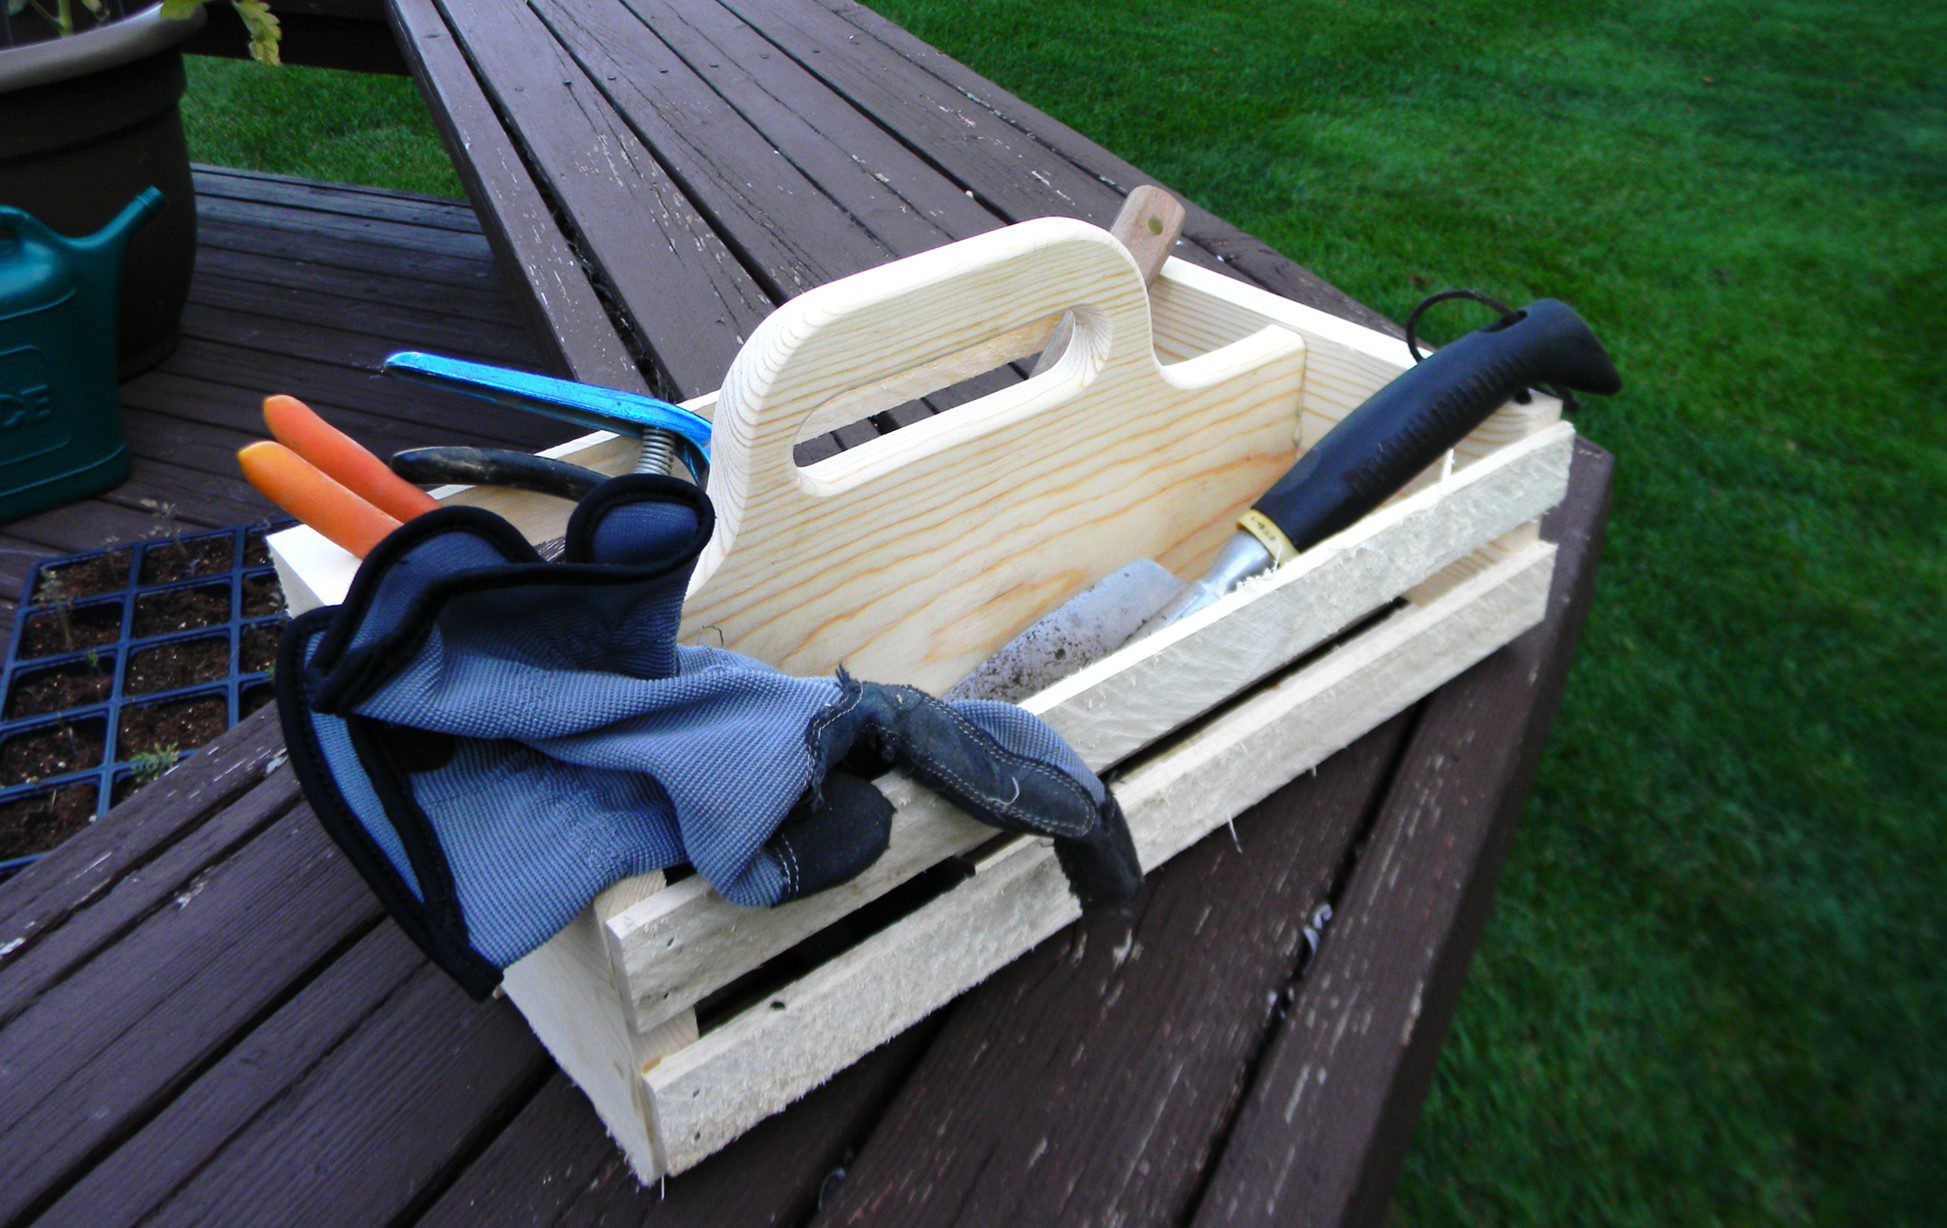

Here is a DIY Garden Tote that’s easy to make and uses very inexpensive materials. If you or your spouse do much gardening, you will collect tools and things you need to be a great gardener. This garden tote will be a faithful companion through many seasons. It also makes a perfect farmhouse style decorator item for your table, kitchen, or family room.
And best of all this is so easy that it is a kid friendly project too! Once you have cut the parts, your kids can glue and nail everything together and then paint and decorate it for Mom or Grandma or Grandpa.
Be sure to explore the links below. And follow this link to my Video to see how it is done. VIDEO LINK
Don’t have time to make it?
Buy it at my Etsy Store https://www.etsy.com/shop/30MinuteWoodshop

Materials
Materials are cheap and simple. Plain pine boards for the center and ends, with sides and bottom from standard lath strips. Then just some glue and nails. You will need about 20” of 1” x 5” and a 14” piece of 1”x 8”. You may have to buy a bundle of lath strips. These are 1-1/2” x 1/4” x 48” and the bundle usually have 50 pieces. Save these for our next project – a DIY Farmhouse Vegetable Crate

Layout
First thing is layout which is not difficult. Start by marking the lath for 9 pieces which are 12-3/4” long. Next cut the two end pieces. These will be 4” x 9”. And last is to cut the center section. The gross dimensions are 7” x 14”. Follow the plans (see Link below) to put in a hand hold and lay the curves.
NOTE: The drawings are a suggestion. Please feel free to change the curves, locations, dimensions, to make the project work for you and your materials.

Rough Cutting
First step to cutting is to size the 1×5 to 4” wide. Next cut two pieces 9” long. You can size the center to 7” wide but you can also leave it at the full 8” nominal width which is 7-1/2”. You won’t have to change the plans at all. Cut 9 pieces of lath to 12-3/4”. I used a stop block and gang cut 3 at a time.
On completion you should have the following parts:
1 Center 7” x 14” x 3/4”
2 Ends 4” x 9” x 3/4”
9 Sides & Bottom 1-1/2” x 12-3/4” x 1/4”

Handle Shaping
Using the layout, drill a 1” hole at each end of the handle slot. Then using a jigsaw cut the center section out. Continue using the jigsaw to cut the outside curves as laid out.

Once you have completed the cuts grab a router with a 1/4” radius bit. Route the inside of the handle and also the top edges. Next sand all the top edges and the handle hole smooth.

Assembly
Assembly is quick – I used air nailer to speed the process. First, center the ends on the center piece then glue and nail. I suggest Titebond III as this is an outdoor project and Titbond II is waterproof. Next you will need to glue and nail lath to the side. The top piece is 1/4” down from the top edge. And the bottom is 1/4” up from the bottom edge. Put a daub of glue on each and two nails in each end. Now flip it over and glue and nail on the bottom pieces. The left and right sides are both 1/4” in from the edge. Then lay in the remaining three so that they are equally spaced. Put a daub of glue and two nails on each end of each lath strip. The nails will hold everything in place until the glue dries.

No finish is needed as this is a rustic outdoor garden tote.
Congratulations
You are done!!

Give this to your spouse, close friend, or a family member that is into gardening and they will love you forever!!
Be sure to check out my video and explore the links below
Thanks for reading and until next time Good Making!
Bill
LINKS
Garden Tote Video https://youtu.be/_brQVu1DVfg
Summer Garden Butterfly House Blog https://30minutewoodshop.com/?p=325
Rustic Garden Bench Video https://youtu.be/7S9SpDErJ5Y
Farmhouse Bench Blog https://30minutewoodshop.com/?p=267
Tools you may need
DEWALT Router Fixed/Plunge Base Kit https://amzn.to/34TeXzp
Router Bits Sets of 24A Pieces 1/4 Inch Shank https://amzn.to/3I5SYU7


