A Solid Light Kitchen Step You Can Depend On

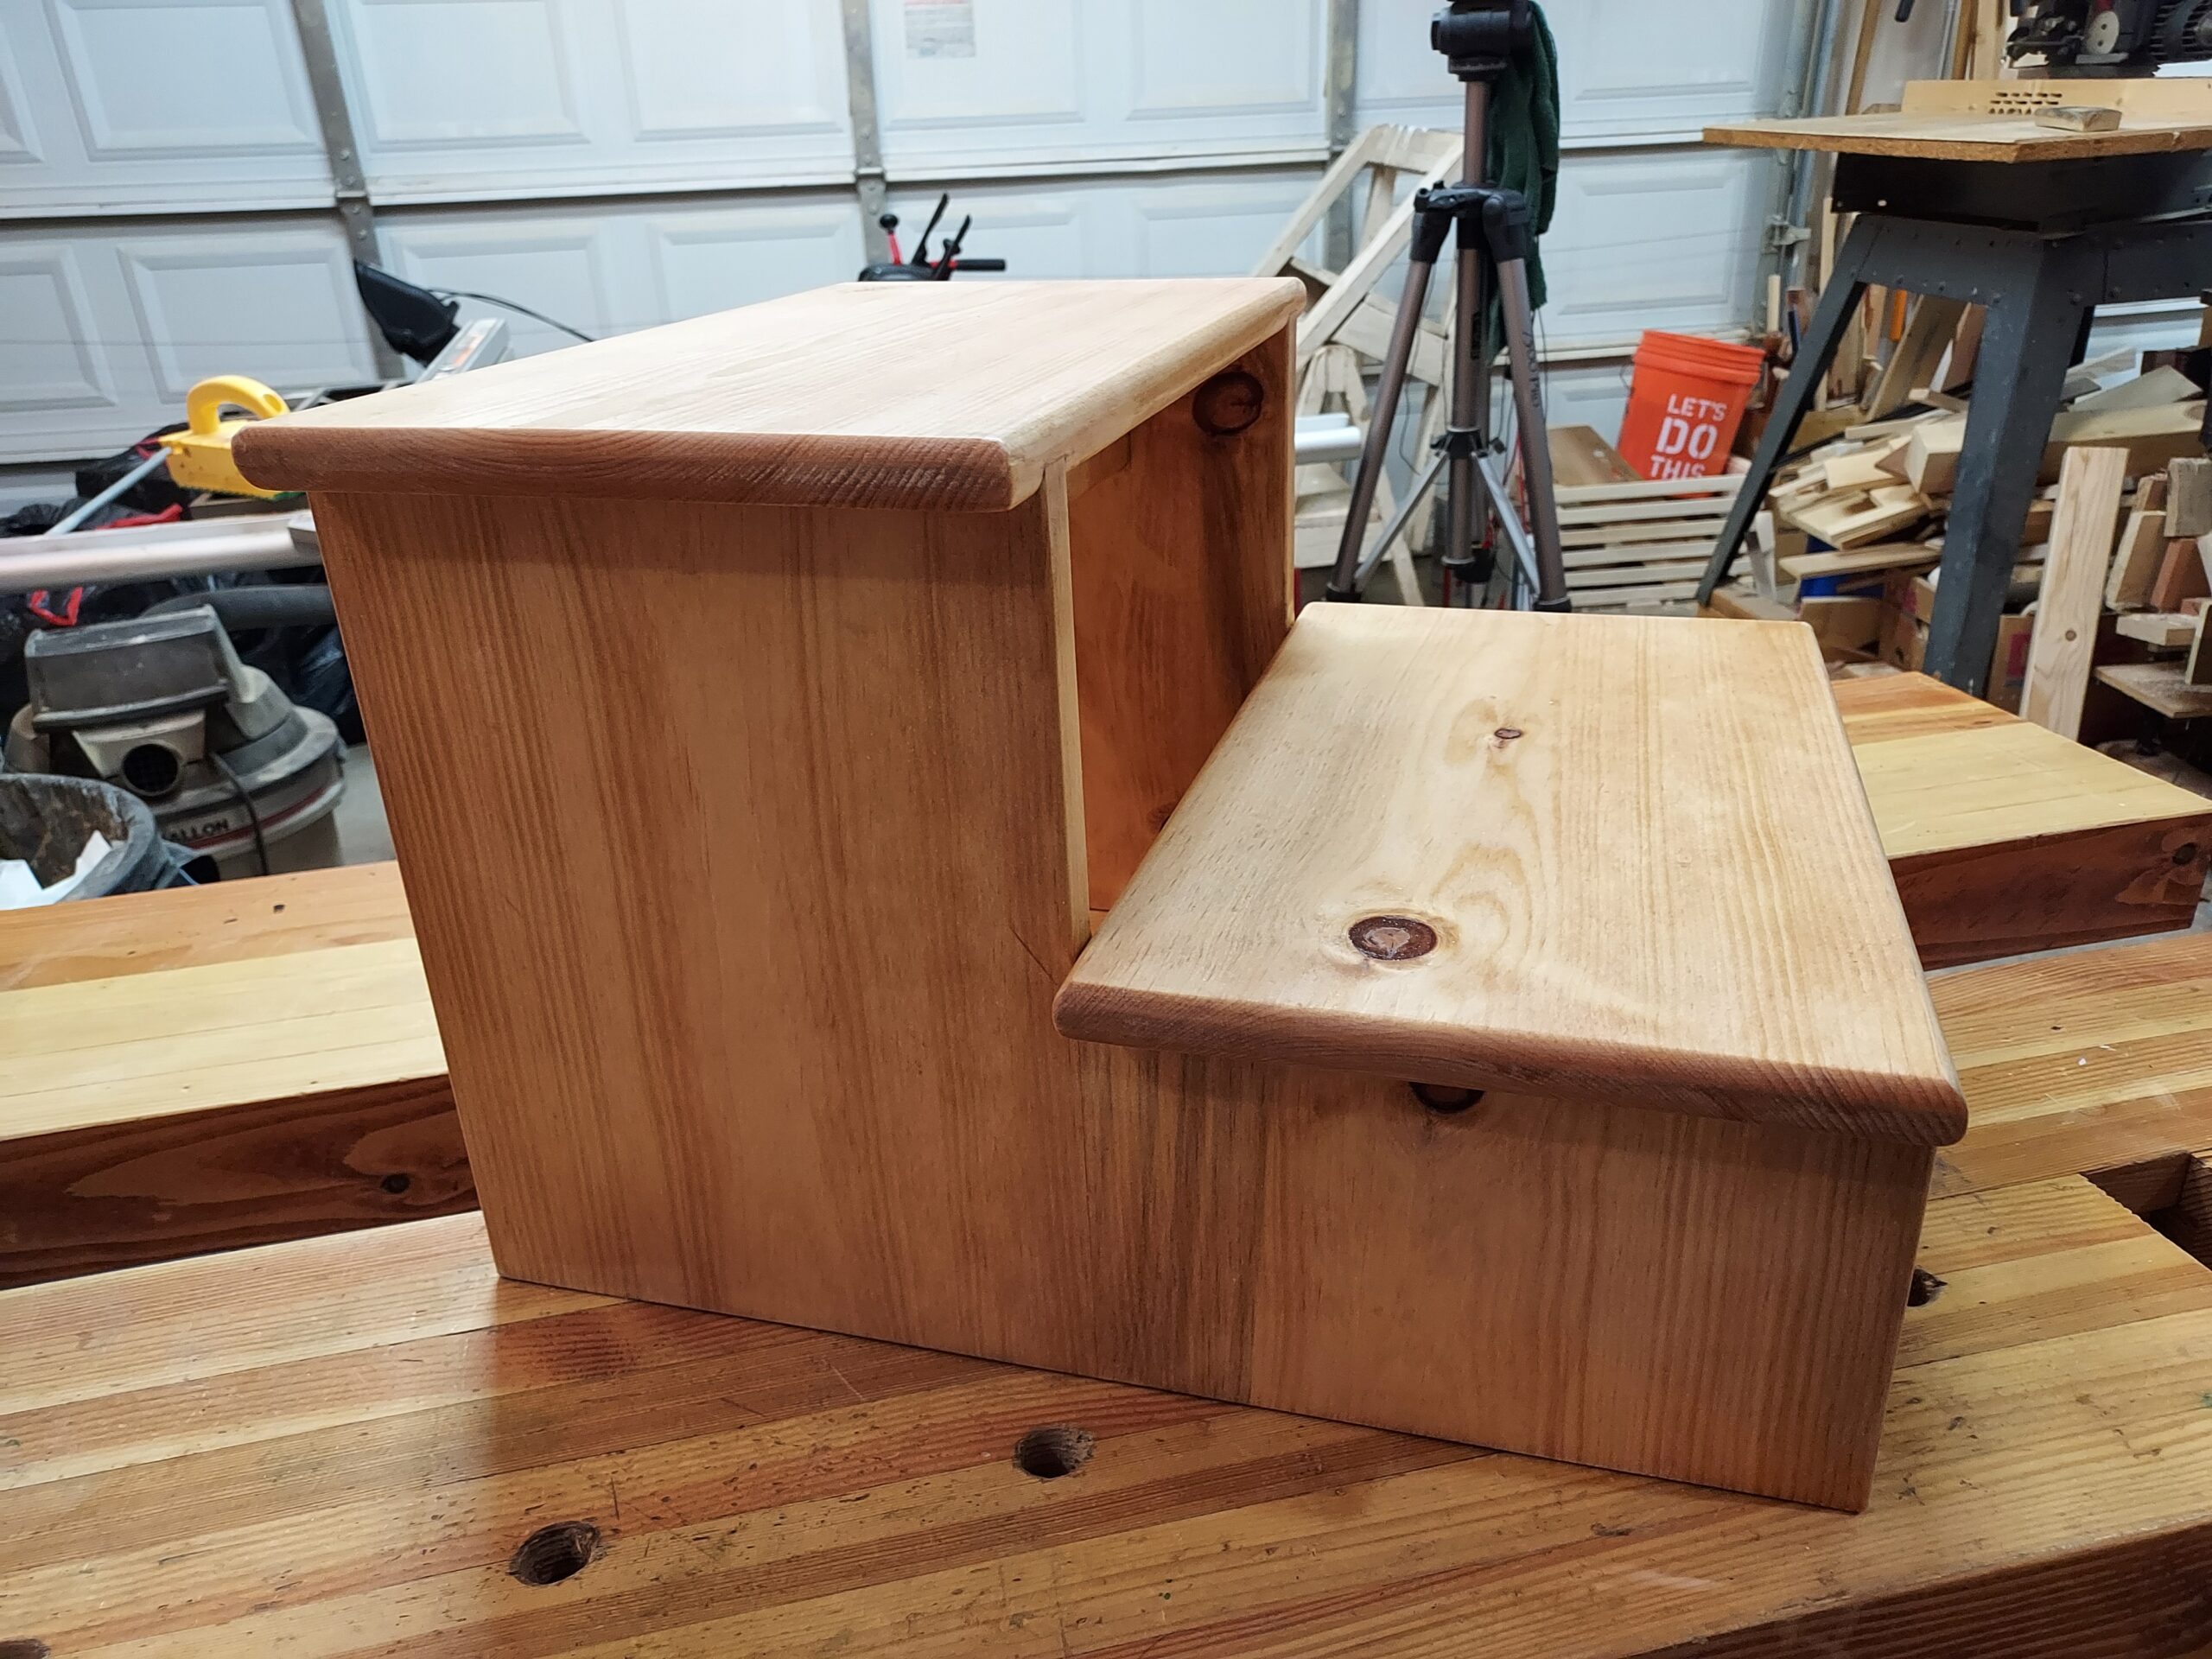
Getting to the top of your kitchen cabinets can be a challenge, for some more than others. Getting up there can require standing on a chair which really isn’t too safe or have a step ladder handy which isn’t really convenient. So, here is a solid light Kitchen Step you can depend on. With a 9-1/2” step and a 6” rise it’s easy to step up on and provides a stable platform. I used a step that I made quite some time ago when my son was a little guy as a pattern. This is a very simple and quick build and inexpensive too.
Safety Tip: As with any step or ladder please exercise caution when using.
Tools and Materials
In order to build this kitchen step, you will need a 6 foot piece of pine 1×10. And of course glue, and #20 biscuits. As far as tools you will need the usual, saw, square and I suggest a dado blade and a biscuit or plate joiner. Btw you can do the project with a Kreg Jig in place of the dado and biscuits too.


Layout
First, layout your steps and sides. And rough cut all parts about 1/16” to 1/18” oversized.

Cutting
Next take your rough cut parts, stack them and make sure that one end is dead even. Then trim the other end to the exact length needed. The advantage of doing this is that even if you are a bit short or long the pieces are identical so your step will be even. You should have by now 2 short side 6” long, 2 tall sides 12” long and two treads 16” long.
With your leftover piece rip two pieces 3” wide then crosscut at 12-1/2”. These are your two braces.

Joining and Glue up
Next, you will need to break out the biscuit jointer and four #20 Biscuits. You will cut two biscuit slots in the 6” sides and two in the 12” sides. Mark where the center of the biscuits will go on the 6” sides making sure they are a 1/ 2” in from the edges. Butt the 6” pieces up to the 12” pieces and carry the center line mark over. Now secure the pieces and cut the biscuit slots.

In order to glue up the joint you will need to get glue into the slots and over the faces. Use enough glue to cover the biscuits when inserted. The biscuit will absorb the glue and swell to fill the slot for a tight joint. Clamp your parts together snugly and wipe of any excess glue with a damp paper towel. And make sure the parts are clamped flat.

Plowing the Dados
While we are waiting for the glue to dry on the sides, let’s plow the dados. Set up your table saw with a 3/4” dado stack and set your fence at 1”. I used a set of brass gauge blocks to set the dept of cut for my dado blade. With caution, run your tread pieces through and cut dados on each end. I use a Freud dado set but you can also use a 3/4” router bit.

Routing the edges
People will be handling this regularly so the edges need to be “soft”. For the steps you can just sand them off but I prefer a roundover. Next chuck a 3/8” roundover bit into your router and hit all the edges of the steps. Then you will need to swap to a 1/8” roundover and do the same on all the vertical edges on the sides.

Sanding
Once the glue has set (about 4-6 hours) break out your orbital sander with 220 grit sandpaper. Thoroughly, sand all the flat surfaces and then hand sand all the edges and round overs.

Final Assembly
Final assembly of the kitchen step is fast and easy. First, glue and clamp in the two cross pieces. Just snug up the clamp to hold the cross pieces in approximate position. Next liberally apply glue to the dados and the top of the cross pieces and fit the sides into the dados. You may need a hammer and a block of wood to get the step into the correct position and fully seated. Next, with the step on remove the clamp and tap the cross pieces into full contact with the steps. You will need to back up the steps – meaning rest the step on you bench so the tread is fully supported while you gently tap. Place two clamps near the cross pieces to help squeeze the sides and hold them in place.

Finishing
Finally we are at the finishing stage. You can do anything you want to make this kitchen step match your décor. I chose to start with a Minwax Golden Pecan oil-based stain. Then apply a couple of coats of a Minwax satin polyurethane. An important note, don’t sand the tops of the step between coats. It give the treads a rougher finish which is perfect for the treads. Less chance of sliding off.
I did sand the sides and all the touch points like edges and under the edges where you pick up the step just to give it a silky feel.

Congratulations
Congratulations on another project successfully completed. I hope you found this inspiring, helpful, and useful. And you head into the shop to make something like it. If you do, I’d love to see it – Go ahead an post it to my FB page or to IG and tag me!

Thanks for reading and until next time Good Making!
Bill
Visit my
Etsy Store www.etsy.com/shop/30MinuteWoodshop
Instagram https://www.instagram.com/bill_berklich/
Facebook https://www.facebook.com/30MinuteWoodshop
Links to my Videos and Blogs
Barrel Stave Whiskey Shelf Blog https://30minutewoodshop.com/barrel-stave-whiskey-shelf-you-can-make/
Easy DIY Whisky and Cigar Butler https://30minutewoodshop.com/easy-diy-whisky-and-cigar-butler/
Tools you may need
Freud 8″ Super Dado Set https://amzn.to/3ZK1YXo
Rockler Brass Setup Bars https://amzn.to/3YvAWCs
Freud 3/4″ Router Bit https://amzn.to/3YmX5CL
Freud 3/8″ Roundover Bit https://amzn.to/3JczFf1
Freud 1/8″ Roundover Bit https://amzn.to/3ISLdmd
Kreg 720 PRO Pocket Hole Jig https://amzn.to/3Jf9X9C
PORTER-CABLE Plate Joiner Kit https://amzn.to/3kHr4HX
No. 20 Plate Joiner Biscuits 3 Pack https://amzn.to/3yebxlL
Microjig Grr-Ripper https://amzn.to/40GjvBq
PORTER-CABLE Random Orbit Sander https://amzn.to/3YdqIXL
JET Dust Collector, 2-Micron Canister https://amzn.to/3HHguIh
3M N95 PPE Mask https://amzn.to/3x4NGEu
ISOtunes Bluetooth Earmuffs https://amzn.to/3lpj1iA
Mitutoyo Electronic Digital Caliper https://amzn.to/3DS2tX5
Some of these are affiliate links


