Quick and Easy Wooden Butter Knife Project

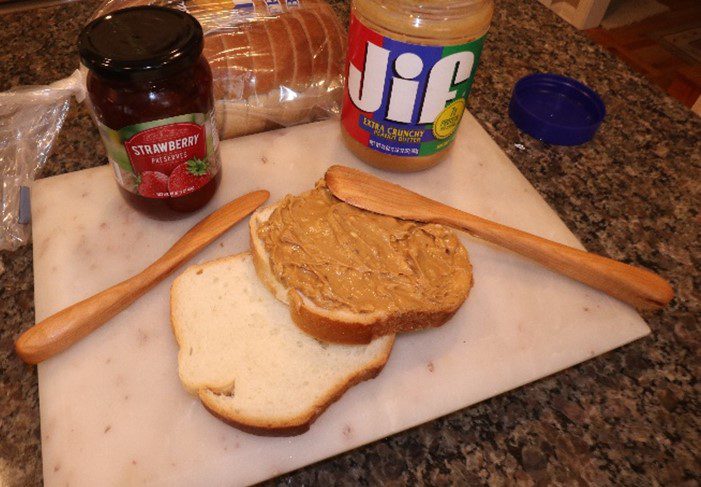
First, let me say I love these wooden butter knife spreaders. I’ve made quite a few of the smaller ones and given them as lagniappes over the holidays. And the larger one for peanut butter works so much better than a butter knife. I’ve found these are perfect for Butter Boards and Charcuterie Boards and general use for jams and jellies too. This Quick and Easy Wood Butter Knife Project is one you should be able to wrap up in about 15 to 20 minutes. And it uses up some of your scrap wood.
Tools and Materials
As I mentioned, this is a great scrap bin project. For the smaller butter knife you will need a 6-7 inch piece just a bit over 1 inch wide and 3/4” thick and 9-10 inches long by about 1-1/2” wide. Choose a dense, tight wood like Maple or Cherry. Hickory would work too.
The tools you will need are few. A band saw, though you can use a coping saw or jigsaw. An oscillating belt sander, some sand paper and an oil/wax finish.

Layout
Lay out is nothing more than gluing the pattern down. Or you could, like me, make a pattern our of 1/4” plywood or plexiglass if you plan on making a few of these.
[PLANS]

Cutting
Cutting the parts comes in two steps. First, cut the profile. No need to be exact, you will be shaping the knife on the sander. So, if you stray a bit that’s ok, we’ll sand it out later.

The second step is to cut away the excess from the sides of the blade. Here you need to make sure you are pretty close to centered or you will be grinding off a lot of wood.

Shaping
Here is where we make it into a wooden butter knife. Using the oscillating belt sander with a 100 grit belt, start grinding away everything that doesn’t look like a knife. You have a lot of options here. You can round the handle, make it octagonal. Or even leave it mostly square. The blade needs to be about 1/4 “ thick in the center and rounded to the tip and edges. The edge will be pretty blunt about 1/32” thick. Once you have it roughed out to the shape you want, it is time ot move on to hand sanding.

Sanding
I still hate sanding but this is pretty fast. Start with 80 grit and sand out all of the hard edges, rough spots, and any dips and doodles left by the belt sander. The 80 grit will cut pretty fast. After 80, move on to100 grit then 220. After sanding with 220 you should raise the grain by wiping the wood with a damp cloth. The moisture will cause the broken wood fibers to stand up and when it is dry you can sand them off easily. Final step is to sand with 320 or 400 grit. You should end up with a smooth and silky surface.

Finishing
These wooden butter knives and spreaders need a food safe finish. The best one I’ve found is 5 parts food grade Mineral Oil, 1 part Organic Beeswax, and 1 part Organic Coconut Oil. It gives a nice buttery consistency and provides protection (though limited) to water and food. You need to apply two to three coats. Rub it in thoroughly and wait for an hour in between for it to soak in. You will need to reapply the finish every few weeks depending on how much you use the spreaders.

Closing and congratulations
Wahoo – you are done!! You have completed your wooden butter knife so get out there and start spreading.

Thanks for reading and until next time Good Making!
Bill
Visit my Etsy Store at https://www.etsy.com/shop/30MinuteWoodshop
Facebook https://www.facebook.com/30MinuteWoodshop
Links to my Videos and Blogs
Barrel Stave Bottle Opener Blog https://30minutewoodshop.com/barrel-stave-bottle-opener/
Mid-Century Modern Two Tier Plant Stand Video https://youtu.be/kmgkzB6utZA
Tools you may need
JET 14-Inch Bandsaw https://amzn.to/3lJiaty
Ridgid Oscillating Belt Sander https://amzn.to/3KdzeSo
Organic Beeswax https://amzn.to/3XE7Sbp
Organic Coconut Oil https://amzn.to/3lJj5Kw
Food Grade Mineral Oil https://amzn.to/412Hmer
JET Dust Collector, 2-Micron Canister https://amzn.to/3HHguIh
3M N95 PPE Mask https://amzn.to/3x4NGEu


