
Making your own Lazy River Coasters with epoxy is a really fun and easy project. And it is a perfect for a novice woodworker and a great introduction to working with Epoxy. Plus, the materials are cheap enough that you can make several sets and experiment with pigments/colors, patterns, and techniques.
Check out my links below for materials and tools
And follow this link to my Video to see how it is done. VIDEO LINK
Tools
You will only need a few tools for this project. First, you have to have a router. I suggest a compact router because it is easier to handle but a full-size router will work too. I have a link below for a DeWalt Compact Router with a plunge base. Mine doesn’t have that and I regret it two to three times a week. Second, a saw to crosscut. A Compound Miter Saw, Radial Arm Saw, or a Table Saw all work. Make sure you have a good sharp blade to eliminate chipping of the epoxy – I use a Forrest Woodworker II (LINK). Third, you will need a hand plane with a sharp blade. I use DMT Diamond Stones to sharpen my blades between grinding on my Tormek. I prefer a hollow grind which sharpens faster. Last, you will need a 3/4” Router bit to fit your router. You can choose a smaller bit but the 3/4” bit makes a perfect “river” in a single pass. And, of course, a Card Scraper.

Materials
Materials a few. You will need a piece of wood about 3-1/2” to 5” wide and long enough to get 5-6 square coasters out of it. The coasters look best at about 1/2” to 3/8” thick, but 3/4” works too – especially if you are making 5” x5” coasters. As far as wood, again your choice. I used Poplar but Maple, Oak, Walnut, or any other hardwood is a good choice. You could try Pine, but you will need a really sharp router bit and the end grain will need a lot of sanding. Honestly, it’s not worth the effort. You will need about a quart to a half gallon of Art epoxy. It cures faster than the Deep Pour. And you need to get some type of colorant. I use easily available mica powders. Links two both are below.

Layout
The only layout you need to do for the coasters is to calculate how long your coasters are end to end then add in 1/8” for each blade cut and 1” additional at each end. Next roughly mark out each coaster. Finally, draw a snaky curvy line about down the center. You should have enough curve(s) in each piece to make it interesting.
Routing
Next, grab your router. Preference goes to a plunge router but you can use a fixed router too. Set the bit for depth of 3/16” unless you are using a pattern. Then you can go a bit deeper by doing several passes. I did it at 3/16” in one pass on Poplar. You need to secure your work piece to the bench and allow clearance at both ends for your router base.
It’s time to route. Turn it on then gently plunge the router into the wood at or near your line. You will need to maintain control of the router as you follow your “river” line. You don’t have to be on the line all the time just close is good enough. Once you reach the end switch the router off and wait until it stops before you move it. Many a good project as has been ruined by lifting the router before it stops thereby creating a divot in the wood.
[picture of routing]

Epoxy prep and pour,
Now, it is time to mix and pour. Start by finding a location you can leave the board at for 24 to 48 hours. Make sure it is level. Mix your epoxy per the directions on the label. My pour took about 2.5 oz for a 3/4” wide 3/16” deep 22” long cutout. Once you have thoroughly mixed the epoxy add in a small amount of the mica powder of your choosing. It doesn’t take much to color it and you can always add more but can’t take it away. Pour the epoxy along the cutout evenly.

Now, you wait for about 3-4 hours then come back and with a toothpick (or two) swirl with epoxy. Or you can mix a small batch of a different color and add it down the center. I did that using white and it gave it a marvelous sparkle right down the center.

Planing, Scraping, and Sanding
After 24 to 48 hours your epoxy should be hardened. My first try I must have mixed it wrong because it never hardened and was a soupy mess. Now you need to secure it to your bench and using a hand plane or very coarse sandpaper level the epoxy to the wood. Once it is level, you should use your Card Scraper to remove all of the sanding scratches.
Continue smoothing the wood with a sander using 220, 320 and 400 grit sandpaper.

Cutting the Coasters
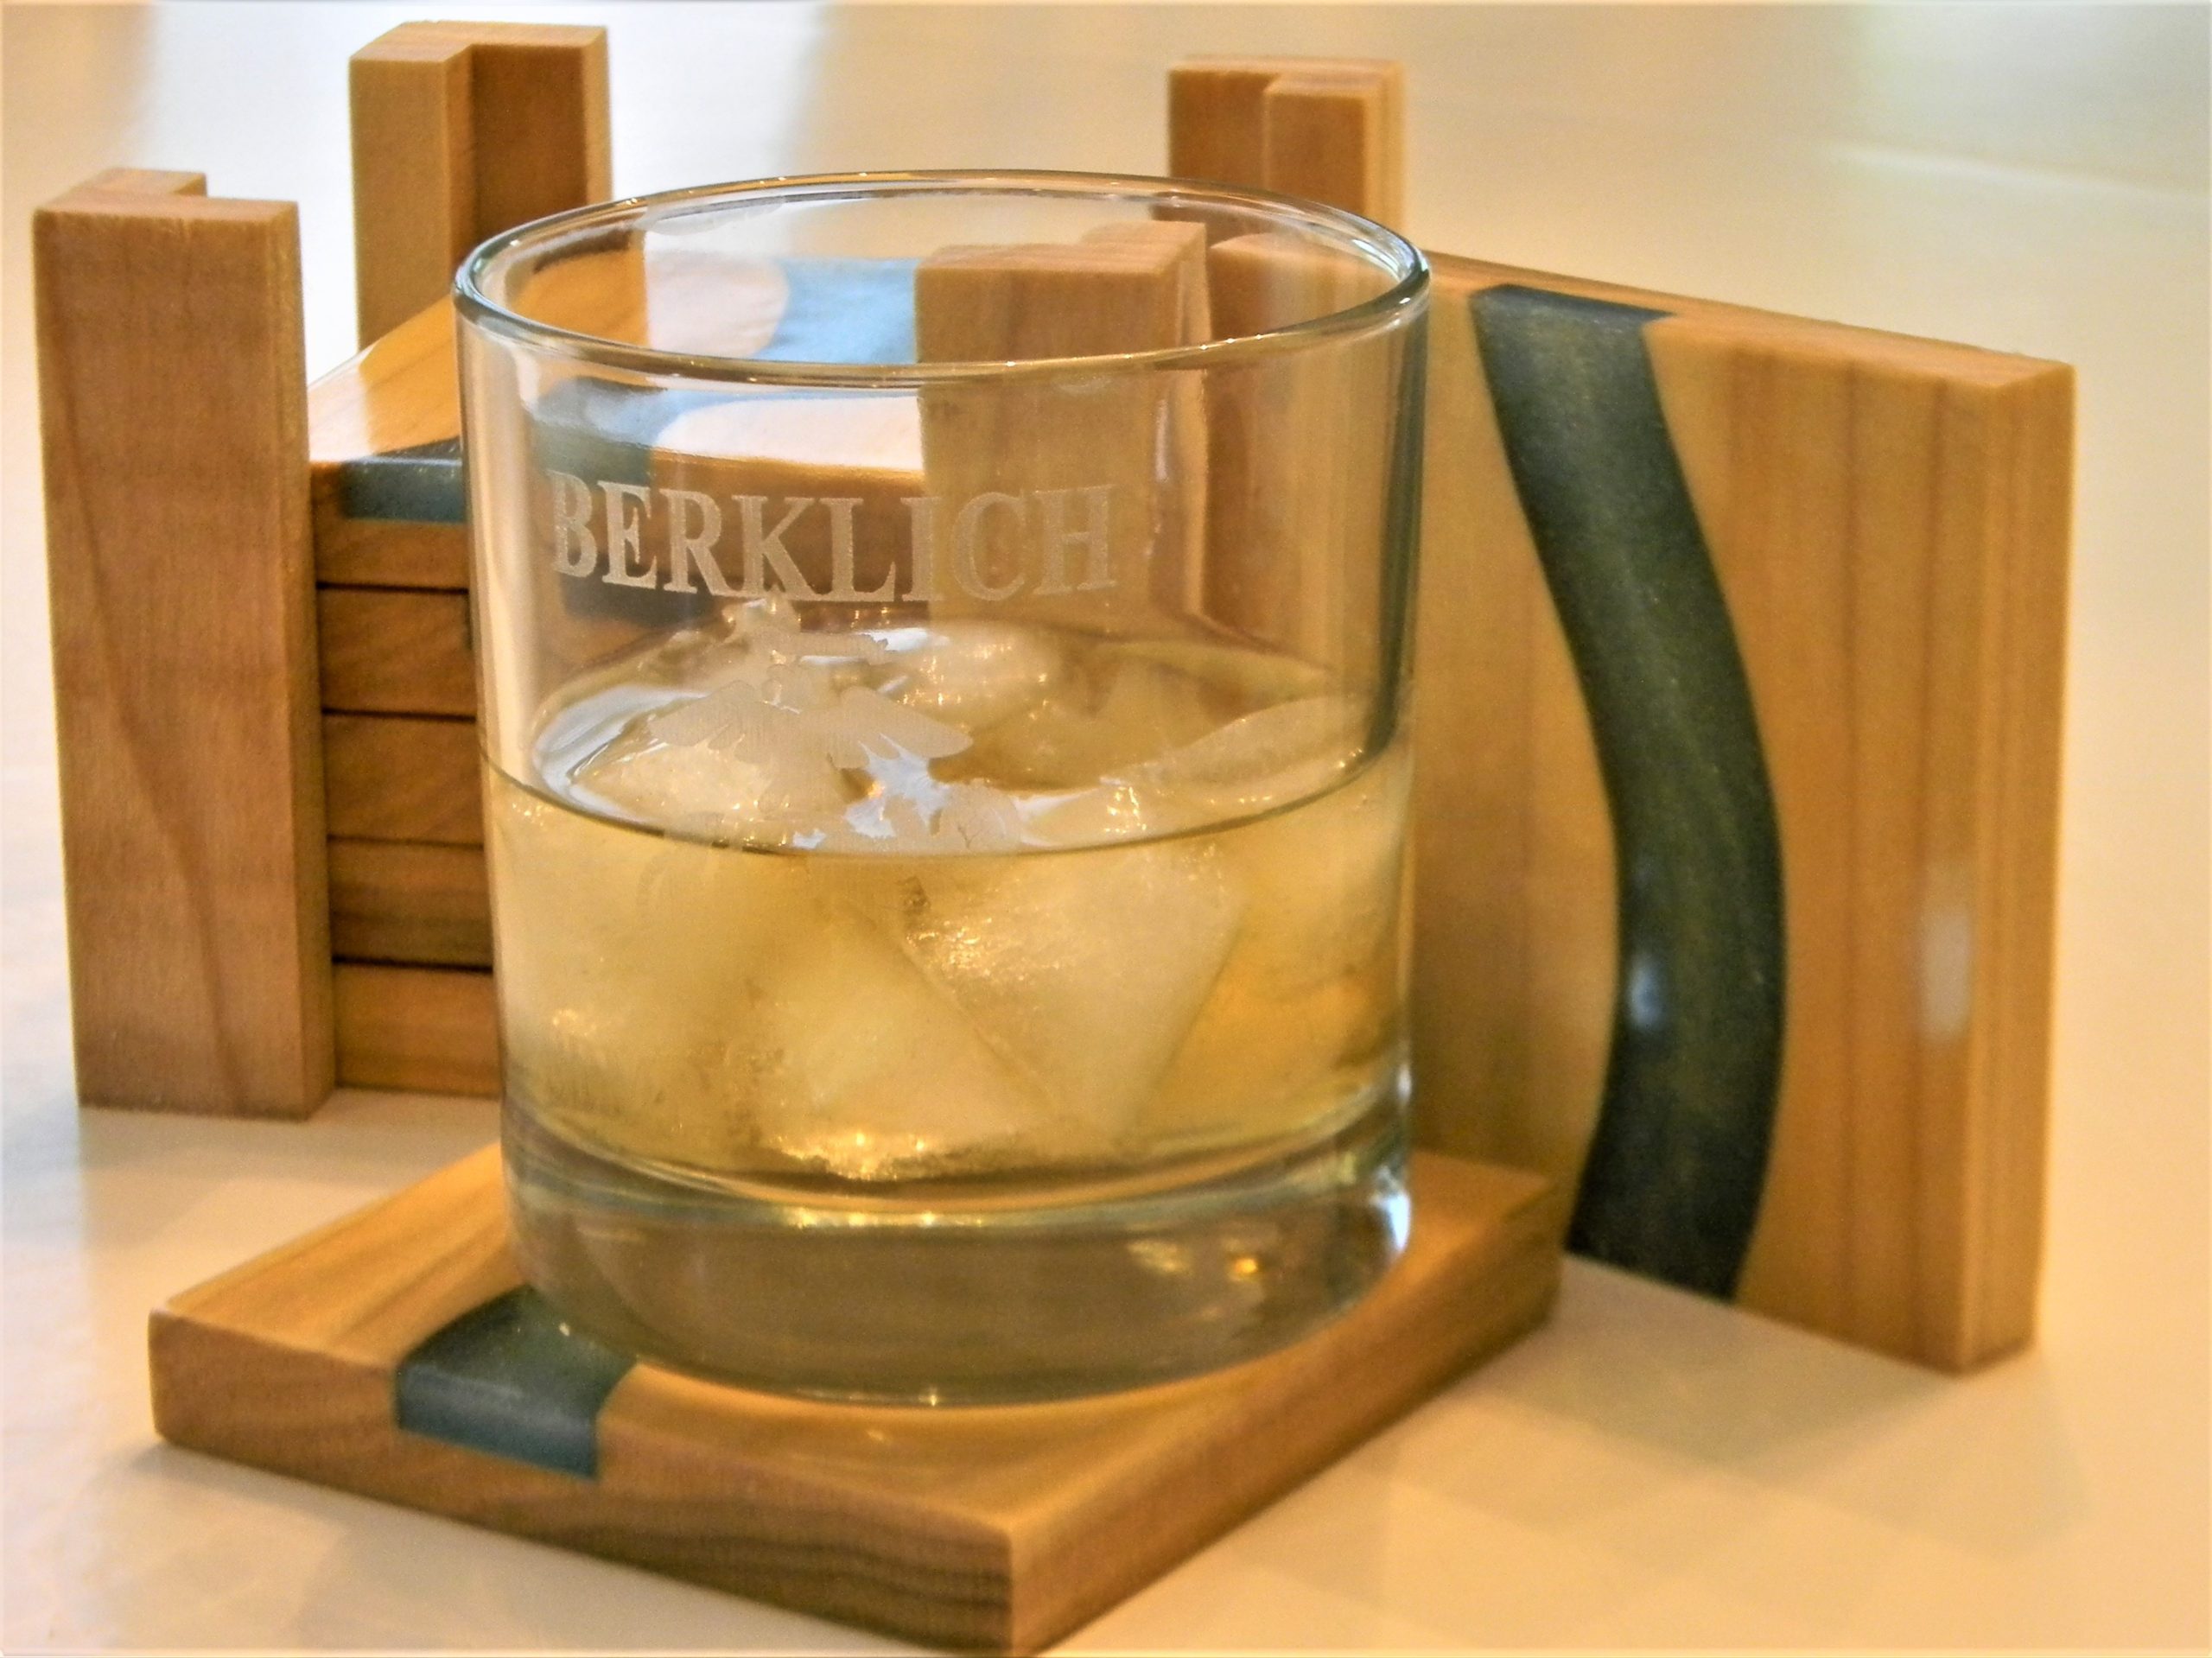
We are ready to cut off the Coasters. Measure and mark your coasters so that they are square. I set a stop block on my Radial Arm Saw to ensure that each of my cuts were the same – here’s where you can “Measure Once and Cut Twice”. You can slice off 4, 5, or 6 coasters in a few minutes using this method. Once you have cut your coasters, cut one additional piece that has no epoxy. This piece will be the base of your carrier.

Sand the edges of all the pieces as well as sanding the corners. At this point you can route a 45 chamfer or roundover or something else if you like. There are several ideas for edge treatments below.

Finishing
Last step in making the Coasters – sign the backs and then apply 3 coats of a Poly Varnish. Let each coat dry and sand gently between coats.

Carrier Build
We still need a carrier to keep our coasters in one place. Easy enough to build using scraps.
Cutting, Sanding, and Assembling
Stack the Coasters and the base and measure the height. Cut four pieces 1/2” wide and four pieces 1” wide and long enough to run from the bottom to the top of the coaster stack plus the base. Give each piece a quick sanding by laying a 1/4 sheet of 220 grit sandpaper on your bench and just scrub it a few times.

To start the assembly, first, glue a 1/2” piece to a 1” piece to make an “L” when viewed from the end. Now make 3 more. Now you can, glue each of these to each corner of the base. I used CA glue. It doesn’t carry any load and a thick CA is very strong.
DO NOT SQUEEZE IN THE TOPS OF THESE PIECES or then coaster won’t fit.

Once the carrier is assembled and the glue has set test the coaster fit. They should be snug. If they are too tight you will need to plane two or four edges. Then a quick sanding and refinish.

Finishing the Carrier
The coaster carrier will not see much use or handling unlike the coasters themselves. Therefore, it doesn’t need a thick film finish like the polyurethane. Instead of that finish, wipe on 2 coats of Boiled Linseed Oil. When dry apply a coat of paste wax.

Wahoo – Congratulation you are done!! You’ve completed a one-of-a-kind project that is a worthy gift for family and friends and will look great at home too. Making your own Lazy River Coasters will amaze your friends and neighbors will they will be asking where you got them. And who knows, maybe you can make a few sets for them too.

Check out my links below for materials and tools
Thanks for reading and until next time Good Making!
Bill
Links to explore
Lazy River Coasters Video https://youtu.be/HjMoxv9lj7M
Laminated Wood Coasters Video https://youtu.be/DcwpTAWKxA0
Kid Friendly Wood Coasters Video https://youtu.be/wfHPH8RN49o
DIY Wood Charcuterie Board Video https://youtu.be/OoaVrF1O2-k
DIY Wood Charcuterie Board Blog https://30minutewoodshop.com/?p=421
Tools you may need
DEWALT Router Plunge Base Kit https://amzn.to/3LKkJEK
DMT Diamond Stone Kit https://amzn.to/39Qkglz
Amana Tools 3/4” Plunge Bit https://amzn.to/3OglUfs
Forrest Woodworker II 10 Inch 40 Tooth Blade https://amzn.to/3MivHjn
Materials you may want
Epoxy Resin Art https://amzn.to/3QOBh03
Disposable Measuring Cups for Resin https://amzn.to/3OBVaWm
Rolio Epoxy Pigments https://amzn.to/3xX4cqa


