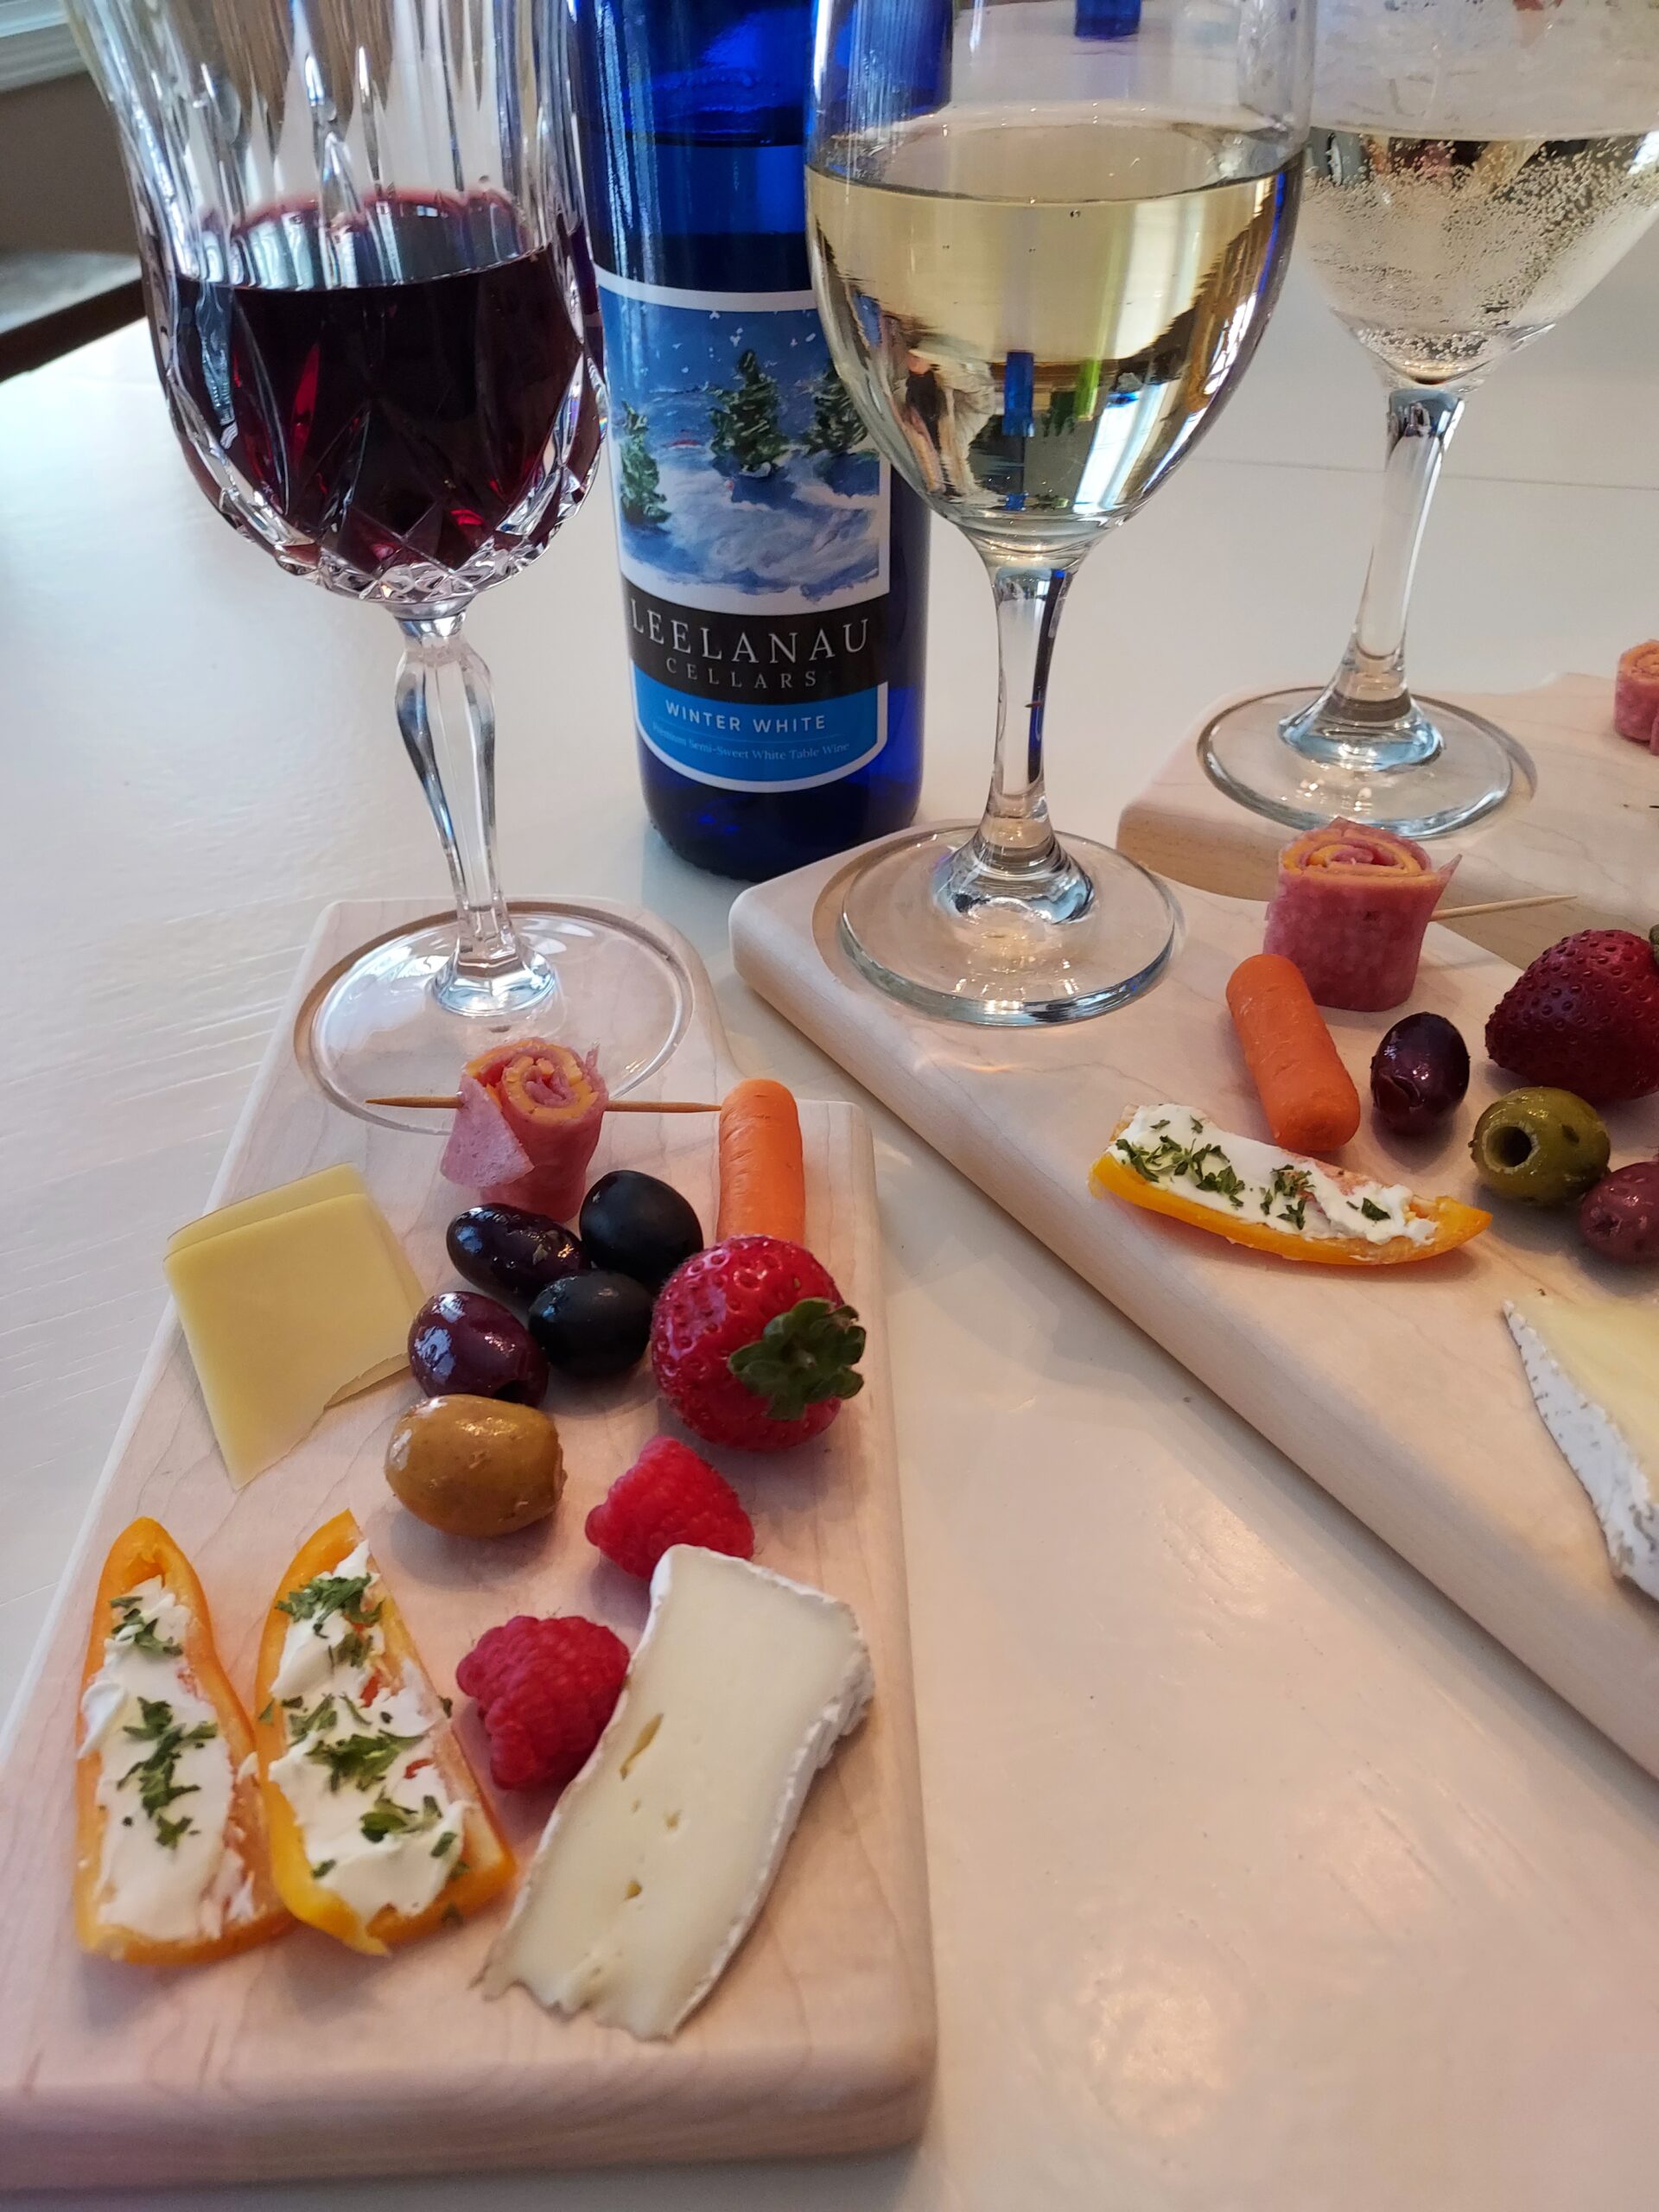
These DIY personal charcuterie and wine boards take almost no time to make and will add panache to your next private moment. We’ve all seen them lately, those monster four or five foot charcuterie boards that are the size of a table, weigh a 100 pounds, and can feed 50 guests. Nice, right. But 99% of the time it’s just you and your husband, wife, spouse, or close friends looking to share an intimate moment or just watch TV with a touch of class. This is the moment for a set of personal charcuterie and wine boards. You can make a couple sets and wow your friends next time you have a small get together. These are excellent as Tapas Boards, Cheese Boards, and you can use them as mini charcuterie boards at your next party too.
I’ve got links below for the tools I use and follow this link to my Video to see how it is done. VIDEO LINK
Tools and Materials
For starters you will need a 6” x 20” piece of hard wood. Actually, a good Spruce or Western Cedar would work too. For these I usually choose Maple, Cherry, or Walnut. Going exotic Brazilian Cherry is perfect for these if you like darker wood for your charcuterie boards.

Tools couldn’t be simpler. You will need an 85mm Forstner Bit. That is about 3-1/8” and it will fit 95% of the wine and cocktail glasses out there. Only ones it won’t fit are our Tiffany Balloons. But those are just big in every dimension. By way the tiffany glasses need an 90mm bit. To put the hole in I used a drill press. You can try it by hand but be careful. A big bit can cause problems. He’s a bench top drill press that will meet 80% of your shop needs a WEN 10” Drill Press. A jigsaw for cutting the curves. I used a bandsaw – here’s one I recommend if you need a bench top bandsaw a Shop Fox 9” Bandsaw. You will need to ease the edges with a router. I used a DeWalt Compact Router with an Amana ¼” roundover bit. But you may want to consider a full set of bits. Last is an Oscillating Sander which will make it
Cutting to Length
First step is to cut the board into two 10” pieces. No need to be perfect, just get pretty darn close. Once they have wine and cheese on them no one is going to measure them.

Sanding
Normally I wait until later in the build to sand but for me in this instance I needed to sand early. The reason is that I am using quilted maple and the grain is pretty squirrely. The result is that after running it through the planer there are a lot of checks – those are the little divots where the wood has chipped out during the planning process. To get these out I need to sand … a lot! If you;ve see my other videos or read my blogs I generally just stick with 220 grit. For this wood I started with 60 grit to grind the surface down. Then went on the 100, 220 320 and 400 grit.

Raising the Grain
I’ve broken this out as a separate step because of how important it is to a smooth finish. These will be handled regularly and you want them to feel good in your hand. To make that happen you need to “raise the grain.” It is a simple process. After you have finished with the 320 grit sanding. Wet a paper towel and wipe all surfaces to get them damp then let it dry (about 5-10 minutes). This process causes the very fine broken wood fibers to stand up. Next sand with 400 grit sandpaper which will sand them all off. AND… do it once more. Wet the surfaces, let it dry, then sand again with 400 grit. You will get a very nice smooth finish.

Layout
Layout is fast for these DIY personal charcuterie and wine boards. You are insetting a 3-1/8” hole with a 1/2” rim. So, measure in form the end and side 2-1/16” to mark your drill center.
NOTE: The drawing assumes you are using a 3” Forstner Bit. The 85mm bits are easier to find.


Then use a compass to mark the 3-1/8” hole and mark the rim too. This will give you your cut line for your first curve. Next, layout your return curve. You can follow the sketch below. Adjust the dimensions as needed for your piece of wood.

Cutting the Curves
Let’s get to making some curves in this thing. You can cut it out with a jigsaw or coping saw, I used a bandsaw. Mostly because I have it and it is really fast. There is a link at the bottom if you need a bench top bandsaw. Just follow the curves as evenly as possible.

Sanding the Curves
The next step is to get rid of all those saw marks. A file and sandpaper will do it but MUCH faster if you have an Oscillating Sander. I run a 150 grit belt for general purpose. It’s coarse enough to cut fast and not so fine that it leaves burn marks on Maple.

Drilling
The next step is to drill the 85mm depression. Easy to do with a drill press. If you are using a hand drill motor with the 85mm bit let me know how it works out good or bad. With either method you want it to be about 1/16” to 3/16” deep. Just enough to make sure the base of the glass is seated. If you are planning on using these with canned or bottled beer, then definitely go with the 3/16” deep measurement because of the curve on the bottom of both containers.

Rounding Over the Edges
Now you will need to ease the edges. This is intended to be held frequently so you want the edges to be “friendly” and that means a nice roundover. I chose a 1/4” radius bit but you could go up to a 3/8” radius.
I used a router table but a compact router will work well too. Be careful when you “freehand” the curves.

Final Sanding
Yes, more sanding. This is you final hand sanding to make sure all the sharp edges are broken and you hare happy with the feel of the entire piece. You may need to give it one more round to raise the grain before you apply the finish.

Finishing
We are here! The final step, finishing. This piece needs a food safe finish. I suggest a simple mineral oil or a mineral oil/bee’s wax mix. This really is after all a mini cutting board. I used an oil/wax blend of 6:1 Oil to Bee’s wax. Rub it in well then wipe off the excess.

Congratulations Your Project is Done
Yes, congratulations your project is done and ready to serve tasty treats to your better half. So grab you significant other, a bottle of wine and some cheese then sit back and relax with your latest project in hand. It’s sure to impress!

Well I hope you got something out of this and will give it a try in your shop. If you do, let me know and post a comment to my Facebook page. I’d love to see what you are working on.
Thanks for reading and until next time Good Making!
Bill
Visit my Etsy Store at www.etsy.com/shop/30MinuteWoodshop
Facebook https://www.facebook.com/30MinuteWoodshop
Links to my Videos and Blogs
Whiskey Display Video https://youtu.be/vVuqMnA4IPo
Barrel Stave Bottle Opener Blog https://30minutewoodshop.com/barrel-stave-bottle-opener/
Mid-Century Modern Two Tier Plant Stand Video https://youtu.be/kmgkzB6utZA
Tools you may need
Freud 16PC Diablo Forstner Drill Bit Set https://amzn.to/3FC4sim
WEN 10-Inch Drill Press with Laser https://amzn.to/3HKZcf8
Shop Fox 9″ Benchtop Bandsaw https://amzn.to/3BHA5FS
Ridgid Oscillating/Edge Belt Sander https://amzn.to/3Wcvcgn
DEWALT Router Fixed/Plunge Base Kit https://amzn.to/34TeXzp
Forrest Woodworker II 10 Inch 40 Tooth Blade https://amzn.to/3MivHjn
Router Bits Sets of 24A Pieces 1/4 Inch Shank https://amzn.to/3I5SYU7
Powertec Non-Slip Woodworking Mat Pad https://amzn.to/3Yy2IPW


