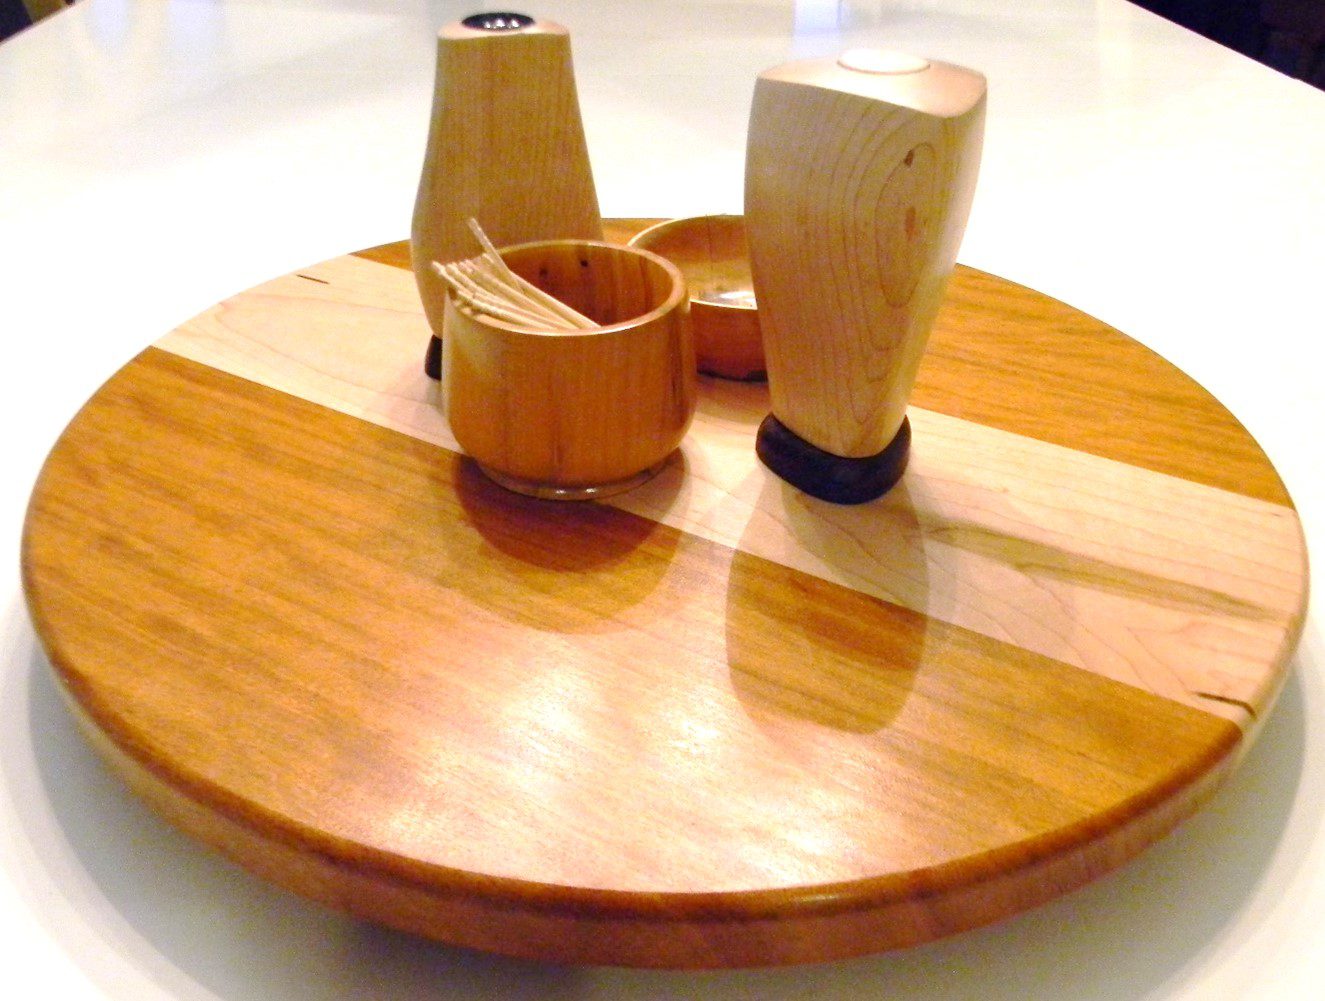
Creating your own Lazy Susan is a easy DIY project for a novice woodworker and a great addition to your family table. And if you’ve built the Cutting Board, Charcuterie Board, or Fix Your Own Cutting Board you already have the skills to create this project (see Links Below). If this is a first for you, no problem. It is a simple and easy project.
I’ve provided several links below for tools and materials for you to explore.
And follow this link to my Video to see how it is done. VIDEO LINK
Materials
Materials for this project are minimal. You will need enough wood to create a circle the size you want. Mine is 15”. I edge glued three pieces together to create a blank wide enough to accommodate a Lazy Susan top of 16” – so I had room to spare. I have a link at the bottom for some wood if you need it. You will also need glue. I use and recommend Titebond III waterproof glue as this project may encounter water frequently by way of spills and clean ups. Last, and arguably the most important part, you will need to create your own Lazy Susan is a turntable bearing race. There is a link at the bottom for the low profile Lazy Susan bearing that used.

As far as tools you need a good saw blade in either a table saw or circle saw, clamps, and an orbital sander. There is a link at the bottom for a really good Forrest Woodworker II blade.
Rough Cutting and Edge Jointing
Initially your stock will probably come in two foot pieces so you will have to crosscut it to the diameter you have chosen plus about a ½”. I cut mine to 16-1/4” because I was targeting a 16” diameter top. Next you will need to joint the edges.
I have a 6” Craftsman Jointer so I used it to prepare the edges but you can use a No. 7 hand plane or your table saw with a good blade. By the way if you bought rough stock this is a good time to run it through your thickness planer. Once you have completed you glue up, it is going to fit.

Glue and Clamp
First thing to do is to lay your parts out and dry fit. You are looking at the glue lines to ensure there are no significant gaps. If you have your jointer, plane, or table saw set up correctly the glue joint should be tight with no gaps. If you have a slight gap don’t worry, we can fix it in sanding.
Now you need to glue and clamp. I use waxed paper to keep drips off my clamps and off my bench. When you apply the glue be liberal. We want the entire joint to be wet. Scrub the pieces back and forth then pull them apart and look for dry spots. Add a dab of glue to any dry spots you find. Tighten your clamps with a light pressure first and check the alignment of the ends and the top. Tap things into alignment if they are mismatched then clamp firmly. If everything is aligned at this stage you will have less sanding later.

Scraping and Sanding Panel
Let’s get to scraping and sanding. You can use a card scraper to clean off the squeeze out for the really tough stuff I use a modified Buck Brothers block plane. You can see it in the video.

Once the glue is cleaned off I usually sand to ensure everything is level. You can of course wait until after you have cut the circle out.

Cutting the Circle
Once you have the panel cleaned up you may need to square it. Cut it to about a ½” larger than your intended diameter then mark the center on the back. If you are using a circle cutting jig for you bandsaw, router, or jigsaw you will probably need to drill a small hole for the pivot. I use a really simple jig for my bandsaw.
Now you are set to cut. Cut as smoothly as possible to minimize the saw mark you will have to sand out later.

Final Sanding and Edge Routing
Ok, we are heading towards the finish (pun intended!). Our last sanding effort is the edge. Depending on what tool you used and how it looks you may need to start with 80 grit and work up to 220 grit. An orbital sander will work for this but hand sanding may be a better choice.
Once you have completed the sanding you can move on to edge treatment. You have lots of choices but I prefer a 1/4” or 3/8” roundover. It’s simple and soft to the touch. I had a friend ask me why I have so many routers. The simple answer is that I don’t have to change bit all the time. For this operation I used a DeWalt compact router with a 1/ 4” roundover bit.
Finishing
Because this will be doing kitchen duty and will potentially be seeing water it needs a durable finish. Your best bet is a polyurethane varnish with 3-4 coats to build up the film thickness. Wait until each coat is fully cured and lightly sand between each coat with 320 grit paper to knock off any nibs and to ensure adhesion.
Oh, and don’t forget to sign the back before you do the back!
Assembly
Final assembly is a cinch! I used a beam compass (link below) to mark a circle just a bit bigger (1/16”) than the bearing ring diameter. Doing that made initial positioning super easy. To lock it in place I use a 4” adjustable square going around the outside diameter to make sure that the edge to bearing distance was the same. All that gave me a perfectly centered bearing ring.
Driving screws into hardwood can be problematic. The solution is to pre-drill but then centering the hole becomes an issue. The best way around that is to use a centering punch or my choice is a Vix Bit. It is a self-centering drill bit that ensures a pilot hole goes right where you want it.
With the bearing ring positioned and pilot holes drilled you only need to drop in the screws and snug them up.
WARNING: DO NOT OVER TIGHTEN THE SCREWS
If you do, you will warp the bearing and it will bind. If that happens just back off the screws a bit and it should fix the problem.
(Btw – notice my signature and date in the picture?)

Congratulations
Wahoo – you are done!! Creating your own Lazy Susan is a perfect project for a novice woodworker and a great addition to your family table. A project worthy of your family table and a piece that you will receive complements and accolades on as friends and family see it. Don’t be surprised if that all ask you to make on for them.

Thanks for reading and until next time Good Making!
Bill
Video and Blog Links
DIY Simple to Make Lazy Susan for Your Table Video https://youtu.be/89lrlA3kpDA
Cutting Board Any Beginning Woodworker Can Make Video https://youtu.be/tmcIJ52stFc
Beautiful DIY Wood Charcuterie Board Blog https://30minutewoodshop.com/?p=421
Wood that my be suitable
County Line Cutting Board Kit https://amzn.to/48Px2dt
Cherry/Walnut Cutting Board Kit https://amzn.to/3wTgW25
Tap Room Cutting Board https://amzn.to/3MNwuto
Materials you may need
Low Profile Turntable Bearing https://amzn.to/3AESeVq
Tools you may need
Forrest Woodworker II 10″ Table Saw Blade https://amzn.to/3wThk0xe
Titebond III Ultimate Wood Glue https://amzn.to/3Gig6ir
Bessey K Body REVO Clamps https://amzn.to/3N1Ao2h
VixBit (you owe it to yourself to have the original USA made) https://amzn.to/3xlchVs
Whiteside 1/8-Inch Round Over Bit https://amzn.to/38HKiqd
DEWALT Router Fixed/Plunge Base Kit https://amzn.to/34TeXzp
Router Bits Sets of 24A Pieces 1/4 Inch Shank https://amzn.to/3I5SYU7


