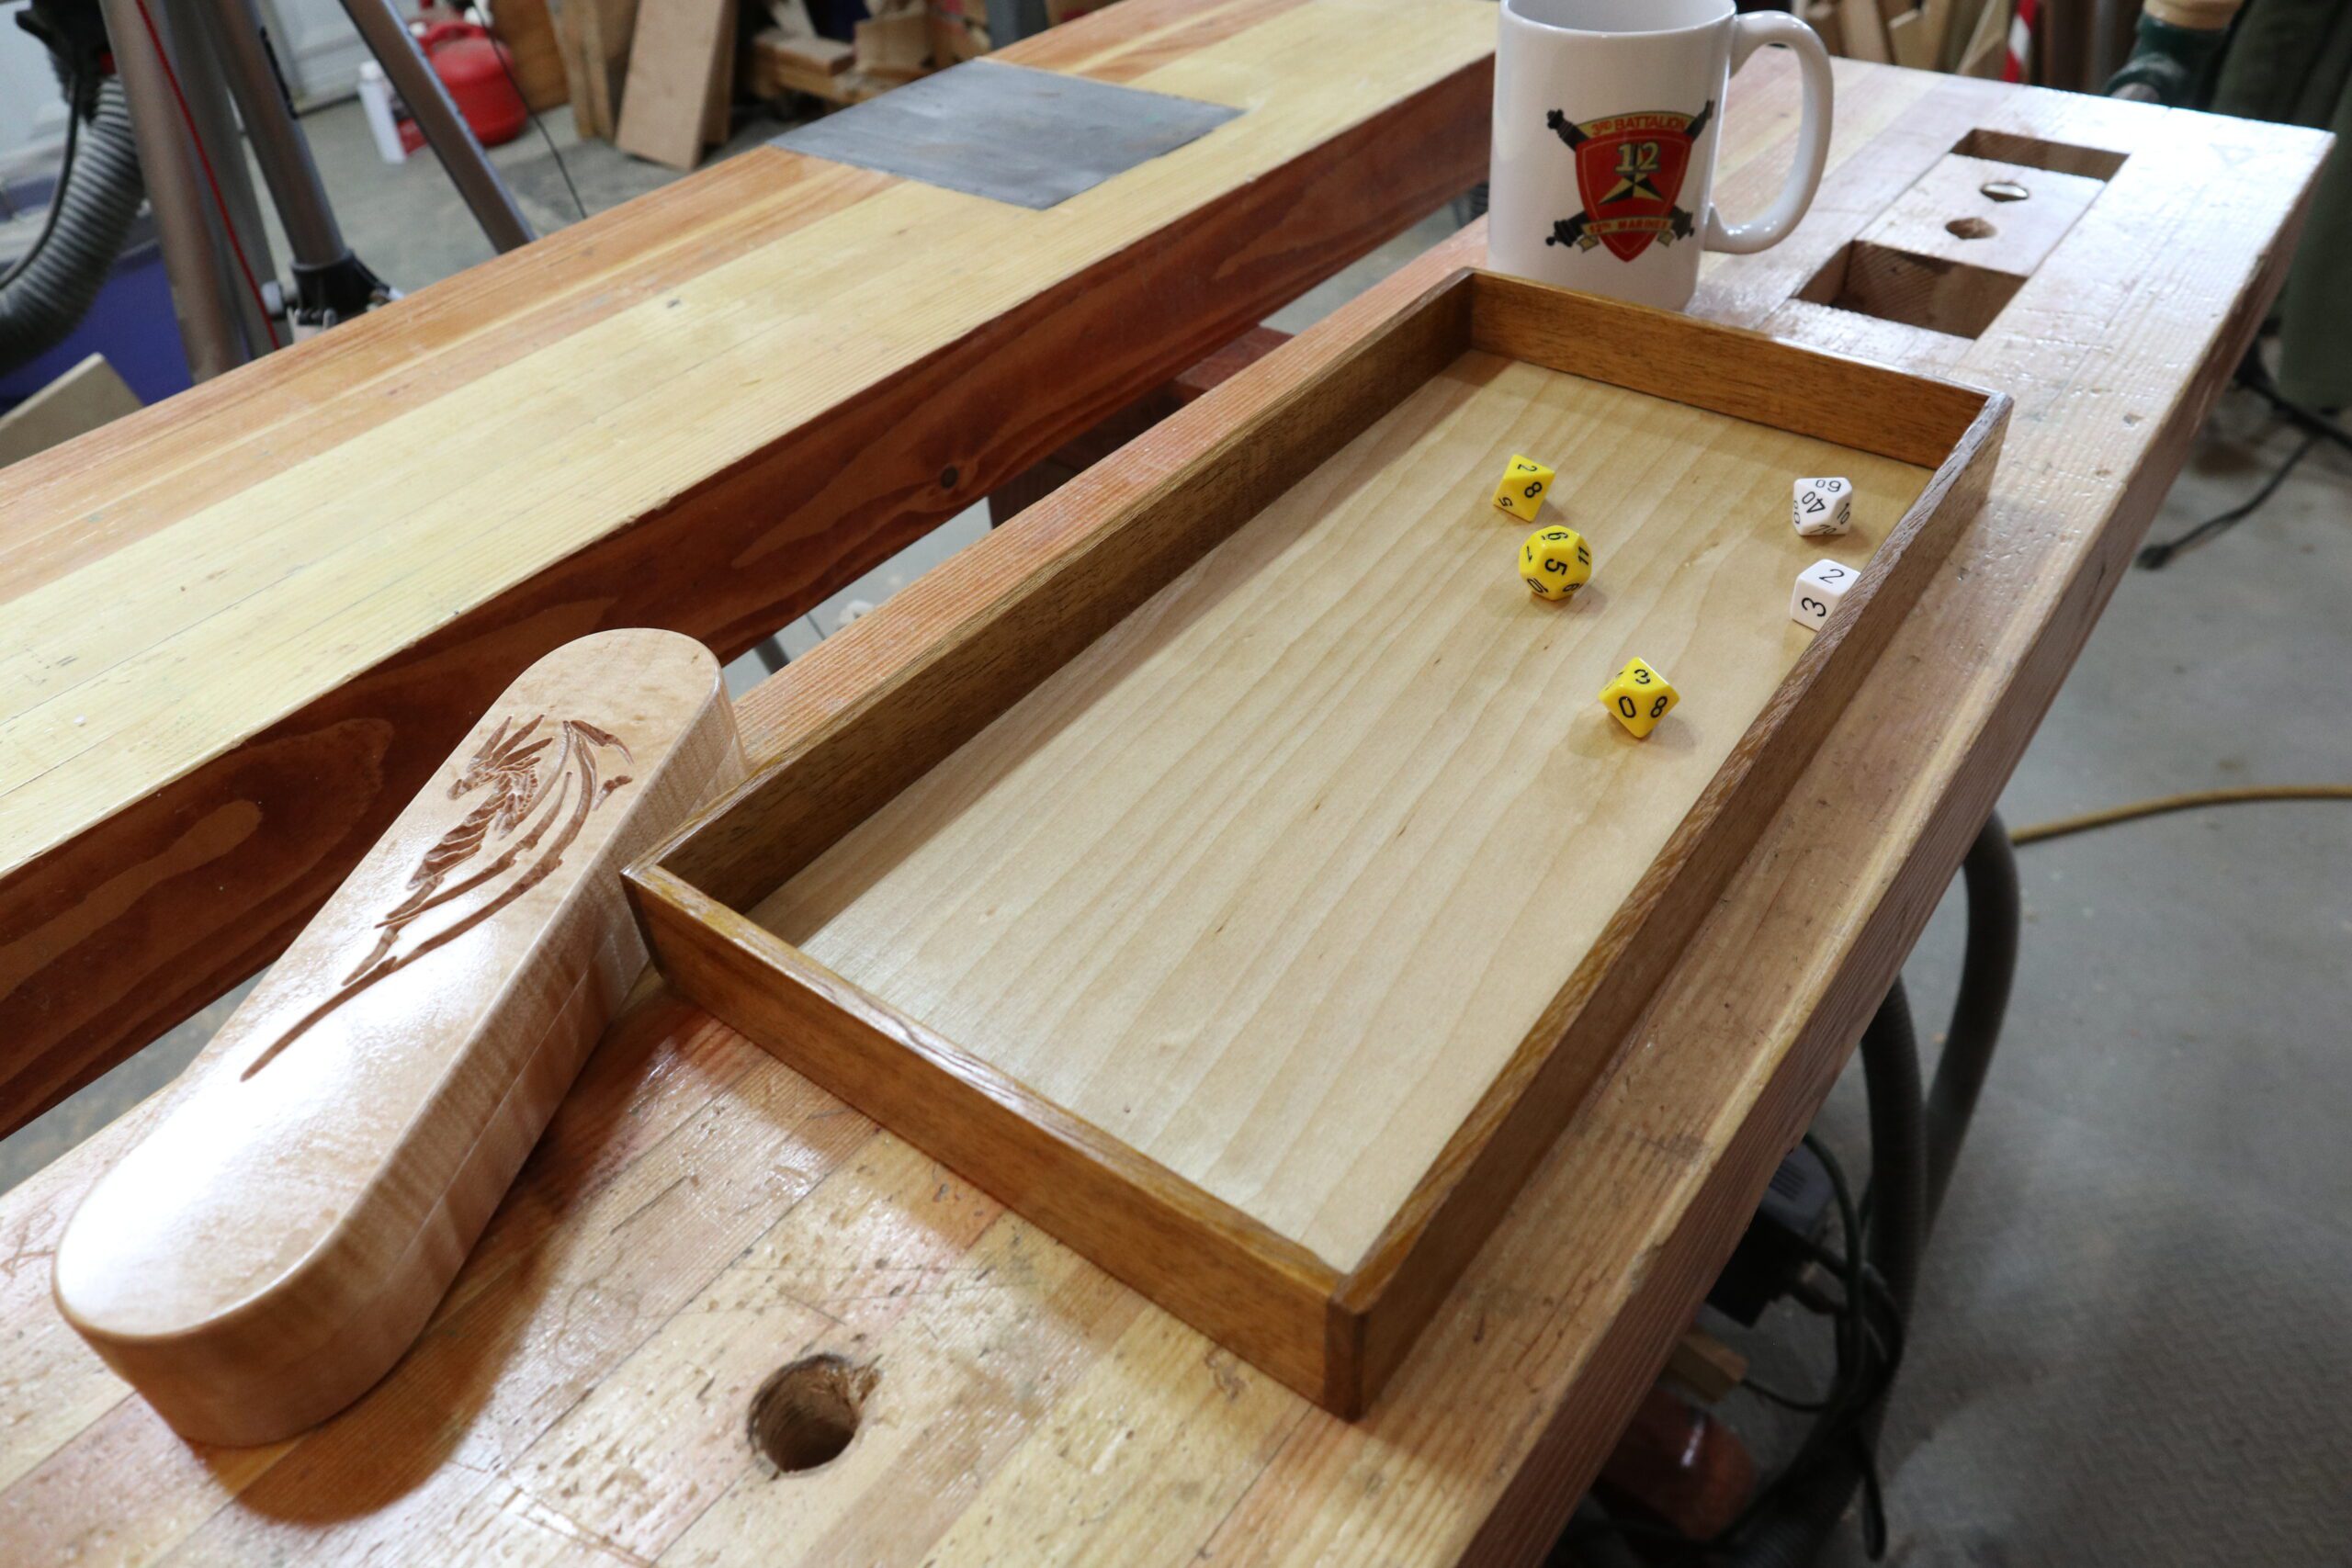

Here’s a great project to complement my D&D dice vault. This is a simple and elegant tray for rolling your dice that’s fun to build and inexpensive. The tray is a longer than many you will see because I like to actually throw my dice. This is probably because I spent a fair amount of time at the craps tables while skiing Tahoe.
Tools and Materials
Materials are straightforward for this project. Here’s a link to some 1/4” inch Paduk and plywood that will work out very well for you. You can of course use any wood you choose. Poplar makes a good choice if you’re buying from a big box store.

The tools you’re going to need to create your dice tray are pretty straightforward too. The table saw would help but you could do almost all this with a circle saw or handsaw. You can also use the compound miter saw to cut things to length if you have one. You may want to try a compact router with a rabbet bit to make the recess for the bottom.

Layout
Mark out two pieces that are 15 inches long and two that are 7 1/2 inches long. Mark the bottom at 14 1/2 inches long by 7 3/4 wide. That’s all there is to laying this out.

Cutting
Cutting parts for the dice tray is equally easy. If you’re using a table saw set your fence to 1 1/2 inches and cut all your size and end pieces to width. Next, cut your two sides to 15 inches and your two ends 7 1/2 inches. Accuracy here counts. Cut the bottom to 14 1/2 inches and crosscut the plywood to 7 and 1/4 inches. Again accuracy counts.


Cutting the rabbets
Making the rabbets is your next step. Set your saw to 1/8 inch deep and your fence to 1/4 inch. You’ll make two to three runs through the saw to cut each rabbit. You may have some clean up when you’re done but usually you can break the feathers off with your finger and use a small bit of sandpaper to clean up any sharp edges.

Test fit
Now you need to test fit all the parts. Do this upside down. This makes sure you can see how the bottom fits and if there are any gaps. If you’ve cut everything accurately it will go together with no problems. If you do find any gaps you may need to trim or adjust the links or widths as needed to close the gaps.

Sanding
Sand everything now. It’s much easier to say and while everything is not assembled, you can get into all the corners. The wood you’re using should have a fairly good finish already. So start with 320 grit edit sand all surfaces.
Assembly
To assemble project prep three or four clamps, apply glue to each of the rabbits, and clamp into place. Do not over tighten the clamps. Snug them up so the joints are tight but no more. Wipe up any glue with a bit of paper towel and water. If you’re using Titebond 3 you’ll need to allow at least two hours for set time. I really like to leave it three or four hours.

Filling the rabbets
So at each corner there will be a small hole from the rabbets. These need to get filled with some small pieces of wood. You’ll need to cut and chisel off four small pieces that will fit in each space. Glue these in place and usually they will be a little proud meaning there will be some extra sticking out that’s OK. We’re going to sand it off in the next step.
Sanding again
We have a bit more sanding to do in this project. First we’re going to use 220 grit to hand sand all of the edges. We want to remove all the sharp corners and bits from the inside outside and edges. Once you’ve used the 220 grit to remove all the sharp edges, select 320 grit in sand all the edges again until they are silky smooth.
Next, inspect the entire box. If any of the joints are not tight now is the time to fix them. There’s an old cabinet makers trick that we can use. Every joint that’s slightly open, apply some glue and force it in with your finger, then sand it. The dust from the sanding we’ll mix with the glue and conceal the crack. We’ll start with 220 grit in your orbital sander and sand the ends. This will sand off any of the wood from the plugs used to conceal the rabbets. It will also even up the ends in case the glue up is not perfect. Once you’ve completed with the 220 grit you will need to move to 320 grit to smooth everything out.

Finishing
Now that you have everything sanded it’s time to apply a finish. As this is an inside project spray lacquer is an excellent choice. It does not build a heavy film like polyurethane and it looks really nice. But This is why we use the 320 grit sandpaper. It smoothed the surface enough to allow the lacquer to lay evenly. So, give your project three or four coats of a good spray lacquer like Minwax Clear Gloss Lacquer. Allow 30 minutes between coats to dry and sand out each coat with 320 grit or 400 grit sandpaper in between. The last coat should be nice and smooth. At this point you can add a coat of paste wax if you choose.

Closing and congratulations
Wahoo – you are done!! You have a finished project that will be the envy of your gaming friends!

If you did make this project, do me a favor and post it on my Facebook page. I’d love to see your work.
Hope you got something out of this and if you did, do me a favor, hit like and subscribe. I’d appreciate that a lot.
Thanks for reading until next time Good Making!
Bill
Visit my Etsy Store at www.etsy.com/shop/30MinuteWoodshop
Facebook https://www.facebook.com/30MinuteWoodshop
Links to my Videos and Blogs
DIY Dice Rolling Tray Video
Create Your Own Dice Vault https://30minutewoodshop.com/?p=1226
DIY Whiskey and Cigar Butler https://30minutewoodshop.com/?p=550
Farmhouse Key Rack https://youtu.be/I65FGq4dKYY
Tools and Materials you may need
1/ 4” Paduk https://amzn.to/45NOxcO
Plywood 15.5” x 9.8” x 0.2” https://amzn.to/3WQBZ0l
Rabbet Bit set https://amzn.to/42hKMtq
DEWALT Drill and Driver Combo https://amzn.to/42yybmy
DEWALT Compact Router Kit https://amzn.to/43HWWwU
Ridgid Oscillating Belt Sander https://amzn.to/45C3rTK
Rockler Brass Setup Blocks https://amzn.to/43nFhun
Narex Scratch Awl https://amzn.to/3O8sM
Milwaukee M18 Jig Saw Kit https://amzn.to/3FAWXsS
BOSCH Compound Miter Saw https://amzn.to/421A1vl
Minwax Spray Lacquer https://amzn.to/3IXOIIV
Titebond III Ultimate Wood Glue https://amzn.to/3Nb4i6n
PPE Gear
3M N95 PPE Mask https://amzn.to/3x4NGEu
ISOtunes Bluetooth Earmuffs https://amzn.to/3lpj1iA


