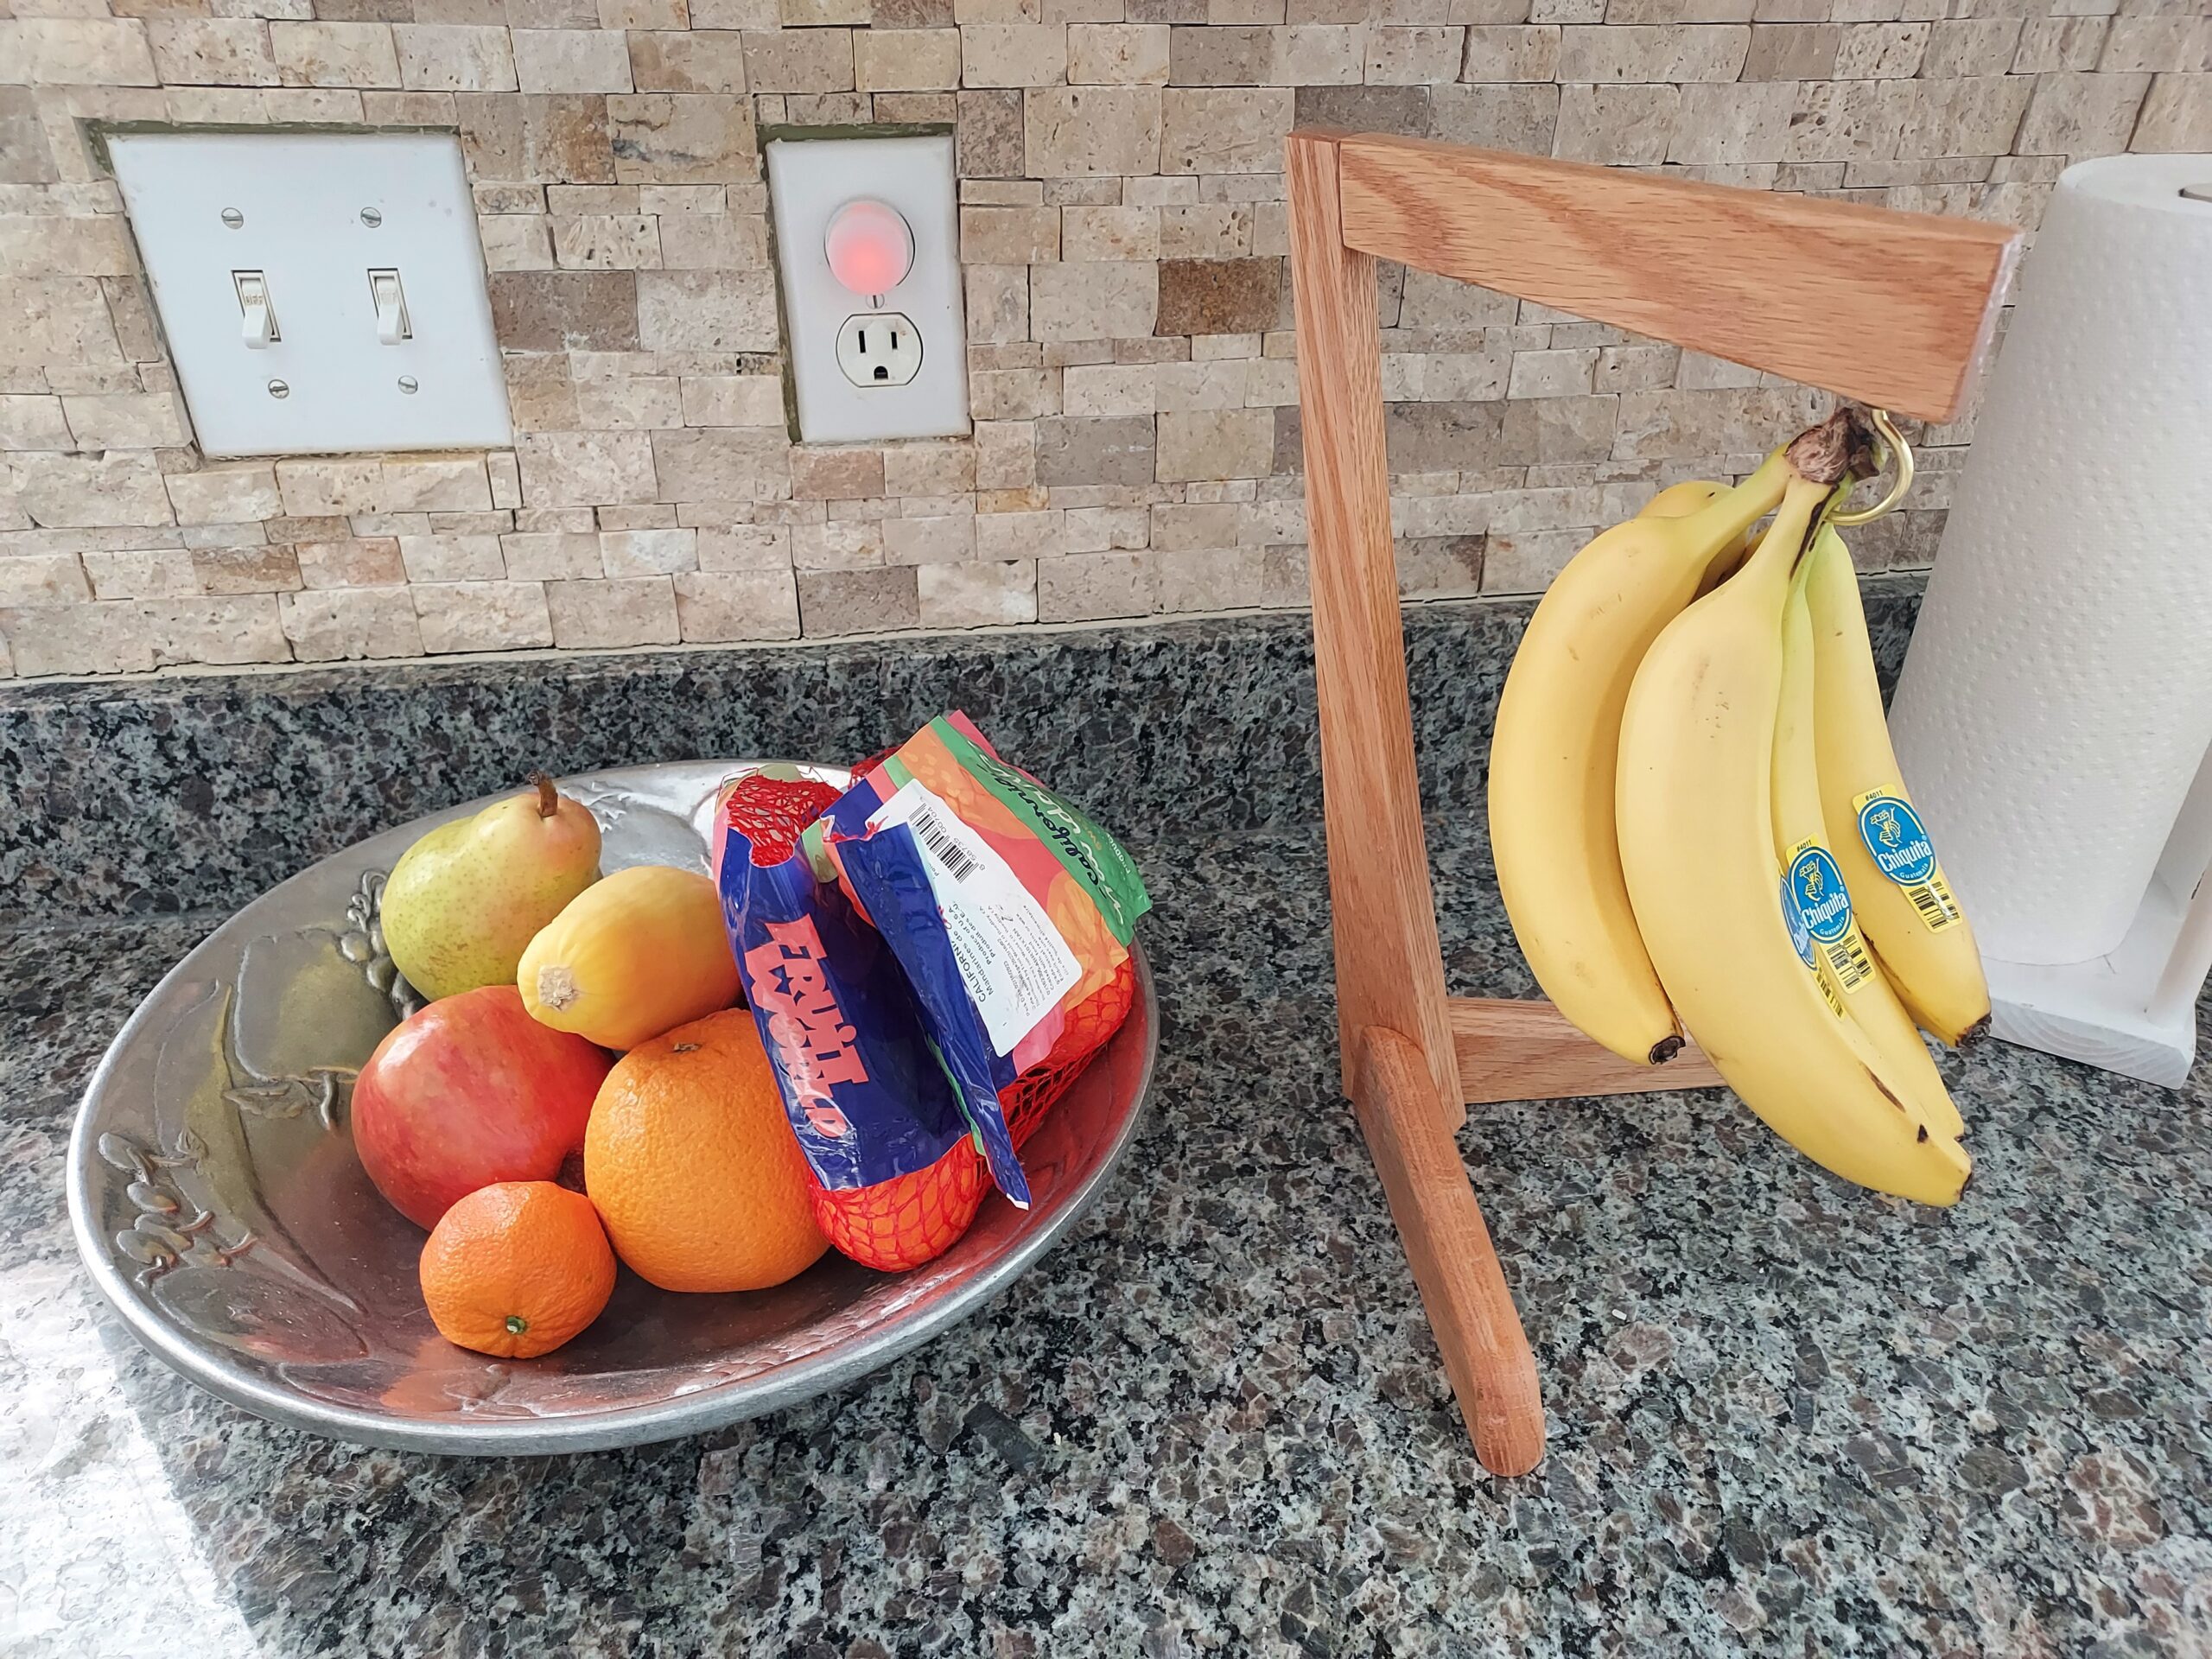

Who really needs a banana hanger – probably you! Besides looking cool on your counter and providing easy access. This Mid Century Modern Banana Hook or holder, actually does extend the life of your bananas keeping them fresh longer. Additionally, a banana hanger is great for families with children who love bananas, as they provide a safe and accessible storage solution that prevents the fruit from getting squished or damaged. And the beauty of this banana hanger project is that you can change up the design and get creative with it. Oh, and it is a great way to repurpose scraps. As always, links to tools and materials are at the bottom so feel free to explore. Let’s get started.
Tools and Materials
To make a banana hanger you will need a 3 foot long piece of 1×2 oak from a big box store. I had scrap material the fit the bill perfectly. You could use scrap too if you have it in your scrap bin. You will also need a 1-1/4” brass cup hook. With respect to the tools for this project you will need a saw, router and roundover bit, jigsaw or bandsaw, sander, drill and 1/8” bit, a hot glue gun, and a 12” clamp.


Layout
Rough cutting your banana hanger parts to length is the first step. Add a 1/4 inch to all your dimensions to account for the 10 degree trim you will make later. That said, cut your support at 7-1/4”, the upright at 13-1/4” and the two feet at 6-1/4” in length. Next, layout your tapers as shown in the Sketch. By the way you don’t have to do the tapers, they just give it a modern look.

Cutting
When I started this project, I had scrap that was already tapered and actually the project was built around using that scrap. You will most likely be starting with a 1×2 which means you will need to cut a series of tapers. I would cut these tapers on my table saw using a jig like this Taper Jig from Rockler. The jig will give you a smooth cut that will need minimal sanding. If you don’t have a table saw and taper jig then you can use a jigsaw or bandsaw. You will need to do some work on the cut edges with a file and sandpaper.

Next, after you have your banana hanger parts tapered, you need to cut your angles, the 10, 13 and 45 degree cuts. I used my table saw but you can use a jigsaw or bandsaw or even a compound miter saw.
Cutting parallel 10 degree angles on the ends of the upright.

And cutting those 45’s on the feet.

Shaping the Toe Curve
The feet need something to finish them off and that is a toe curve. You can leave them square but a curved end gives a more finished look. The curve radius is from a rattle can of paint. You need to pop off the top and use that to lay in a curve. Then, move on to your jigsaw or bandsaw and cut away.

Fairing the Curve
With your toe curve cut you will need to “fair” the curve which is basically blending and smoothing the curve with a file and sandpaper. I used an oscillating belt sander which made short work of eliminating the saw marks and fairing the curve.

Routing the Edges
Now you should have all your parts cut to size and the toe curves shaped and faired, your next operation is to round the top edges of the feet. You really don’t have to do this; you could leave them sharp and just sand the edges but I like to look of a rounded foot. I used my router table but you can do it with a compact router and a 3/8” roundover bit. I suggest that you use double faced tape to secure both pieces together and then route. Unstick and flip them over then finish the routing. BE CAREFUL routing the toe.

Sanding
Well, you are closing in on the assembly of the project. Grab a piece of 220 grit sandpaper and sand all of your collected pieces. Be sure to break all of the sharp edges too.

Assembly
Assembly is a two-step process. First, glue the support piece to the upright as shown in the picture below.
Use plenty of waterproof glue and clamp firmly but don’t over tighten it. You need to leave a fair amount of glue in the joint because one piece is end grain and will suck up the glue.

Making Glue Blocks
Next you will need to nip off two small 3/4” x 3/4” x 45 degree blocks. These are clamp blocks used for clamping across a 90 degree corner.

With those two blocks, hot glue them to the feet as shown in the picture below. Be sure to get them pressed on tightly and square to the edges and ends.

Gluing the Feet
Gluing the feet on is a straightforward process. Use plenty of waterproof glue and snug the clamp across the glue block. The critical part here is that the feet and upright need to be flush and flat!! Make sure you do this on a level surface and adjust all three pieces until it sits flat and doesn’t rock. Once everything is flat and flush tighten the clamps firmly – don’t over tighten. You need to leave a fair amount of glue in the joint because one piece is end grain and will suck up the glue. Wipe off any excess glue with a damp paper towel. And give it several hours to dry.

Finishing
You are almost ready for a finish. Use a chisel to knock off the clamp blocks and scrap off any hot glue residue. Then, with a bit of 220 grit sandpaper, touch up any areas you may have missed. Wipe off the entire project with a soft cloth or paper towel to remove most of the dust. NOW let’s finish.
The choice of finish is up to you. I like Minwax Golden Pecan oil-based stain followed by 3 coats of Minwax Satin Polyurethane with a light sanding with 320 grit sandpaper in between.
The Final Bit
There is one last thing to do – add the hook. I used a 1-1/4” brass cup hook and bent it open to about 45 degrees (so it wasn’t so curly). Then drilled an 1/8” pilot hole (you need this for brass or it will break) 1 and 1/4″ in from the front and screwed in the hook. I faced mine toward the back. If you want your facing forward, then drill the hole 1-3/4” back from the front edge. And that is it!!
Congratulations
Wahoo!! You have a project worthy of your kitchen counter. Hope you enjoyed this and please don’t feel constrained by the design. You can take it and make it your own with curves or other nuances.

Thanks for reading and until next time Good Making! Btw if you give this project a try then post pic on my FB Page!!
Bill
Visit my Etsy Store at www.etsy.com/shop/30MinuteWoodshop
Facebook https://www.facebook.com/30MinuteWoodshop
Links to my Videos and Blogs
DIY Whiskey and Cigar Butler https://30minutewoodshop.com/?p=550
Farmhouse Key Rack https://youtu.be/I65FGq4dKYY
DIY Cigar and Whiskey Butler Video https://youtu.be/PR0C5dOrO2E
Tools and Materials you may need
Rockler Taper Jig https://amzn.to/3YWAM7c
Milwaukee M18 Jig Saw Kit https://amzn.to/3FAWXsS
BOSCH 12” Sliding Glide Miter Saw https://amzn.to/3IvOt72
DEWALT Router Kit https://amzn.to/3FzUJKh
Milwaukee M18 Drill Kit https://amzn.to/42h0E0W
Milwaukee M18 Hot Glue Gun https://amzn.to/3ZXf6Jv
Ridgid Oscillating Belt Sander https://amzn.to/3KdzeSo
Freud 3/8″ Roundover Bit https://amzn.to/3llVOyg
XFasten Double Sided Woodworking Tape https://amzn.to/400NHX2
Minwax Oil-Based Wood Stain https://amzn.to/3mqi36o
Minwax Helmsman Polyurethane https://amzn.to/3SRuzYD
Cup Hooks Brass, 1 1/4-Inch https://amzn.to/3FxVnI2
PPE Gear
3M N95 PPE Mask https://amzn.to/3x4NGEu
ISOtunes Bluetooth Earmuffs https://amzn.to/3lpj1iA


