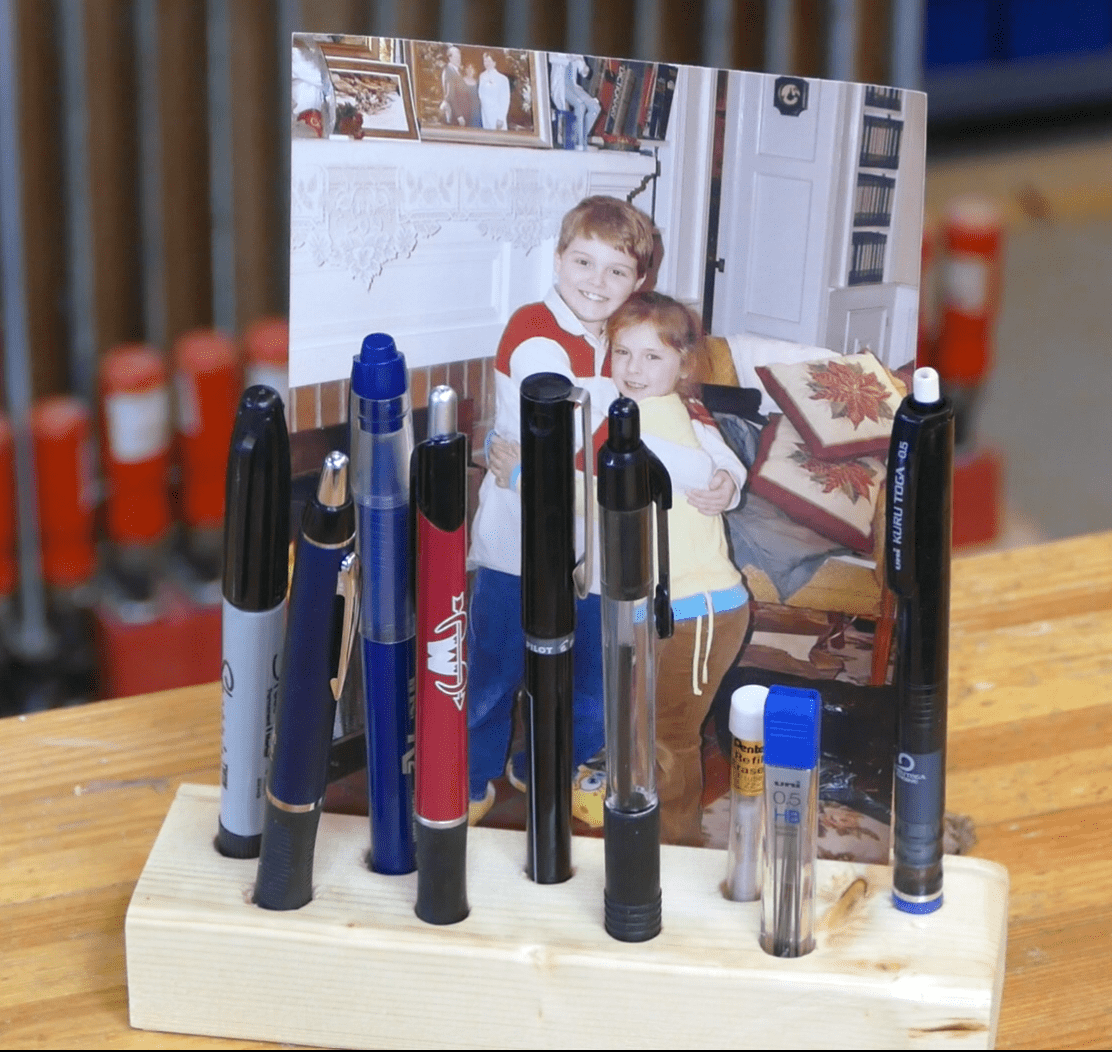
You can create this desk organizer with only hand tools. It is the perfect picture and pen holder whether for home or work. And it will keep your desk organized and make changing pictures a breeze.
Follow this link to my Video to see how it is done.
Tools and Materials
To create this desk organizer you really only hand tools. For that you will need a is a hand saw, block plane, and drill. Power tools make this job really quick and really easy. A table saw with a good blade and a compound miter saw helps immensely, as does a drill and several drill bits. You also need the usual tools such as a tape measure, and a combination square,.
As far as materials for this project we’re using a 7” chunk of 2×4 that I cut down to 1-1/4” x 2”. I chose this size because it is convenient and easily fits into my backpack. Also it is fairly small and doesn’t take up too much room on my desk at home. You can use a full sized piece of 2×4 and save yourself having to mill it to size. While I used construction grade pine which is usually pretty cheap this project would look great in Walnut or Cherry. Either of those would definitely move the picture and pen holder upscale. There also, is an alternate plan below that uses a 4×4 if you don’t plan on taking this to the office.

Layout
The layout for this project centers around the holes. Just use the sketches below or make up your own layout.

Alternate Design
If you are going to use this 4×4 based design be sure to choose a figured piece of wood to add interest to you workspace.

Cutting and the Groove
First, set you stop block and cut off a 7” piece of 2×4. Next set your table saw fence to 2” and rip it to a width then reset it to 1-1/4” and rip it to thickness. This may take 2 passes unless you have a powerful cabinet saw.
Now you will need to set your blade depth to ½” and saw fence to 5/16” and run the block through creating the picture groove.

Drilling
To make this pen holder work we need to drill some holes. You will need a 1/2” and a 3/8” drill bit. I recommend bradpoint drills because there is less tear out and it will save you some work. I used a split-point and it caused extra work.
Layout the hole centers as noted in the sketch. Feel free to change or adjust them as needed to fit your pens, pencils, and pictures.
You will only be drilling down 1” so apply a flag to the drill bit using masking tape.

Planing
Ok, I had to hand plane because the drill bits I chose caused some tear out. I used a 100 year old Bailey No. 4-1/2 and that fixed my problem. If you do get some tear out at the hole entrance and don’t have a plane you can either sand it out or use your table saw to skim the surface to remove it. Take off about a 1/2 a blade with at a time.

Sanding
Depending on your tools, you may need to sand. Unless the surface is really bad 220 grit then 320 grit should be perfect. You will also need to break the edges with 220 grit and ease the edges of the holes. I did no sanding other than the edges and hole because the plane left a smooth surface.
Finishing
Staining, varnishing, or painting or some of you finishing options. I chose a Minwax spray lacquer and applied three coats with a light 320 grit sanding between coats. And then finished it off with a coat of paste wax. This gave the piece a nice silky smooth feel.

Project Finished
This was a sweet and useful little project that will dress up your workspace either at home or at work in your “Hotel” cube. Give it a try and enjoy.

Hope you got something out of this hit like and subscribe. I’d appreciate that a lot.
Thanks for reading and until next time Good Making!
Bill
Visit my Etsy Store at www.etsy.com/shop/30MinuteWoodshop
Facebook https://www.facebook.com/30MinuteWoodshop
Links to my Videos and Blogs
Create Your Own Dice Vault https://30minutewoodshop.com/?p=1226
DIY Whiskey and Cigar Butler https://30minutewoodshop.com/?p=550
Farmhouse Key Rack https://youtu.be/I65FGq4dKYY
Create Your Own Lazy Susan https://30minutewoodshop.com/?p=491
Tools and Materials you may need
DEWALT Drill and Driver Combo https://amzn.to/42yybmy
DEWALT Router Plunge Base Kit https://amzn.to/3LKkJEK
Ridgid Oscillating Belt Sander https://amzn.to/45C3rTK
DeWalt Drill Bits https://amzn.to/3LH3MMt
Starrett Combination Square https://amzn.to/3XpbrDN
WoodRiver Low Angle Block Plane https://amzn.to/3pkNvos
Milwaukee M18 Jig Saw Kit https://amzn.to/3FAWXsS
BOSCH Compound Miter Saw https://amzn.to/421A1vl
Minwax Fast Drying Polyurethane https://amzn.to/3V5h0pO


