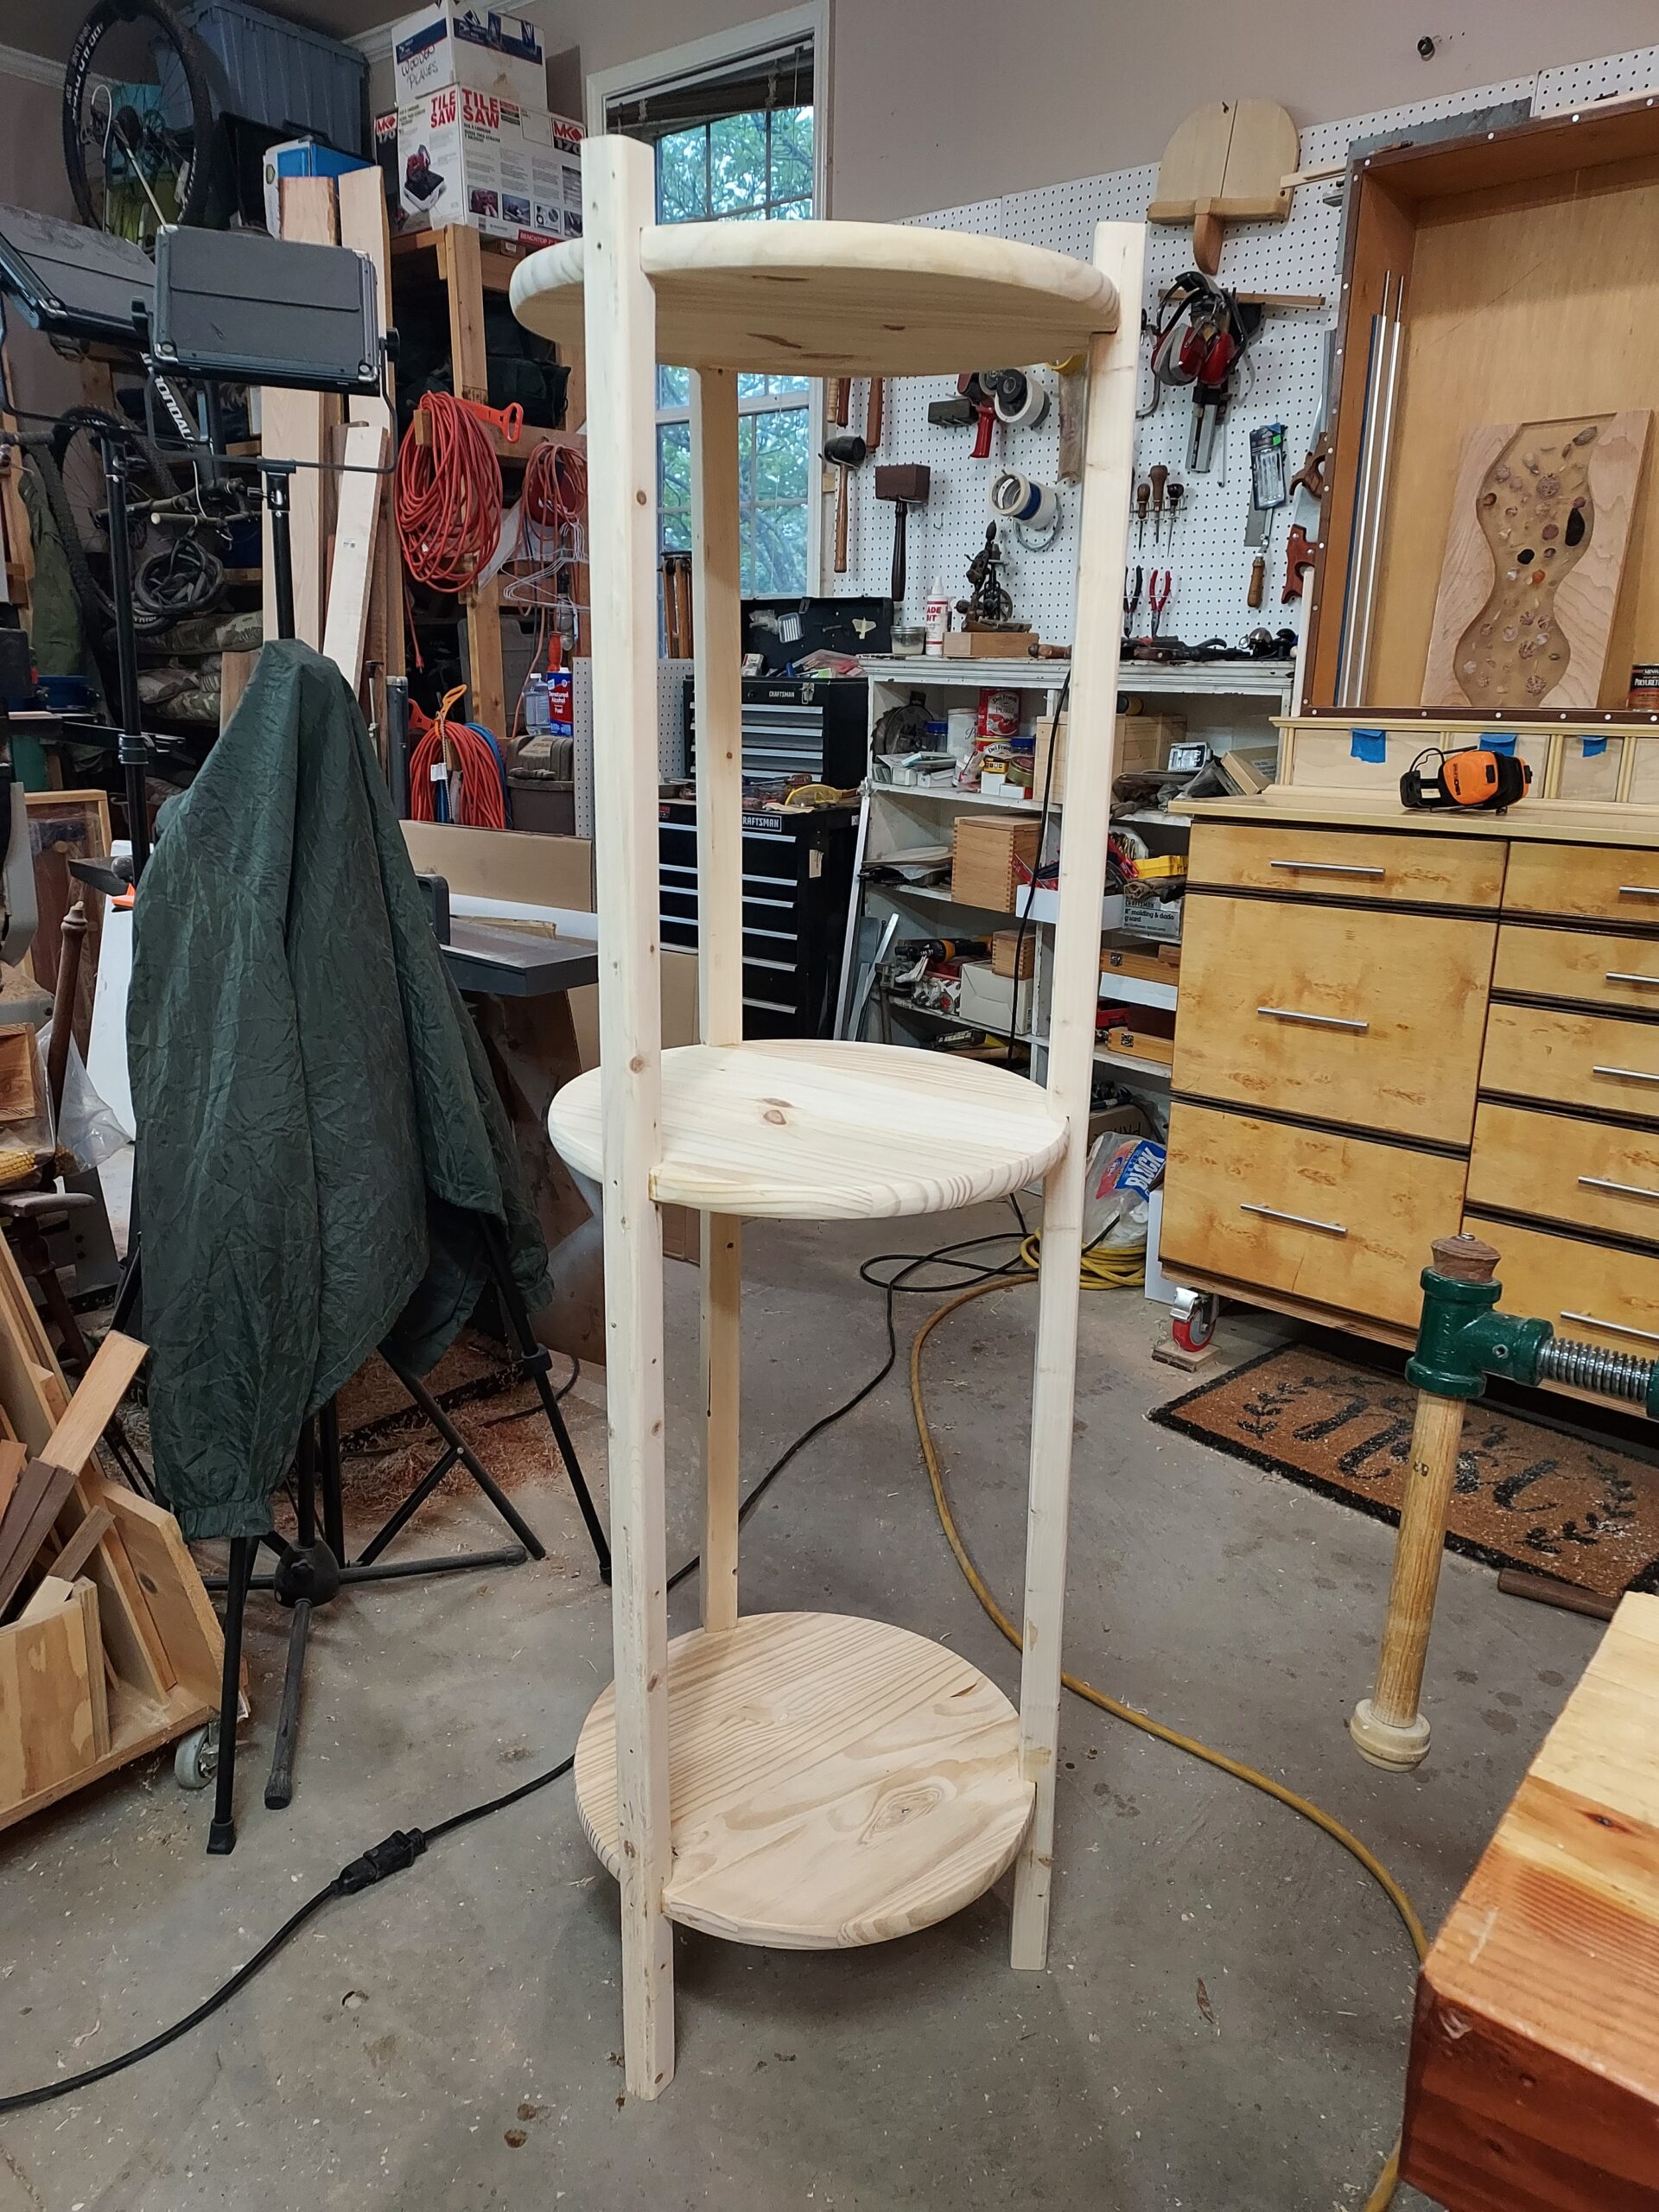
If you’re really into plants then here is a very simple 3 Tier Plant Stand for all your large plants to help create a vertical garden. This uses pre-cut rounds for the shelves and construction lumber to make it simple and easy to create. Though I have a dimension sketch below don’t feel constrained by either materials or dimensions come on create your own. This would look smashing in Cherry or Walnut. Follow this link to my Video to see how it is done. VIDEO LINK
Tools and Materials
This is the type of project you can build with only hand tools basically a saw, a chisel, a hammer, and some clamps. But the right tools make creating this XL Plant Stand much faster and easier. So the specialty tools you will need would be a dado set, a Micro Jig Dado Stop and an Angle Protractor.
The materials for this project are three very straight 8 foot 2 x 2s and three 18” precut rounds. The rounds should be solid wood like pine. They will be 17-1/2” in diameter and 1”thick.

Layout
The most complicated thing to lay out on the Plant Stand is the location of the legs. You will need to mark three lines radiating from the center to the outside edge 120 degrees apart. To do this find the center and then strike a line across the middle. Then you use your Angle Protractor to lay in the other two lines 120 degrees on each side of the center line. Next, carry those lines down across the edge. Then stack up all three rounds and transfer the mark from the first one onto the other two in each location. These marks are the centers of the legs. Now you will need to mark the outside edges of the legs. Measure the width of the 2 x 2 and divide it in half. Using that measurement mark each side of the center line. If you did it right, you should get a band that’s exactly as wide as the 2 x 2. I usually put slash marks between those to let me know where the legs will sit.
You will have to mark the legs at 61-1/2”es And then using the drawing below mark the location of the notches for the shelves.

Safety Note: this is a 3-tier stand that’s fairly broad and stable. But it’s probably at its Max height so I wouldn’t consider adding a higher shelf.
Crosscutting and Making the Dados
The 2 x 2s marked Crosscut all three at 61-1/2”.

The next step is to make the notches or dados. I used a Freud Dado Blade and a Micro Jig Dado Stop. These two tools made it super fast and easy. If you don’t have these tools you can use the “nibble” method to make the dados. Set your saw blade depth to ¾” and then making multiple passes between the lines that you created earlier and nibble away the wood. Test fit often – you want the joint snug not sloppy.
If you are using a Freud Dado Blade and a Micro Jig Dado Stop just follow the instructions in the packages.

Routing
I routed the front edge of my legs using a 1/2” “roundover bit. You don’t have to do that you can just sand those edges to make them smooth. I like the round over because it gives it a little bit more finished look to the Plant Stand especially using the construction lumber.

Sanding
Because I used construction lumber I had to do a lot of sanding. Especially on the 2 x 2s. These were rough and checked and this is an inside project. Sanding the legs, I started with 60 grit sandpaper, move to 80 grit sandpaper, and finished with 220 grit sandpaper. This gave me the finish I wanted which was fairly smooth and good enough for two coats of latex paint.

I also had to sand the three round shelves. All three required extensive edge sanding with 60, 80, and 220 grit sandpaper. Be sure that you transfer the lines for the legs back onto the edges once you’ve sanded them. You will need to have these lines as reference in a later step. The tops were in good shape and I only used 220 grit sandpaper. If you are using Poplar, Cherry, or Maple you may only have to use 220 grit to get the surface smooth.

Sanding the flats
The last thing you have to do in sanding is to create three flat spots on each round shelf. These flat spots are where the legs will touch. The flat spots provide a lot more contact area for the glue and provide a much better joint. I used 60 grit sandpaper to create three of these on each of the shelves. Just sand them square and flat and you’ll be good to go. Check the fit often – you would like the shelf to be fully seated in the dado.

Assembly
Final assembly of the Plant Stand is very easy. First put glue in the notch. Then place that notch over the flat spot on the shelf and use a mallet to gently tap the leg home. Wipe off any squeeze out with a wet paper towel. Continue doing this for other two shelves. Then carry on with the remaining two legs in the same manner. Once everything is tapped home snag a few clamps and clamp all the legs.

Once the glue is dried (3-5 hours) you may want to drive in a screw at the center of each leg centered on the shelf. I used 1-½” #8 trim screws. With all the glue that should be plenty. If your joints are loose however, you may consider using 2 ½” deck screws. Just be sure to pre-drill and countersink the deck screws.

We’re at the last step. I did not paint mine because it’s going to my daughter, and she wants to do the finish herself. Because this will be used for plants, I suggest that you paint Plant Stand with two coats of latex paint and a third coat on the top of each shelf. This should provide more than adequate protection from drips and spills. If you use a gloss or semi-gloss it will also make it very easy to clean.
Finishing
We’re at the last step. I did not paint mine because it’s going to my daughter, and she wants to do the finish herself. Because this will be used for plants, I suggest that you paint it with two coats of latex paint and a third coat on the top of each shelf. This should provide more than adequate protection from drips and spills. If you use a gloss or semi-gloss it will also make it very easy to clean.
Congratulations
This has been a fun and fast project. Easy to do with the right tools and even if you don’t have those it’s still very straightforward. I hope you can make the time to actually do this project and create this small vertical garden for your home.

If you did make this project, congratulations on a job well done. And do me a favor and post it on my Facebook page. I’d love to see your work.
Hope you got something out of this and if you did, do me a favor, hit like and subscribe. I’d appreciate that a lot.
Thanks for reading and until next time Good Making!
Bill
Visit my Etsy Store at www.etsy.com/shop/30MinuteWoodshop
Facebook https://www.facebook.com/30MinuteWoodshop
Links to my Videos and Blogs
DIY Whiskey and Cigar Butler https://30minutewoodshop.com/?p=550
Farmhouse Key Rack https://youtu.be/I65FGq4dKYY
Create Your Own Lazy Susan https://30minutewoodshop.com/?p=491
Tools and Materials you may need
Match Fit Dado Stop https://amzn.to/3NQTHxY
Freud 1-1/2″ Forstner Bit https://amzn.to/3W3sjiT
GRK Trim Screws 8 x 1-1/2″ https://amzn.to/46rQ0Gg
General Tools Angle Protractor https://amzn.to/3JD50r1
DEWALT Drill and Driver Combo https://amzn.to/42yybmy
DEWALT Router Plunge Base Kit https://amzn.to/3LKkJEK
Milwaukee M18 Jig Saw Kit https://amzn.to/3FAWXsS
BOSCH Compound Miter Saw https://amzn.to/421A1vl


