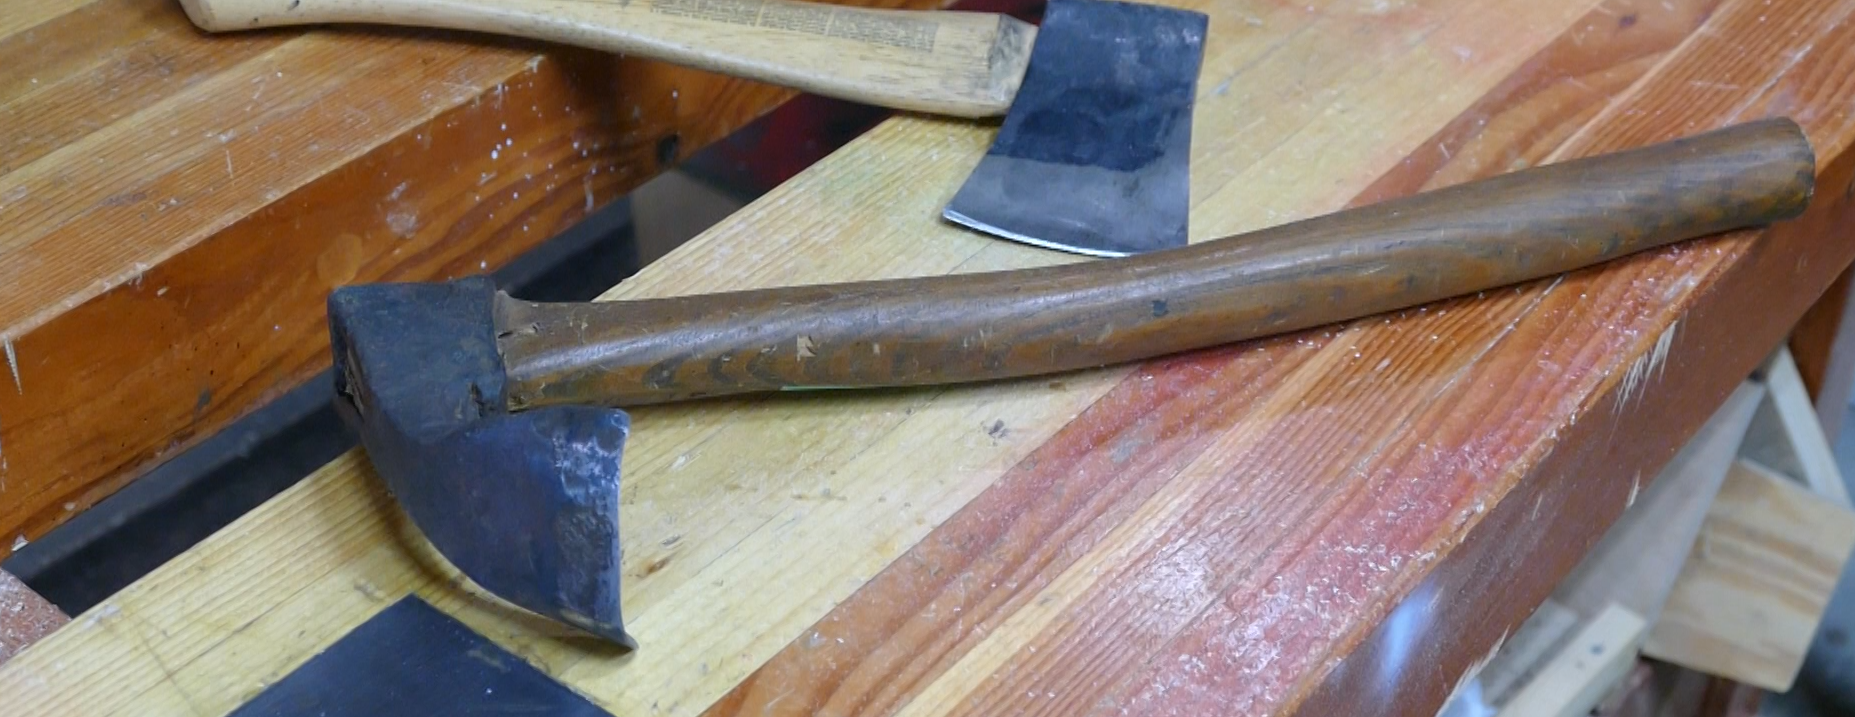

OK, this is not a 30-minute project. But it’s a really fun project. I was with my wife at an antique fair on a Sunday and stumbled across an Adz. As it was Sunday the guy gave me the adz for half price which was $12.00. I simply couldn’t pass it up. It was in pretty rough shape and when I got home I took a really good look at it. It looked old.

I had a friend take a look at the Adz. He is a Farrier Which community the blacksmith that shoes horses. So this gent is about 80 years old it has a lot of experience in blacksmith forging. He went over this tool with me and pointed out the hammer marks, the forge welds, and some interesting points about the handle.
It turns out, in his estimate this tool was hand forged by a blacksmith sometime in the early 1800s to possibly the mid-1800s he thinks most likely in the 1820s to 1830s. He showed me where the Smith had created the scoop and then forge welded it to the head or eyelet. He also pointed out that the islet which many times will be Oval was in this case square. The square eyelet is really why he thinks tool was made in the 1820s or 1830s. He also showed me quite a few of the hammer marks and pointed out that this was a user tool that the blacksmith probably used himself to make things like bowls and gutters.


Having this tool really excited me. So what I thought I would do is I would recover the tool and put it back into use 200 years after it was made.
Tools and Materials
There are a lot of ways that you could do this. My objective was to make the tool useful and not to “restore it”. Though I have to say I probably did actually restore this piece because it was never a shiny polished tool. The Smith probably pulled it out of the fire quenched it, sharpened it, and used it in its blackened state.
So to get started on recovery the first thing I did is grab several files including mill bastard and mill files both flat and half round. I could have used a grinder but my intent was to take off as little material as possible and keep the tool as close to original as I could.
Cleaning it up
I started by filling the outside curve in the back. This took quite some time because of hammer marks and rust. As I got down to bare steel I switched over to straightening the edge. The edge had quite a bit of wave in it from years of sharpening. Running the mill file crossed yeah I just flatten it and straighten it kind of hurt me. Mostly because I realized I would have a lot of additional filing to do to make the edge.

With the back cleaned up and the edge straight and square I started in with half round mill file to actually create an edge. Again this took quite some time it probably could have been faster had I used a die grinder but I really wanted to keep as much of the material in place as possible a die grinder moves really fast.

Sharpening
Once I add an actual edge I took a few different stones at homes to it to get its sharp. I’m actually pretty happy that I had my dad’s scythe stone. This particular curve and the stone matched the ads almost perfectly.

What’s all the additional sharpening was done I got the ads to the point where it was Much sharper than an axe but not as sharp as a chisel. Then I went to town on a couple pieces of lumber just to check it out. It can make chips really fast.
Recovering this tool has been a lot of fun though it did take a lot of work and time. But I think the elbow grease that I put into this project will pay off I start making my guitar stool. And yes this is going to be one of those tools that I use to scoop out the saddle of that guitar stool. I will say for the few strokes that I used it for I have a lot more respect for guys that are creating and scooping out chair seats by hand.
I’d say this folks, if you’re at an antique fair keep your eye out for tools that need to be rehabilitated. Recovering a 200 year old tool is really satisfying Especially when you could put it back into service after almost 2 centuries.

Hope you got something out of this and if you did, do me a favor, hit like and subscribe. I’d appreciate that a lot.
Thanks for reading and until next time Good Making!
Bill
Visit my Etsy Store at www.etsy.com/shop/30MinuteWoodshop
Facebook https://www.facebook.com/30MinuteWoodshop
Links to my Videos and Blogs
6 Tools to Start Woodworking https://30minutewoodshop.com/you-need-these-6-tools-to-start-woodworking/
Create Your Own Dice Vault https://30minutewoodshop.com/?p=1226
DIY Whiskey and Cigar Butler https://30minutewoodshop.com/?p=550
Farmhouse Key Rack https://youtu.be/I65FGq4dKYY
Create Your Own Lazy Susan https://30minutewoodshop.com/?p=491
Tools and Materials you may need
Milwaukee M18 Fuel 2-Tool Combo KIT https://amzn.to/4l7vAsc
Milwaukee’s M18 Compact Router https://amzn.to/4oh0pxm
Milwaukee M12 Detail Sander https://amzn.to/46I6tss
Milwaukee M12 Rotary Tool https://amzn.to/4lDpz6Z
Bostitch Nailer and Compressor Combo Kit https://amzn.to/3HsfXO6
Bostitch 18 GA Brad Nails (900) https://amzn.to/3Hopnu4
Kreg K4 Pocket Hole Jig https://amzn.to/45bxFgQ
Ridgid Oscillating Belt Sander https://amzn.to/45C3rTK
Starrett Combination Square https://amzn.to/3XpbrDN
Milwaukee M18 Jig Saw Kit https://amzn.to/3FAWXsS
BOSCH Compound Miter Saw https://amzn.to/421A1vl
Minwax Fast Drying Polyurethane https://amzn.to/3V5h0pO
PPE Gear
3M N95 PPE Mask https://amzn.to/3x4NGEu
ISOtunes Bluetooth Earmuffs https://amzn.to/3lpj1iA