
Summer is here and it’s time for roasting marshmallows and hot dogs. Here’s a really quick turn hot dog and marshmallow roasting stick set that’s very easy to do.
Tools and Materials
The materials you’ll need for this project are very straightforward. First of course, you will need the roasting sticks. You can find these at woodcraft (check the link below) for about $35. Then you’re going to need the handle material which is nothing more than a series of turning blanks that are about one inch square and about 6 inches long. And of course, you’re going to need a 10mm drill, a center finder, and some kind of finish.

Layout and Marking
If you’re working with raw wood or branches, you’ll need to get your material prepped which could mean squaring it up or getting it straight. If you already have blanks, they should be about 1 inch to 1-1/8 inches square and about 5-1/2 to 6 inches long. Regardless of whether a square blank or round branch you’ll need to mark the center. Your best bet is to get a center finder. These are really fairly cheap and easy to find at Woodcraft, Rockler, or Amazon. And they’re easy to use.

Once you have marked the centers on both ends you will need to drill a straight 10mm diameter hole to a depth of about 2 1/2 inches (be sure you read the instructions). This hole is where the steel portion of the hot dog fork gets inserted. At the other end you should take an awl and mark the center for your drive center.

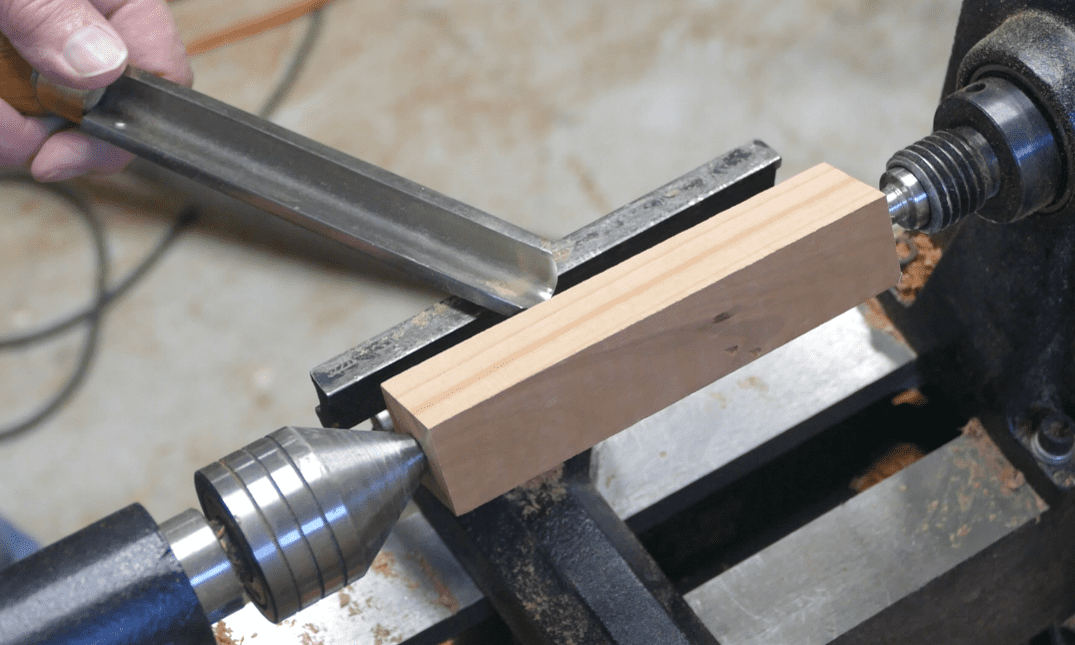
Chucking
Your next step is to chuck your piece into your lathe. Center it on your drive spur and whack it a couple times with a hammer then pull up your 60° live center and tighten everything down. Bring up your tool rest and lock it into place then step back and turn on you’re lathe.
Caution: always step back will you first turn on your lathe just in case you made a mistake.

Roughing and Shaping
Once you have the part chucked and spinning grab a roughing gouge and start turning the square blank into a round blank. It should take you 2 to 3 minutes to get the part generally round. At this point you can keep going with the roughing gouge to provide a gentle arc and swell to the handle. If you want to get fancy then pick up your thumbnail gouge or skew and you can create a Tulip or Bead detail.

Sanding
With your handle formed and detailed it’s time to sand. This is a case where you will need to run through the grits. I started with an 80 grit went to 220 and ultimately finished the 400 grit.


Assembly
Assembly is straightforward. You will need to glue the parts together with either epoxy or CA glue. With a 10mm hole the parts fit very tightly so I would recommend CA glue to avoid having the epoxy get into the works and jam up the extension. To do this all you do is push the metal fork about 1/3 of the way into the handle then apply CA glue to the part remaining outside. Now as you push the two pieces together, the CA glue will be dragged into the hole securing the two pieces together. Give it about 10 minutes to dry then apply some additional CA glue in case there is a gap between the two parts.

Finishing
Finishing could not be easier. You have a wide range of finished choices here. You could use boiled linseed oil, wax, oil, paint, or varnish. You could even choose not to put a finish on. I chose to use varnish because it stands up better over the long haul. My application method was simply dipping the handles into the varnish then wiping off the excess. I applied 4 coats this way which built the film up fairly thickly.

Project complete
Well, this was a super easy project and one that makes summer a little bit more fun. If you choose to do this project, you could actually have these done in less than 1/2 an hour if you choose to apply an oil or wax finish.
I do hope you take the chance to build something like this and have some fun with the family this summer.

Hope you got something out of this and if you did, do me a favor, hit like and subscribe. I’d appreciate that a lot.
Thanks for reading and until next time Good Making!
Bill
Visit my Etsy Store at www.etsy.com/shop/30MinuteWoodshop
Facebook https://www.facebook.com/30MinuteWoodshop
Links to my Videos and Blogs
Create Your Own Dice Vault https://30minutewoodshop.com/?p=1226
DIY Whiskey and Cigar Butler https://30minutewoodshop.com/?p=550
Farmhouse Key Rack https://youtu.be/I65FGq4dKYY
Create Your Own Lazy Susan https://30minutewoodshop.com/?p=491
Tools and Materials you may need
Woodriver Campfire Forks https://amzn.to/4dBcTdf
Frisch 10mm Brad point Drill Bit https://amzn.to/4ddDpJE
Center Finder https://amzn.to/46FtZEj
Milwaukee Hammer Drill Kit https://amzn.to/3LUnhkg
Milwaukee M18 Jig Saw Kit https://amzn.to/3FAWXsS
DEWALT Router Plunge Base Kit https://amzn.to/3LKkJEK
Ridgid Oscillating Belt Sander https://amzn.to/45C3rTK
Starrett Combination Square https://amzn.to/3XpbrDN
WoodRiver Low Angle Block Plane https://amzn.to/3pkNvos
BOSCH Compound Miter Saw https://amzn.to/421A1vl
Minwax Fast Drying Polyurethane https://amzn.to/3V5h0pO
PPE Gear
3M N95 PPE Mask https://amzn.to/3x4NGEu
ISOtunes Bluetooth Earmuffs https://amzn.to/3lpj1iA


