Here is a quick and easy Cargo Crate Style Pencil Box you can create in a short time. Check out the Video here. [Video Link] This makes great gift for the kids and friends and is an awesome place to capture all those little things.
This Pencil Box features simple butt joints and a tilting lid. And uses the material scraps to create a cargo crate esthetic. The finish is a wipe on Boiled Linseed Oil (BLO) which is perfect for this project.
Tools and video link are at the bottom.
MATERIAL
We will start with purchasing a piece of 1/4” thick Oak 3-1/2” wide and 48” long from a Big Box Store. This saves a lot of time in material prep. Make sure the piece you buy is flat without and cup, twist, or warp.

Pens and pencils are generally 6” – 8” long and we need a bit more for the thickness of the material so 9” for an outside length should cover us. About 4” wide and 2-1/4” high will give plenty of room for lots of pens and pencils. Or Crayons!
CUTTING

BE SURE TO WEAR EYE AND HEARING PROTECTION IF YOU ARE USING POWER TOOLS

First we crosscut four identical 9” long pieces. Set aside two pieces for the top and bottom. The other two rip to a width of 2-1/4”. These are the sides. Rip the remaining piece to a width of 2”. This will be the ends. Accuracy in ripping to the width dimensions is very important. It will save you time later.

Oh, and set the scrap aside, we will need it later too. Crosscut the 2” wide piece into two 3-1/2” long pieces. Now you should have 6 pieces with the following Width x Length x Thickness:
2 3-1/2” x 9” x ¼”
2 2-1/4” x 9” x ¼”
2 2” x 3-1/2” x ¼”
SANDING
Now is the time to sand. Do it while you can sand all sides easily. Because you purchased 4S wood (Surfaced on four sides) you have machined surfaces, so sanding is easy. Grab a sanding block and 220 grit paper and sand all surfaces. Wipe off all the dust and your box is ready to assemble.
GLUE UP
Grab some glue. My favorite is Titebond but select the one you like best. Apply your glue and clamp gently then make sure that all the joints are flush and even. Then clamp firmly but don’t crush it. You don’t want to squeeze the glue out of the joint. Use a minimum amount of glue. You want to avoid squeeze out and glue slopping everywhere. Be sure you have a water-soaked sponge or rag handy to wipe up glue drips. Once dry, pull the clamps. You may have to sand or use a card scraper to remove any squeeze out. Just be sure that you do it now. Check out my Card Scraper post here and the accompanying video here

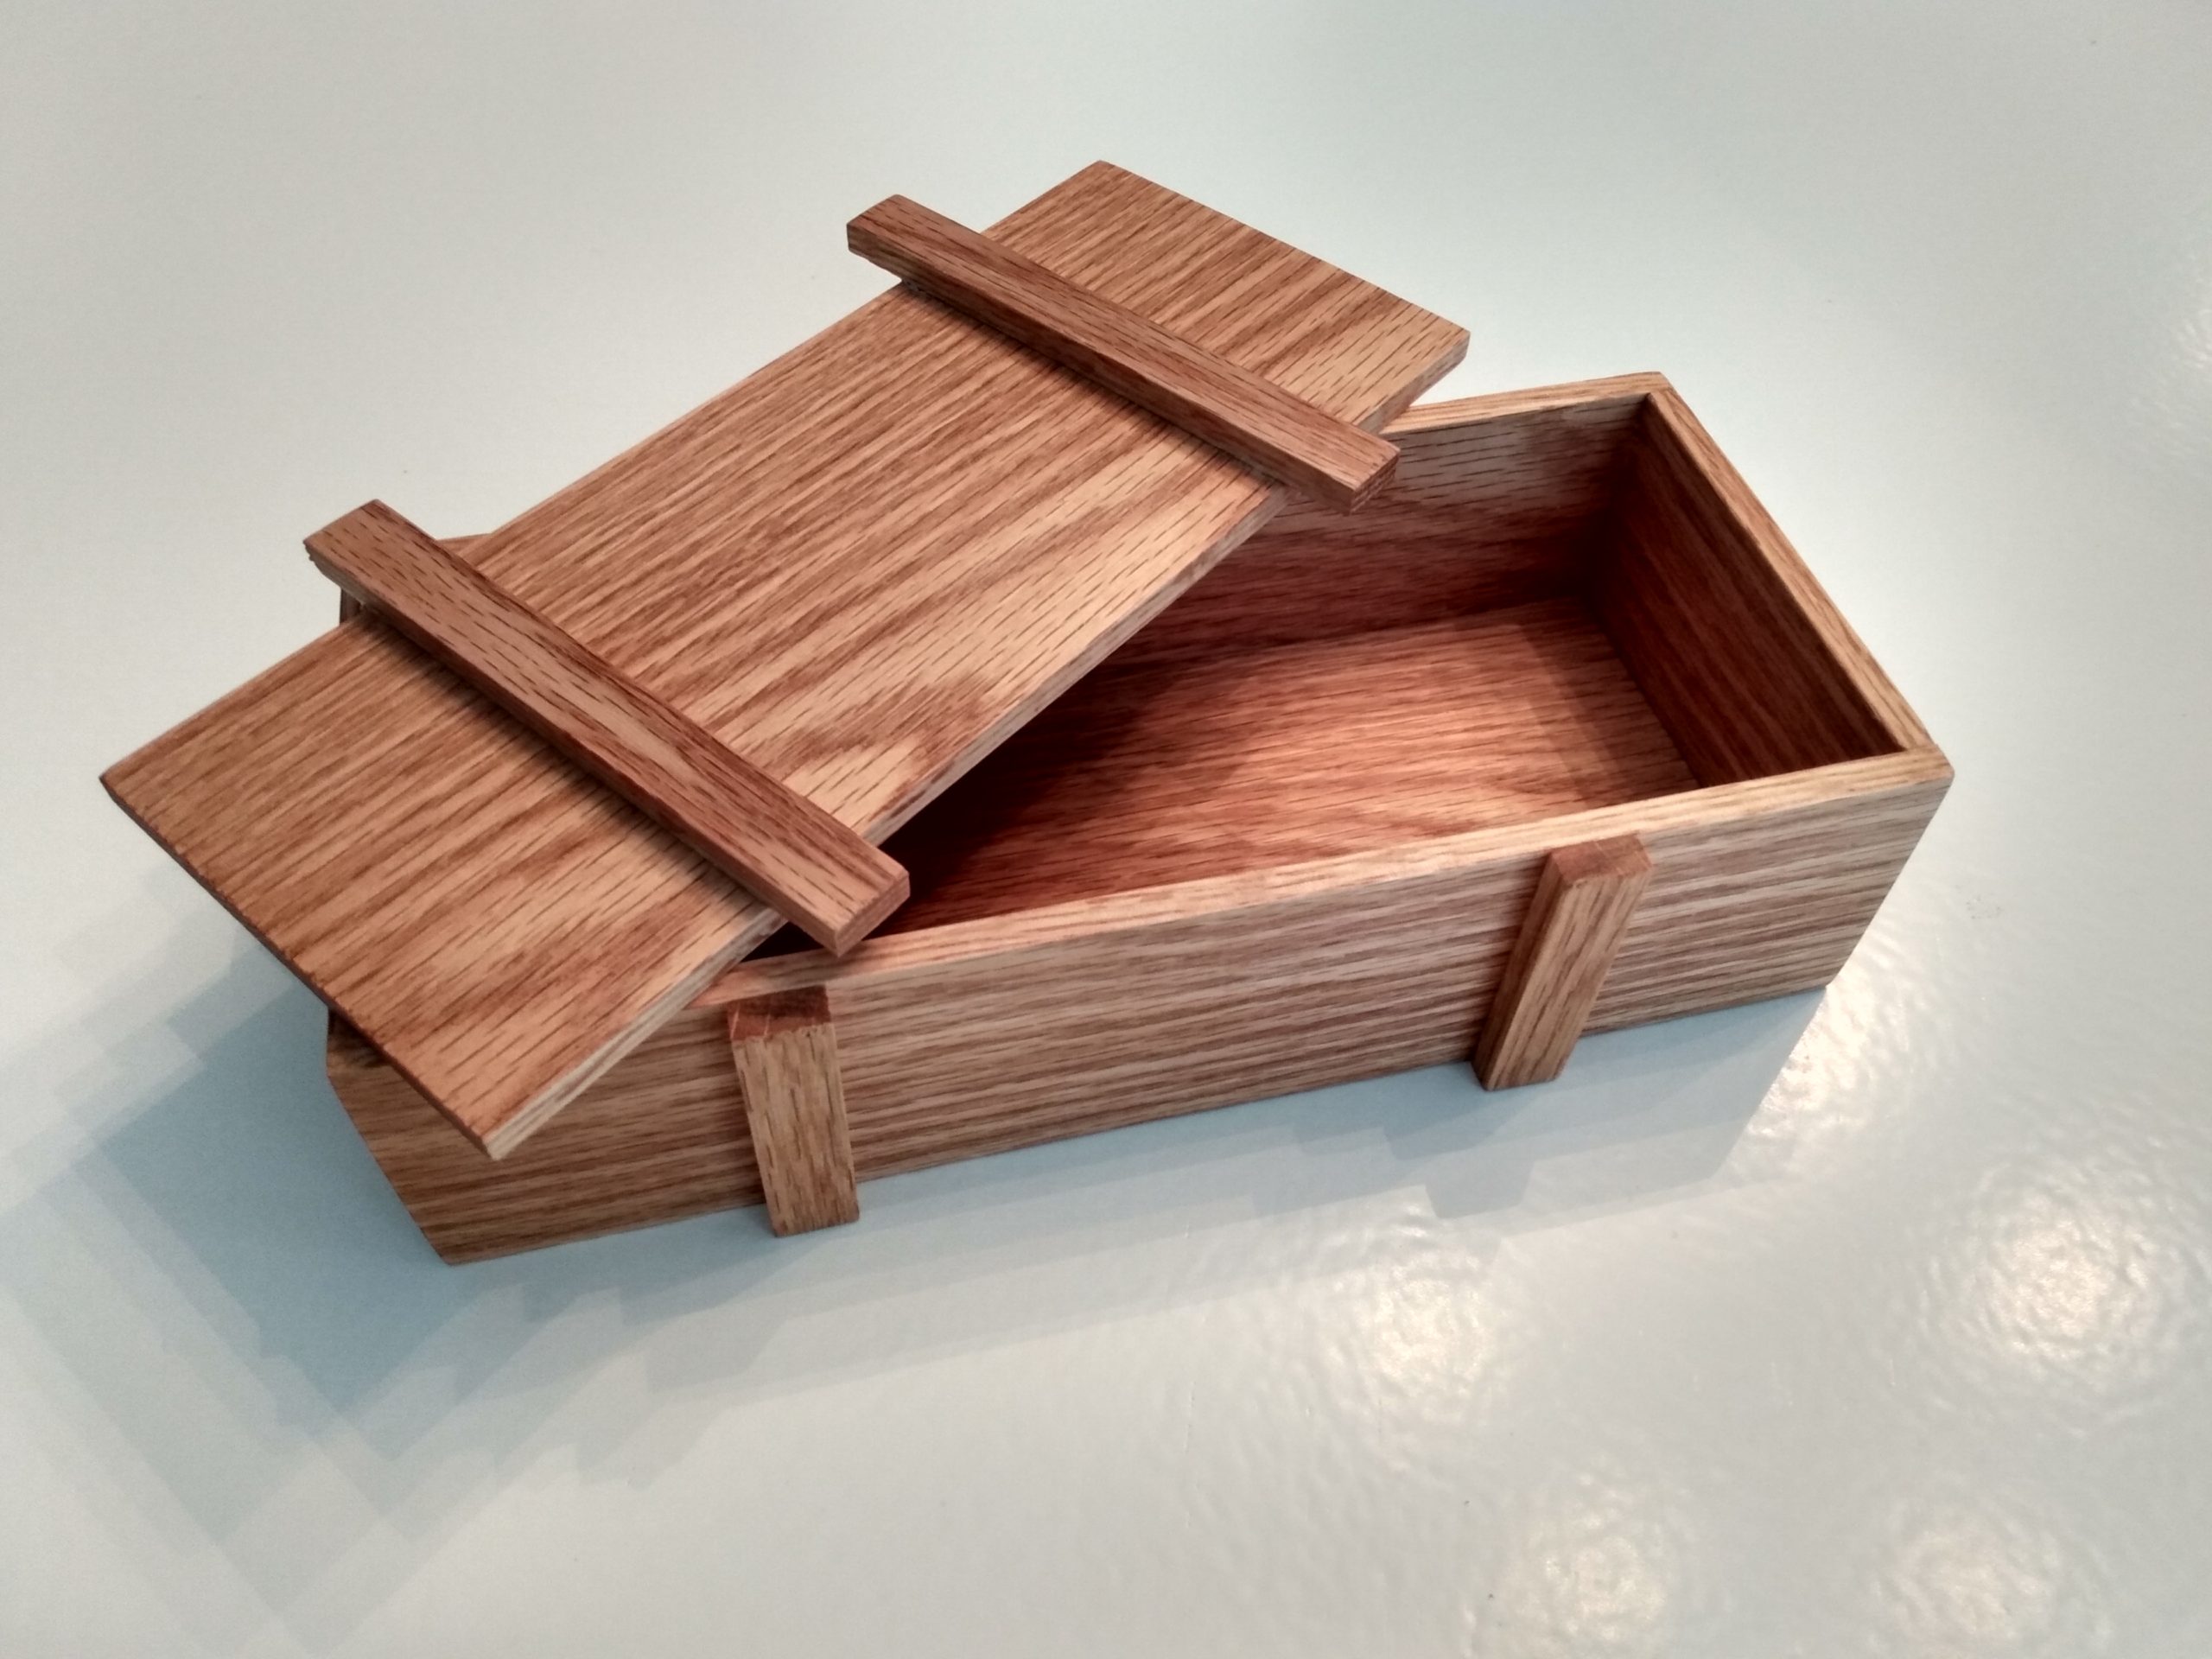
FITTING THE LID
Now that you have the box assembled you need to fit the lid. Inside the box stick a small piece of wood on each side 3/16” below the top. This will keep the lid from falling in while you work. You will need to file, sand, or plane the long edge of the lid until it just fits with a little gap on each side. About the thickness of 2 playing cards. I used a sharp block plane, and it took about 2 minutes. Once you lid fits width wise you will need to crosscut it to 8-31/32” long. Basically, cut it just short of 9” so it fits. As you fit this lid be sure you continually check it.

ADDING THE STRIPS
Remember those leftover strips? Rip those into ½” wide pieces then crosscut 4 of them to 2-1/4” long and 2 more to 4-1/2” long. You will glue the short pieces vertically 2” in from each end. I used Thick CA Glue and an Activator. That will make short work of installing the ones on the sides. Set the top in place and apply glue to the long cross pieces. Don’t use too much or you may glue the box shut. Line them up to the vertical pieces and let them dry.

FINISHING
The final step couldn’t be easier. Remove the taped in supports on the inside Then just wipe on the Boiled Linseed Oil, wait 3 to 5 minutes, and wipe it off.

DO NOT LEAVE YOUR Boiled Linseed Oil RAG IN A CRUMPLED WAD, IT MAY CATCH FIRE LAY IT OUT TO DRY
Congratulations your box is done!

Be sure you check out my video on this project [VIDEO LINK HERE]
Thanks for reading – until next time – Good making.
Bill
TOOLS YOU MAY NEED
GERBER KNIFE https://amzn.to/3CCJayZ
WOOD RIVER BLOCK PLANE https://amzn.to/34Ap4Jp
CARD SCRAPER https://amzn.to/3CHICIj
DOUBLE SIDED TAPE https://amzn.to/3CHICIj


