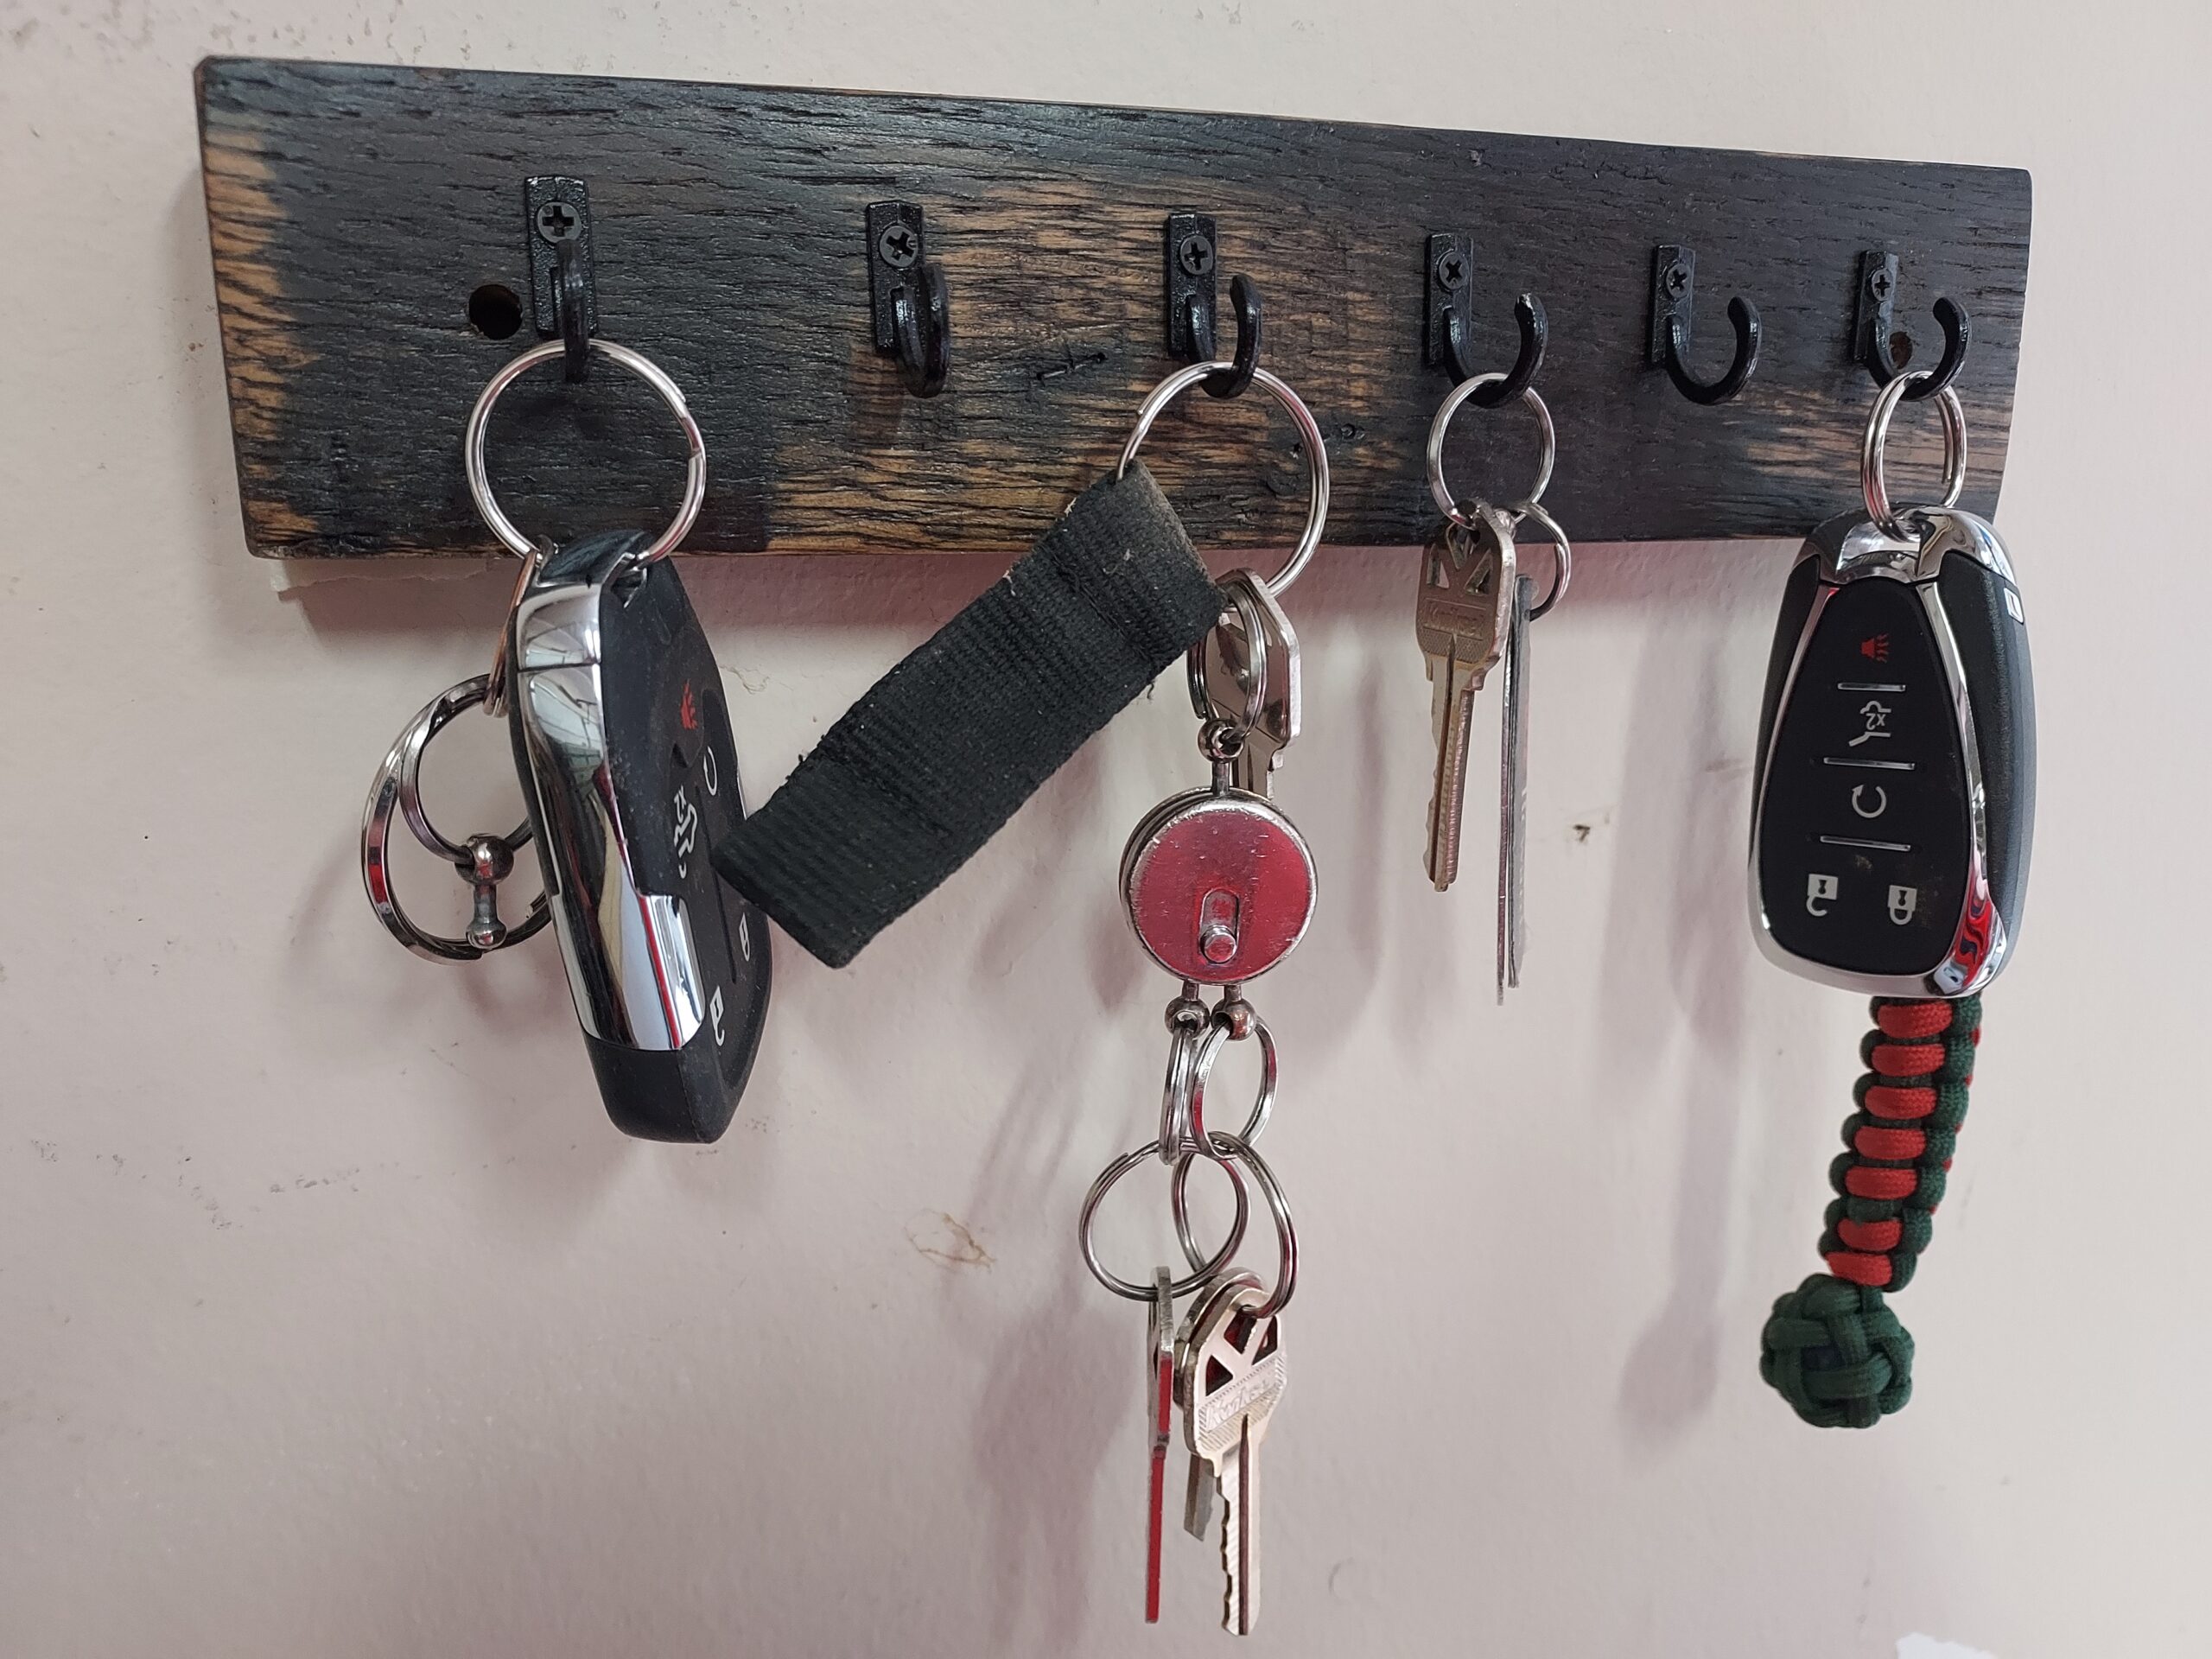
If you have followed my other posts about making things from whiskey barrel staves then you will appreciate this post. You probably have a few offcuts and scrap from those projects. So, Let’s Make a Barrel Stave Key Rack from Scrap. This is a really fast and easy project that uses minimal tools and you only need to buy the cup hooks. As always, tools and material links below. So let’s get started.
Tools & Materials
First, you will need a 10” piece of whiskey barrel stave that is about 1-1/2” to 2-1/2” wide. If you don’t have a stave, then check out Scull Creek Designs, Travis will send you one. Next you will need to pick up some cup hooks. Personally I hate the brass ones so, I used cast hooks that are e-coated.
Watch this video to see how to prep a barrel stave before you start working on it.
Cutting
Start by laying out your piece at 10” and cutting it off. BE CAREFUL – a barrel stave curves in three direction and crosscutting with power tools can be hazardous.
Layout
Next you will need to layout your mounting hole. Mine are 1” in from each edge along the centerline. Mark and use and Awl to punch a hole. The hole helps your brill bit stay centered. Following this work, mark you first hook location 1/4” to 1/2” in from the mounting holes. Then you will need to divide the remaining space for the last four hooks. The measurement for mine lead to a 1-7/16” spacing. Yours may be different depending on your measurements. Using a set of Dividers will speed your work. And be sure you punch each location with your Awl.


Drilling
Now that the lay out is complete you will need to drill pilot hole for the cup hooks. Barrel Staves are made of white oak and can be very tough, so a pilot hole is usually needed. I chose a 1/16” drill bit to fit the cup hook screws. Yours may be different depending on the hooks you use.

Sanding
Once you have your holes marked and drilled, give the barrel stave a light sanding with 220 grit sandpaper to knock off the dirt and grime. Give the edges a bit of a roundover too just to soften them.
Finishing
Next apply the finish of your choice. I used a Minwax DARK Walnut stain to give the wood and antique look. Once it was dry I applied two coats of Minwax Satin Polyurethane Varnish with a light sanding with 320 grit in between.

Assembly
Now comes final assembly. So, screw down your cup hooks. The ones I chose needed a #1 Philips Screwdriver and had to be hand driven. They were short so it really didn’t take very long. Be sure you straighten the hooks when you finish.

Congratulations
Will you work here is done. And you have a beautiful place to hang your keys that has a personal story behind it.

Thanks for reading and until next time Good Making!
Bill
Visit my Etsy Store at www.etsy.com/shop/30MinuteWoodshop
Facebook https://www.facebook.com/30MinuteWoodshop
Links to my Videos and Blogs
DIY Whiskey and Cigar Butler https://30minutewoodshop.com/?p=550
Farmhouse Key Rack https://youtu.be/I65FGq4dKYY
Create Your Own Lazy Susan https://30minutewoodshop.com/?p=491
Tools and Materials you may need
Barrel parts at Skull Creek Designs https://www.etsy.com/shop/SkullCreekDesigns
Crown Tools Scratch Awl https://amzn.to/41XNDZD
Tay Tool Yankee Spring Dividers https://amzn.to/3l7Jqli
BOSCH 1/16-Inch Drill Bit https://amzn.to/3KrLmNW


