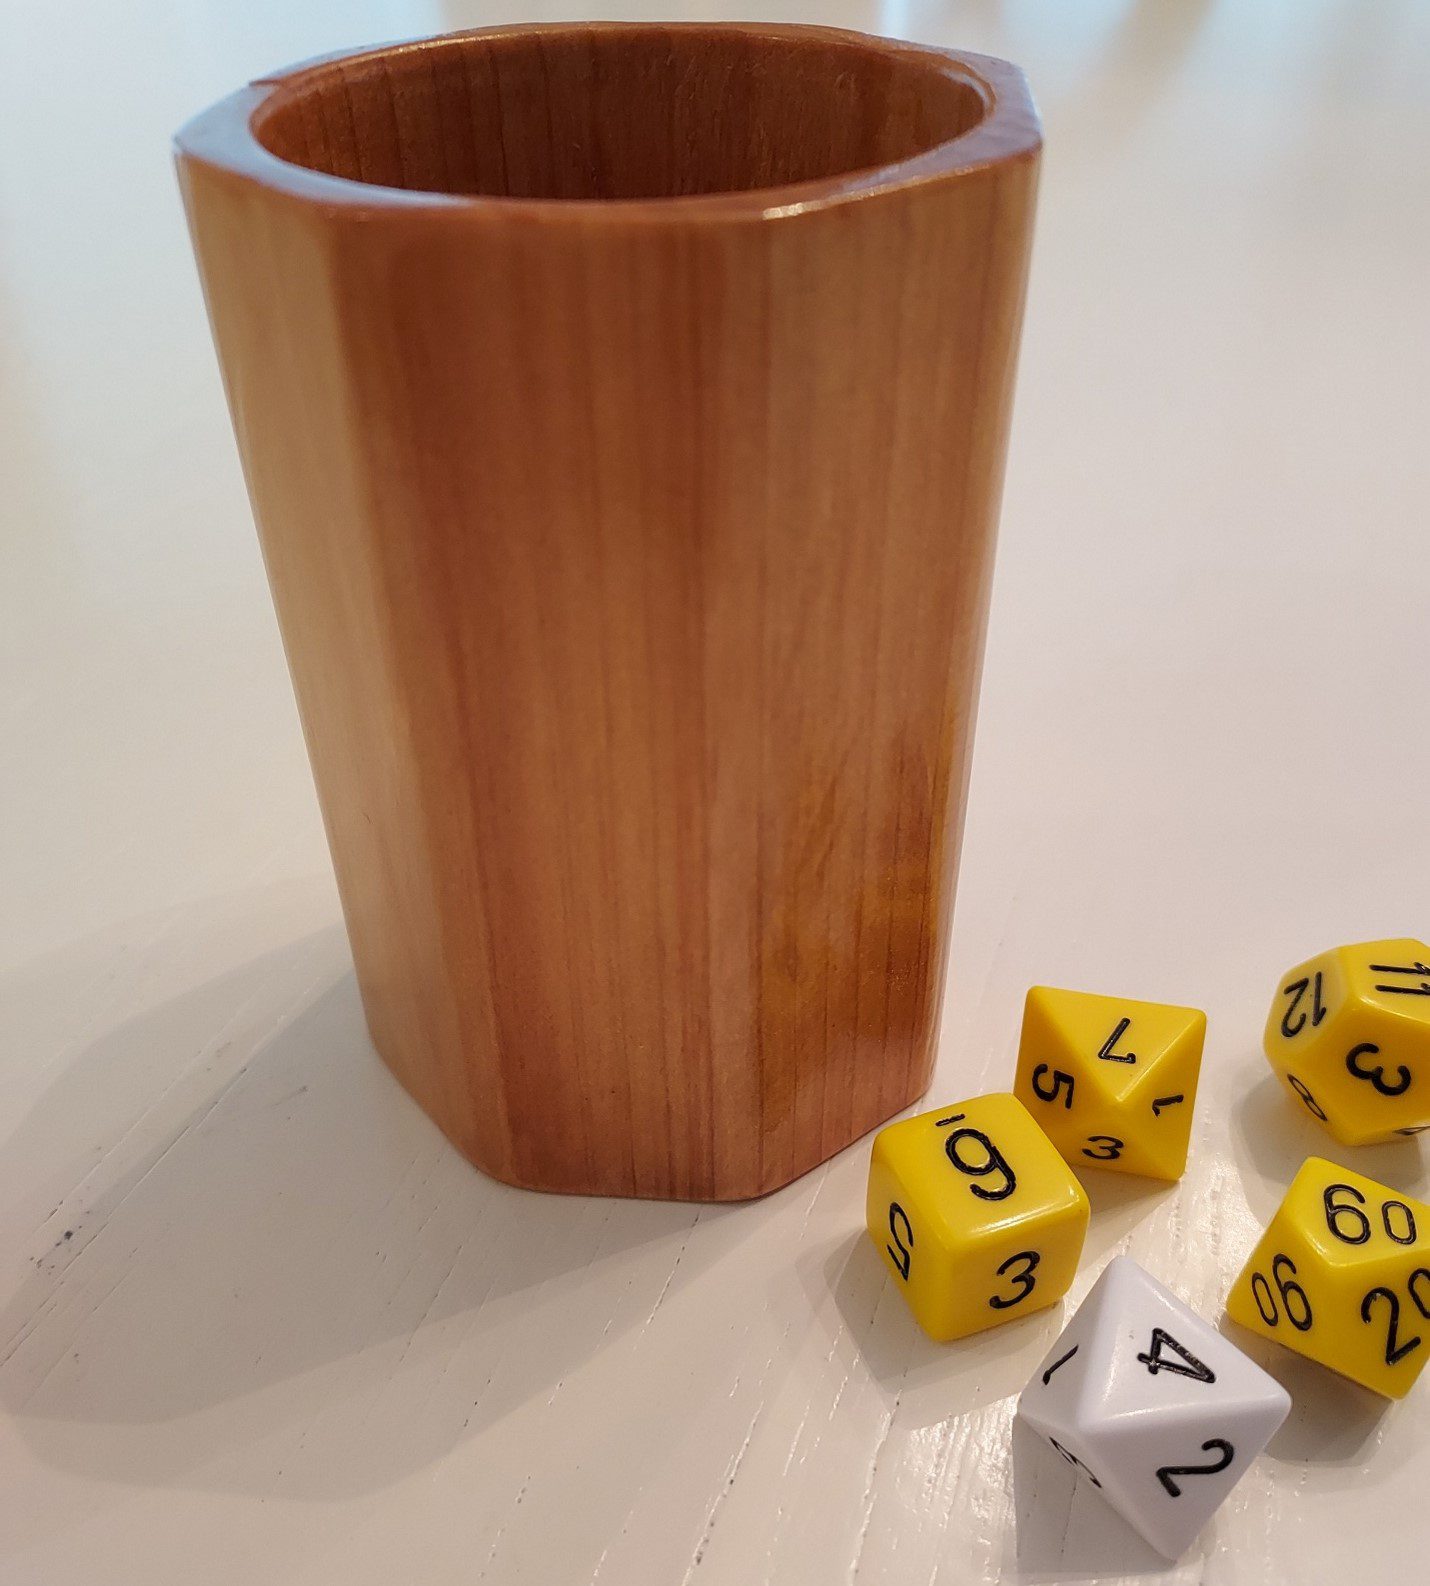

If you followed some of my other blogs and videos you will have seen me do several other tabletop gaming accessories. What follows here is how to turn a cedar 4×4 into a really nice dice cup. And you won’t need a lathe to do it. This dice cup is a great addition to the previous RPG game accessories I made too. There are links below two tools and materials as well as a dimensioned sketch.
Tools and Materials to Make the Dice Cup
As usual tools are very straightforward for this project. The first thing you will need is a way to cut a 4×4. I suggest compound miter saw as the best option. I used my table saw which works also. Next you’ll need a 2-1/8 inch Forstner bit, or a 55 millimeter Forstner bit will work too. Additionally, a small block plane will come in handy to knock the corners off. Additionally, you will need a Center Finder to mark the center, a Birdcage Awl, and a Combination Square to mark the 45’s. As far as materials you need a piece of 4×4 western red cedar. You can of course choose alternate types of wood such as Oak, Walnut, or Maple. If you choose one of those, however, you may have to glue up a couple of pieces to get the correct thickness.


Sizing the material
The first thing to do is to cut off a piece of the western red cedar 4×4 to 3-3/4 inch long. Because these are so easy to make you may want to cut off two or three extra sections and make several dice cups.

Layout
The next step is to find the center of the 4×4. Normally you can just strike a line from corner to corner. The 4x4s however have rounded edges so it’s very difficult to be accurate. Instead, I used a Center Finder to mark the center then used a Birdcage Awl to put a small divot at the center. This is for the point of the Forstner Bit. Using a Compass, strike the 2-1/8” circle then strike a 2-1/2” outer circle. This will establish a 3/16” wall thickness. Now using your Combination Square, mark the 45s so they just touch the outer circle. Next mark the 90s so they also just touched the outer circle. This establishes all of your cut lines.


Drilling
With the layout done we are ready to drill put a 2-1/8 inch Forstner bit, or a 55 millimeter Forstner bit in your drill and secure your piece in a vise or on the drill press table. Now you can begin drilling. Drill to a depth of three inches. Be sure to clear the chips often.

Cutting
The next step is to cut the corners off and make the octagon. Set your saw blade to 45 degrees and use the cut lines to set your fence distance so that the teeth cut on the line. Begin your cut with a smooth motion and consistent pressure. Do not force the wood into the blade. With one corner cut off continue to cut the other seven. Make sure that you check where the blade hits on the cut line before each cut.
NOTE: be very careful! Do not force the wood into the saw blade. It should cut smoothly. If you force it you may get kickback.

Corner Planing
Sweet! All eight sides of your dice cup are cut. Now take your block plane and round all 8 sharp corners by planing each three or four times. By the way if you do want a round cup you can keep planing until you’ve reached the line.

Sanding the Dice Cup
The next step is to sand all the corners, sides, top, add bottom. Start with 220 grit sandpaper and round off the planed corners and sand off all the plane marks. Then switch to 320 grit sandpaper and give everything a thorough sanding. You want it to be smooth and silky to the touch.

Finishing
The last step is to apply a finish to your dice cup. I like to use a Minwax polyurethane or their spray lacquer. In either case you will need to put on two or three coats because the red cedar will absorb much of the initial finish. Be sure to sand in between coats with 320 grit sandpaper. You’re looking for a smooth silky finish because this is a piece that will be handled frequently. I used a Miniwax polyurethane because it builds a film on the piece that will provide a bit more protection because it will be handled a lot.

Congratulations
Wahoo – you are done!! I hope you got something out of this and we’ll give this project a try it’s really simple and easy to do doesn’t require too many tools and you can make it in a very short time as a matter of fact if you’re going to make one you should make two or three. They are just that easy to make.

If you do make this project, congratulations on a job well done. And do me a favor and post it on my Facebook page (see link below).
Hope you got something out of this and if you did, do me a favor, hit like and subscribe. I’d appreciate that a lot.
Thanks for reading and until next time Good Making!
Bill
Visit my Etsy Store at www.etsy.com/shop/30MinuteWoodshop
Facebook https://www.facebook.com/30MinuteWoodshop
Links to my Videos and Blogs
Create Your Own Dice Vault https://30minutewoodshop.com/?p=1226
DIY Whiskey and Cigar Butler https://30minutewoodshop.com/?p=550
Farmhouse Key Rack https://youtu.be/I65FGq4dKYY
Create Your Own Lazy Susan https://30minutewoodshop.com/?p=491
Tools and Materials you may need
DEWALT Drill and Driver Combo https://amzn.to/42yybmy
DEWALT Router Plunge Base Kit https://amzn.to/3LKkJEK
Ridgid Oscillating Belt Sander https://amzn.to/45C3rTK
Starrett Cobination Square https://amzn.to/3XpbrDN
WoodRiver Low Angle Block Plane https://amzn.to/3pkNvos
Center Finder Line Gauge https://amzn.to/3phRhPm
Freud 2-1/8″ Forstner Bit https://amzn.to/42VfYPh
https://amzn.to/3Nma9VC https://amzn.to/3Nma9VC
Milwaukee M18 Jig Saw Kit https://amzn.to/3FAWXsS
BOSCH Compound Miter Saw https://amzn.to/421A1vl
Minwax Fast Drying Polyurethane https://amzn.to/3V5h0pO
PPE Gear
3M N95 PPE Mask https://amzn.to/3x4NGEu
ISOtunes Bluetooth Earmuffs https://amzn.to/3lpj1iA


