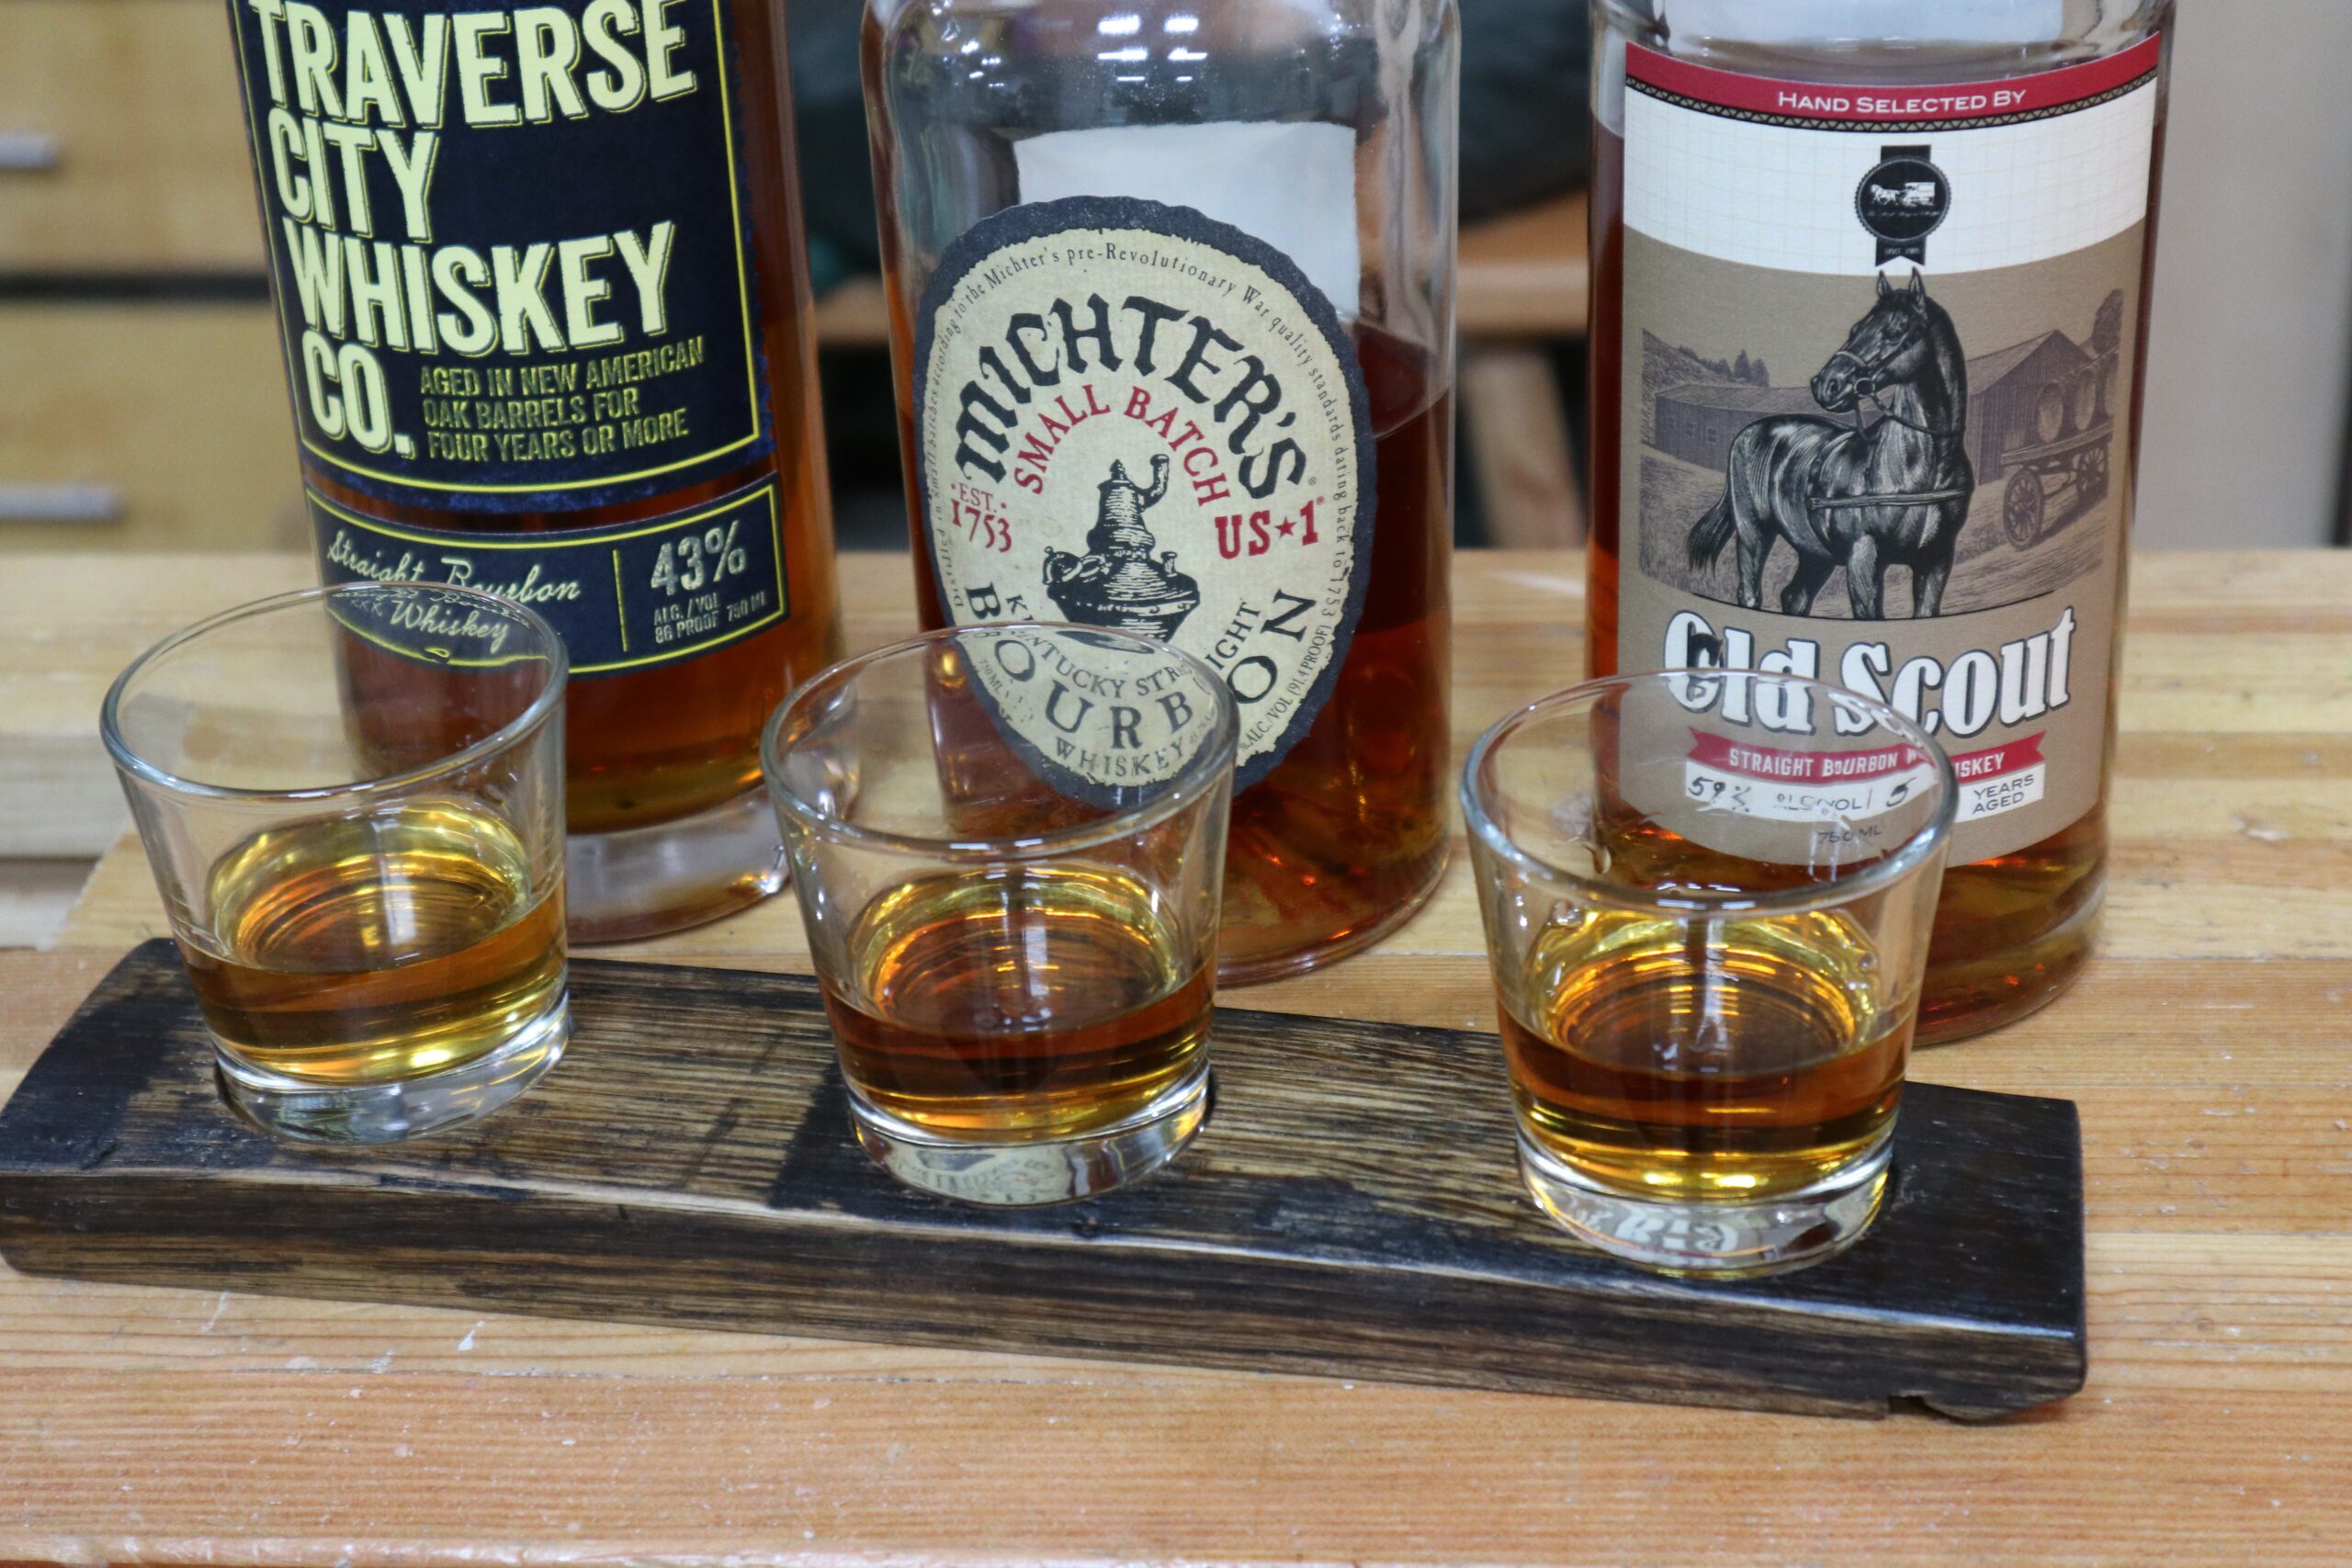
If you follow any of my other blogs or videos, you’ll know I’m a whiskey drinker. What I thought I’d do today is make a whiskey flight board from a barrel stave. This really is a fast and easy project that requires no special tools or materials and will impress the heck out of your friends.
This project started because I picked up these really nice 3.5-ounce whiskey glasses which are fairly inexpensive. And though small, they are large enough for ice and whiskey. But 3oz of whiskey is a lot, even with ice, so I am planning on a three-glass flight. You can, of course, add a bit more length and a fourth or fifth glass. Regardless please drink responsibly, folks.
Tools and Materials
Materials are straight forward. We are going to use a whiskey barrel stave as the base for the whiskey flight board. You will need a barrel stave that is 2-1/2 inch or wider. Mine are 2-1/2″ and come from Skull Creek Designs in Midland Michigan. By the way, once you receive your barrel stave(s) be sure you wire brush off all the char and seal the inside surface. This will keep you shop and hands cleans while you work. See my DIY Whiskey and Cigar Butler blog and video for details. And you will, of course, need several whiskey glasses. If you are buying different glasses, don’t start the project until you have the glassware because the size will define the countersink diameter. I chose 3.5oz tapered glasses because I thought the 1.5oz and 2oz glasses were just too small to comfortably handle a decent whiskey sample with ice. If you choose these glasses, you will need a 2 inch Forstner bit. Links in the bottom for the materials and some of the tools I use.

Layout
Do a quick layout with 1 inch in from the ends then 2” for the glass base and 1-3/4” between glasses. This spacing will give you enough room to stick your fingers between the glasses and not knock something over. Based on the 2-inch glasses and going with three glasses, cut the barrel stave off at 11-1/2 inches.

Cutting to Length
The first task is to crosscut the barrel stave into three 11-1/2 inch pieces. I used my Radial Arm Saw but you can use a handsaw or compound miter saw. Cross cutting these barrel staves, you’ll notice how much curvature there is in the Z and the and the Y axis. That makes it a little tougher to cut them safely. And whatever you do, make sure that you have safety in mind. Either way be sure you properly support the barrel stave as you cut it to prevent accidents.

Flattening the Bottom
The next step is to flatten the bottom. The easiest for me was to use my 6” Jointer. You can easily use a Taytool #5 handplane to flatten a 1” spot on each end on the bottom. You want to plane off enough material so that the piece doesn’t rock when you press down on any of the corners.
Example: if you push on the left lower corner and it rocks, then remove material from the left upper corner.

Drilling the Countersinks
The next thing you need to do is layout the countersinks. These are the depressions that the glasses sit in. As the staves are tapered you will need find the center across the width by measuring at both ends and dividing each by two. Measure and mark those centers then strike a center line along the length. Then measure 2 inches inward from each end and mark. These are your outside countersinks. Next find your center point (half of 11-1/2” or 5-3/4”) which is for you middle countersink.
Now, drill a counter sink for each glass. You will need a 2-inch Forstner bit (or one sized to the glass of your choice). You can do this with a hand drill but I used my drill press because I want to guarantee that they are perpendicular to the world, not square to the surface. I don’t really want to see my glasses leaning when I’m drinking, if you know what I mean.
As the stave is curved, drill down to about 3/16 inch on the low side. This is deep enough to capture the glass and keep it from sliding around.

Sanding
Next, take 60 grit sandpaper and give the top and sides a light sanding just to knock off the dirt. You should have already knocked off the char and sealed the bottom before you started the project. If not, check our my DIY Whiskey and Cigar Butler blog and video for directions. Once you have it sanded out with 60 grit, go to 220 grit and sand everything lightly. Be sure to round over the edges to give it a smooth feel. Sand lightly, you do not want to knock off all the patina.

Finishing
Now we can move on to finishing. First, we will hit it with a stain to even out the freshly sanded areas and the aged barrel patina. I chose a Minwax Dark Walnut. I like it because it brings the piece to a darker look so it gives it a more even color and an older antique look. Wipe it on then rub off the excess. I usually allow 24 hours for it to fully dry.
Once it is dry, I wipe on 3 coats of Minwax Polyurethane, sanding with 320 grit sandpaper between each coat. Then I apply a final coat of Minwax paste wax.
All of that makes it silky smooth.

Wrap up
Well, you are done with your whiskey flight board. Just drop your glasses in, invite your friends over and fill them up (Ok don’t actually FILL them).

This Whiskey Flight Board is really fast and easy, and you can impress your drinking buddies with your awesome woodworking skills. I hope you got something out of this and if you did, do me a favor, hit like and subscribe. I’d appreciate that a lot.
If you do make this project post it in my my Facebook page. I’d love to see your work.
Thanks for reading and until next time Good Making!
Bill
Visit my Etsy Store at www.etsy.com/shop/30MinuteWoodshop
Facebook https://www.facebook.com/30MinuteWoodshop
Links to my Videos and Blogs
DIY Barrel Stave Whiskey Flight Video https://youtu.be/d7y8dZXyHWU
DIY Whiskey and Cigar Butler https://30minutewoodshop.com/?p=550
Farmhouse Key Rack https://youtu.be/I65FGq4dKYY
Create Your Own Lazy Susan https://30minutewoodshop.com/?p=491
Tools and Materials you may need
Barrel parts at Skull Creek Designs https://www.etsy.com/shop/SkullCreekDesigns
3.5 Ounce Shot Glasses https://amzn.to/3AAiFdi
Freud 2″ Forstner Bit https://amzn.to/41DVHy8
Milwaukee M18 Jig Saw Kit https://amzn.to/3FAWXsS
BOSCH Compound Miter Saw https://amzn.to/421A1vl
PORTER-CABLE Random Orbit Sander https://amzn.to/3YdqIXL
Minwax Fast Drying Polyurethane https://amzn.to/3V5h0pO
Taytools #5 Jack Plane https://amzn.to/3LGle4h
Minwax Dark Walnut Stain https://amzn.to/3L6R8VP
Minwax Finishing Wax https://amzn.to/3Hfndtq


