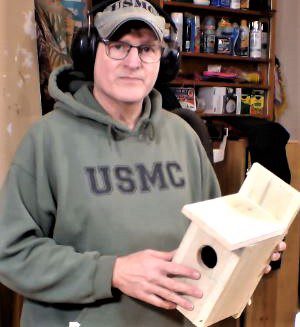
It’s Spring and birds are getting ready to nest. Here is a very inexpensive ($2.50) Bird Nest House. I made these with my grandfather many years ago. You need minimum tools and only need a single fence board. This is a great project to involve your kid, grandkids, nieces or nephews, and is the perfect opportunity to teach them about birds, conservation, and wildlife management. Check out the links below.
And follow this link to my Video to see how it is done. VIDEO LINK
Tools
You only need a saw, a square and pencil, a hammer, a drill motor, a forstner bit, a tape measure, and possibly a plane. You may want a pneumatic nailer and a tablesaw. Check the links below if you do.

Materials
Again, you only need minimal materials – one 6’ fences board, 18 4p finish nails, and waterproof glue or construction adhesive.
Layout
Start by laying out the font, left side and right side. These are each 9” long. When laying the measurements out be sure you add in the thickness of your saw blade. Then mark the back at 13-1/2” Root at 8-1/4”, and the floor at 4”

Cutting
Cut these with your handsaw, tablesaw, chopsaw or Radial Arm Saw. I use a Radial Arm Saw.
On completion you should have the following pieces:
Back 13-1/2” x 5-1/2” x 5/8”
2 Sides 9” x 5-1/2” x 5/8”
Front 9” x 5-1/2” x 5/8”
Roof 8-1/4” x 5-1/2” x 5/8”
1 Floor 4” x 5-1/2” x 5/8”
Assembly
Let’s get to building with the basic plan. I don’t know the source anymore it is a photocopy of a photocopy.
First, you will need to drill four ¼” drain holes in the floor and 2 breather holes near the top on each side.

You will start assembly by gluing and nailing the floor to the back. Position it about 1”up from the bottom and centered on the back. Be liberal with the glue or adhesive – it’s an outdoor project.
Next, glue and nail the left side and then the roof in place. Be sure that they are square.

You need now to decide on the entry hole. You have several choices. (see above) I chose to make a single 2-3/4” hole because that is what we used to make long ago. Once you have the hole in, glue and nail in the front.
Fitting the door
Now you are ready to fit the right-side in. You will need to shave off about 1/32” to as much as 1/16” to get it to a sung fit. I suggest using a handplane. Here I am using a Bailey #7 Jointer Plane which is over century old.

Once you have a sung fit set it in place with a 1/16” gap at the top (to allow clearance to swing) and drive a 4p nail into the front and back about 1” below the top of the side. The side should now flip out.
Next drill a 1/8” hole 1” deep in the front about 1” up from the bottom Yes, it will go through the front in a bit into the side. This is your closing “latch: Nail in a 4p finish nail and leave at least ¼” exposed so you can pull it out later to open the side.

Wahoo – you are done!! No finish needed

A conservation note – PLEASE do not nail or screw this bird house to a living tree. This damages the tree and it creates problems for future urban foresters trying to sustainably recover and harvest urban trees. Instead nail it to a wood fence, a barn or garage, or install a post and nail it to that. As a kid I nailed them to fence posts.
Use this project to teach the kids about woodworking, and wildlife.
Thanks for reading and until next time Good Making!
Bill
Link to my Rustic Bird House Video
Check out my previous blog on how to make a Quick and Easy Cargo Crate Pencil Box
Tools you may need
Bostitch dual Nailer and Compressor Combo https://amzn.to/3MKSp53
Tay Tool #5-1/2 Bench Plane https://amzn.to/3MNRHUs
Porter Cable 14 piece Forstner Bit set https://amzn.to/3MNRHUs
Wildlife links
All about Birds https://www.allaboutbirds.org/news/the-basics-how-why-and-where-of-bird-migration/
Audubon Society https://www.audubon.org/
National Wildlife Federation https://www.nwf.org/Kids-and-Family/Connecting-Kids-and-Nature
U.S. Fish and Wildlife Service https://www.fws.gov/


