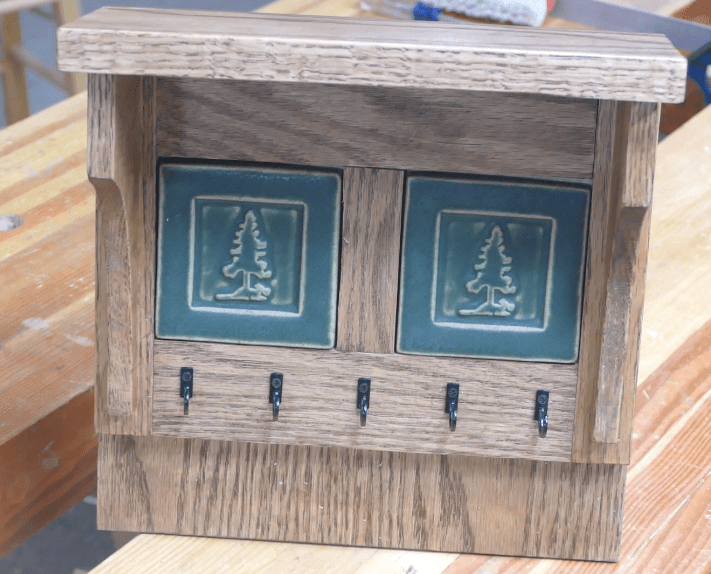
Here’s a really fun and easy project that looks really good hanging on the wall. It is an Arts and Crafts Keyholder that features tiles from Pewabic Pottery in Detroit. Pewabic pottery was founded in 1903 and is one of the oldest continually operating Potteries in the country. I would encourage you to go ahead and follow the link and check out these folks because they do some awesome work. And these are perfect for this DIY Arts and Crafts key holder.
And follow this link to my Video to see how it is done.
Tools and Materials
This project doesn’t use much in the way of special tools you could do it all with a hand saw a coping saw and some sandpaper. I use a table saw, a bandsaw, and a few other tools. But the first thing you’ll need is materials. Usually for arts and crafts white oak is the choice. But red oak works just as well and is much cheaper plus you can find it at the big box store. So I would suggest to start with gathering some material that is both quarter inch thick and half inch thick and you may need to glue up the quarter inch thick back panel.

Layout
There are several pieces to this project, but the layout is very easy. Start with sizing the back and then move on to cross cutting and sizing the rails and styles.


The trickiest part of the layout is doing the curve for the brackets. For this you’ll use a French curve which makes the job really easy.

Cutting
Basically for the parts you’re going to want to size the back then cross cut the rails and styles to size, and finally cut the brackets to the correct length.

That should lead to go ahead and cut the bracket curves and you can use either a band saw or a coping saw.

Sanding
Standing for this project comes in two forms. The 1st is shaping the curves so that they match this is fairly easy to do with either a file or an Oscillating Belt Sander. Both will make short work of it they’ll have to say the belt Sander is much faster.

With your bracket curve fared you’re ready to move on to surface sanding. Be sure you send all parts before assembly and take your 220 grid to all the sharp edges. You want to make sure they’re all broken for two reasons one is touch and the other reason is to help the finish it here properly.

Assembly
at this point assembly is super easy you’re going to just glue and pin all the parts to the back panel. I used a waterproof glue, Titebond 3 And 18 gauge 5/8 inch air nails. You can do all this with a few three quarter inch brads and a hammer also.

Finishing
For finishing this project I chose to use a dark walnut stained by mid wax as my base. I wanted to get an antique look to the project which this worked really well to achieve. I overcoated that with three coats of Varathane satin varnish. The pairing of these two really made the project look like an antique.

this was a really easy project and it looks really good on the wall. I hope you take the time to make one of these and if you do post it to my Facebook page because I’d really love to see it.

Hope you got something out of this and if you did, do me a favor, hit like and subscribe. I’d appreciate that a lot.
Thanks for reading and until next time Good Making!
Bill
Visit my Etsy Store at www.etsy.com/shop/30MinuteWoodshop
Facebook https://www.facebook.com/30MinuteWoodshop
Links to my Videos and Blogs
Create Your Own Dice Vault https://30minutewoodshop.com/?p=1226
DIY Whiskey and Cigar Butler https://30minutewoodshop.com/?p=550
Farmhouse Key Rack https://youtu.be/I65FGq4dKYY
Create Your Own Lazy Susan https://30minutewoodshop.com/?p=491
Tools and Materials you may need
DEWALT Drill and Driver Combo https://amzn.to/42yybmy
DEWALT Router Plunge Base Kit https://amzn.to/3LKkJEK
Ridgid Oscillating Belt Sander https://amzn.to/45C3rTK
Starrett Combination Square https://amzn.to/3XpbrDN
WoodRiver Low Angle Block Plane https://amzn.to/3pkNvos
Milwaukee M18 Jig Saw Kit https://amzn.to/3FAWXsS
BOSCH Compound Miter Saw https://amzn.to/421A1vl
Minwax Fast Drying Polyurethane https://amzn.to/3V5h0pO
PPE Gear


James W McPherson
Very nice idea and video!