
Here’s an easy to build bathroom towel rack to store your towels and still keep them fresh. Everyone needs someplace to store towels and linens. And, it’s great for your Home Gym or Pool too! This project will take longer than 30 minutes but it’s well worth extra time if you have the space to create one. The design offers easy access, and the open slats of this towel shelf ensure that air can move around the towels and linens to keep them fresh.
And follow the link to my Video to see how it is done.
Tools and Materials
Tools you need to make the bathroom towel rack are very straightforward. You can do this entire project with a hand saw, a hammer, block plane, and a few clamps. Doing so will take you a fair amount of time however. Mostly because you have to rip the strips. To make this job go easier and faster I recommend a compound miter saw, a table saw, and a router which will cut the time dramatically. Additionally, you’ll need an air nailer, tape measure, a combination square, and some clamps.

The materials you will need to build the bathroom towel rack are approximately 17 board feet of the wood of your choice. Really, you’re going to need four 1×8’s that are 6 feet long from your local lumberyard or big box store. You can choose any species of wood do you like, Pine, Oak, Maple, Poplar, or Aspen. I chose Aspen for this project because where I’m at it happened to be cheaper than Poplar. Beyond the wood you’ll need some waterproof glue like Titebond III, some type of finish, and I suggest 1-1/4 inch and 1-1/2 inch nails.

Layout
Layout for this towel rack project is not complicated. The easiest way is to set is to set up a stopblock on your compound miter saw or Radial Arm Saw (RAS). Follow the parts list in the sketch below to make sure you mark everything to the correct dimensions.

Cutting
Cutting is the longest process in this project. You’ll end up with something around 40 parts out of your four 1×8’s. Start by cutting to length the leg pieces. And next you want to cut to length the shelf pieces. Finally, you’ll cut to length the supports. Next, you’re going to want to rip everything to the correct width. This is where it will take some time because you are cutting a lot of parts. Be sure to cut and stack the parts so you know what goes where later on. I did take my shelf supports over to the bandsaw and cut a radius on the end of each one. This just prevents the linens and towels from hanging up on a sharp edge as you slide them onto the shelf as well as all four sides of the legs. .

Routing
Now that you have all your towel rack parts cut you’ll need to round over the edges. Rounding the edges prevents the towels and linens from catching on them as you place them on the shelves or remove them. You could do this with sandpaper, a block plane, or a router. The router was my choice for this operation because it’s much much faster and much more consistent. I suggest 1/4 inch radius bit to make sure the towels and linens don’t catch. You will need to run through all of your shelving slats and be sure to do the bottom edge of each of the shelf supports.

Sanding
If you bought S4S wood, that is, finished on all four sides, you shouldn’t have much sanding to do. Just sand it with 220 grit it you will be good if you’re going to paint. If you plan on using varnish or a much thinner finish like boiled linseed oil you probably want to go to 320 grit. I actually started with 150 grit because the Aspen that I bought was fairly rough. Then I went to 220 grit because this project will be painted.

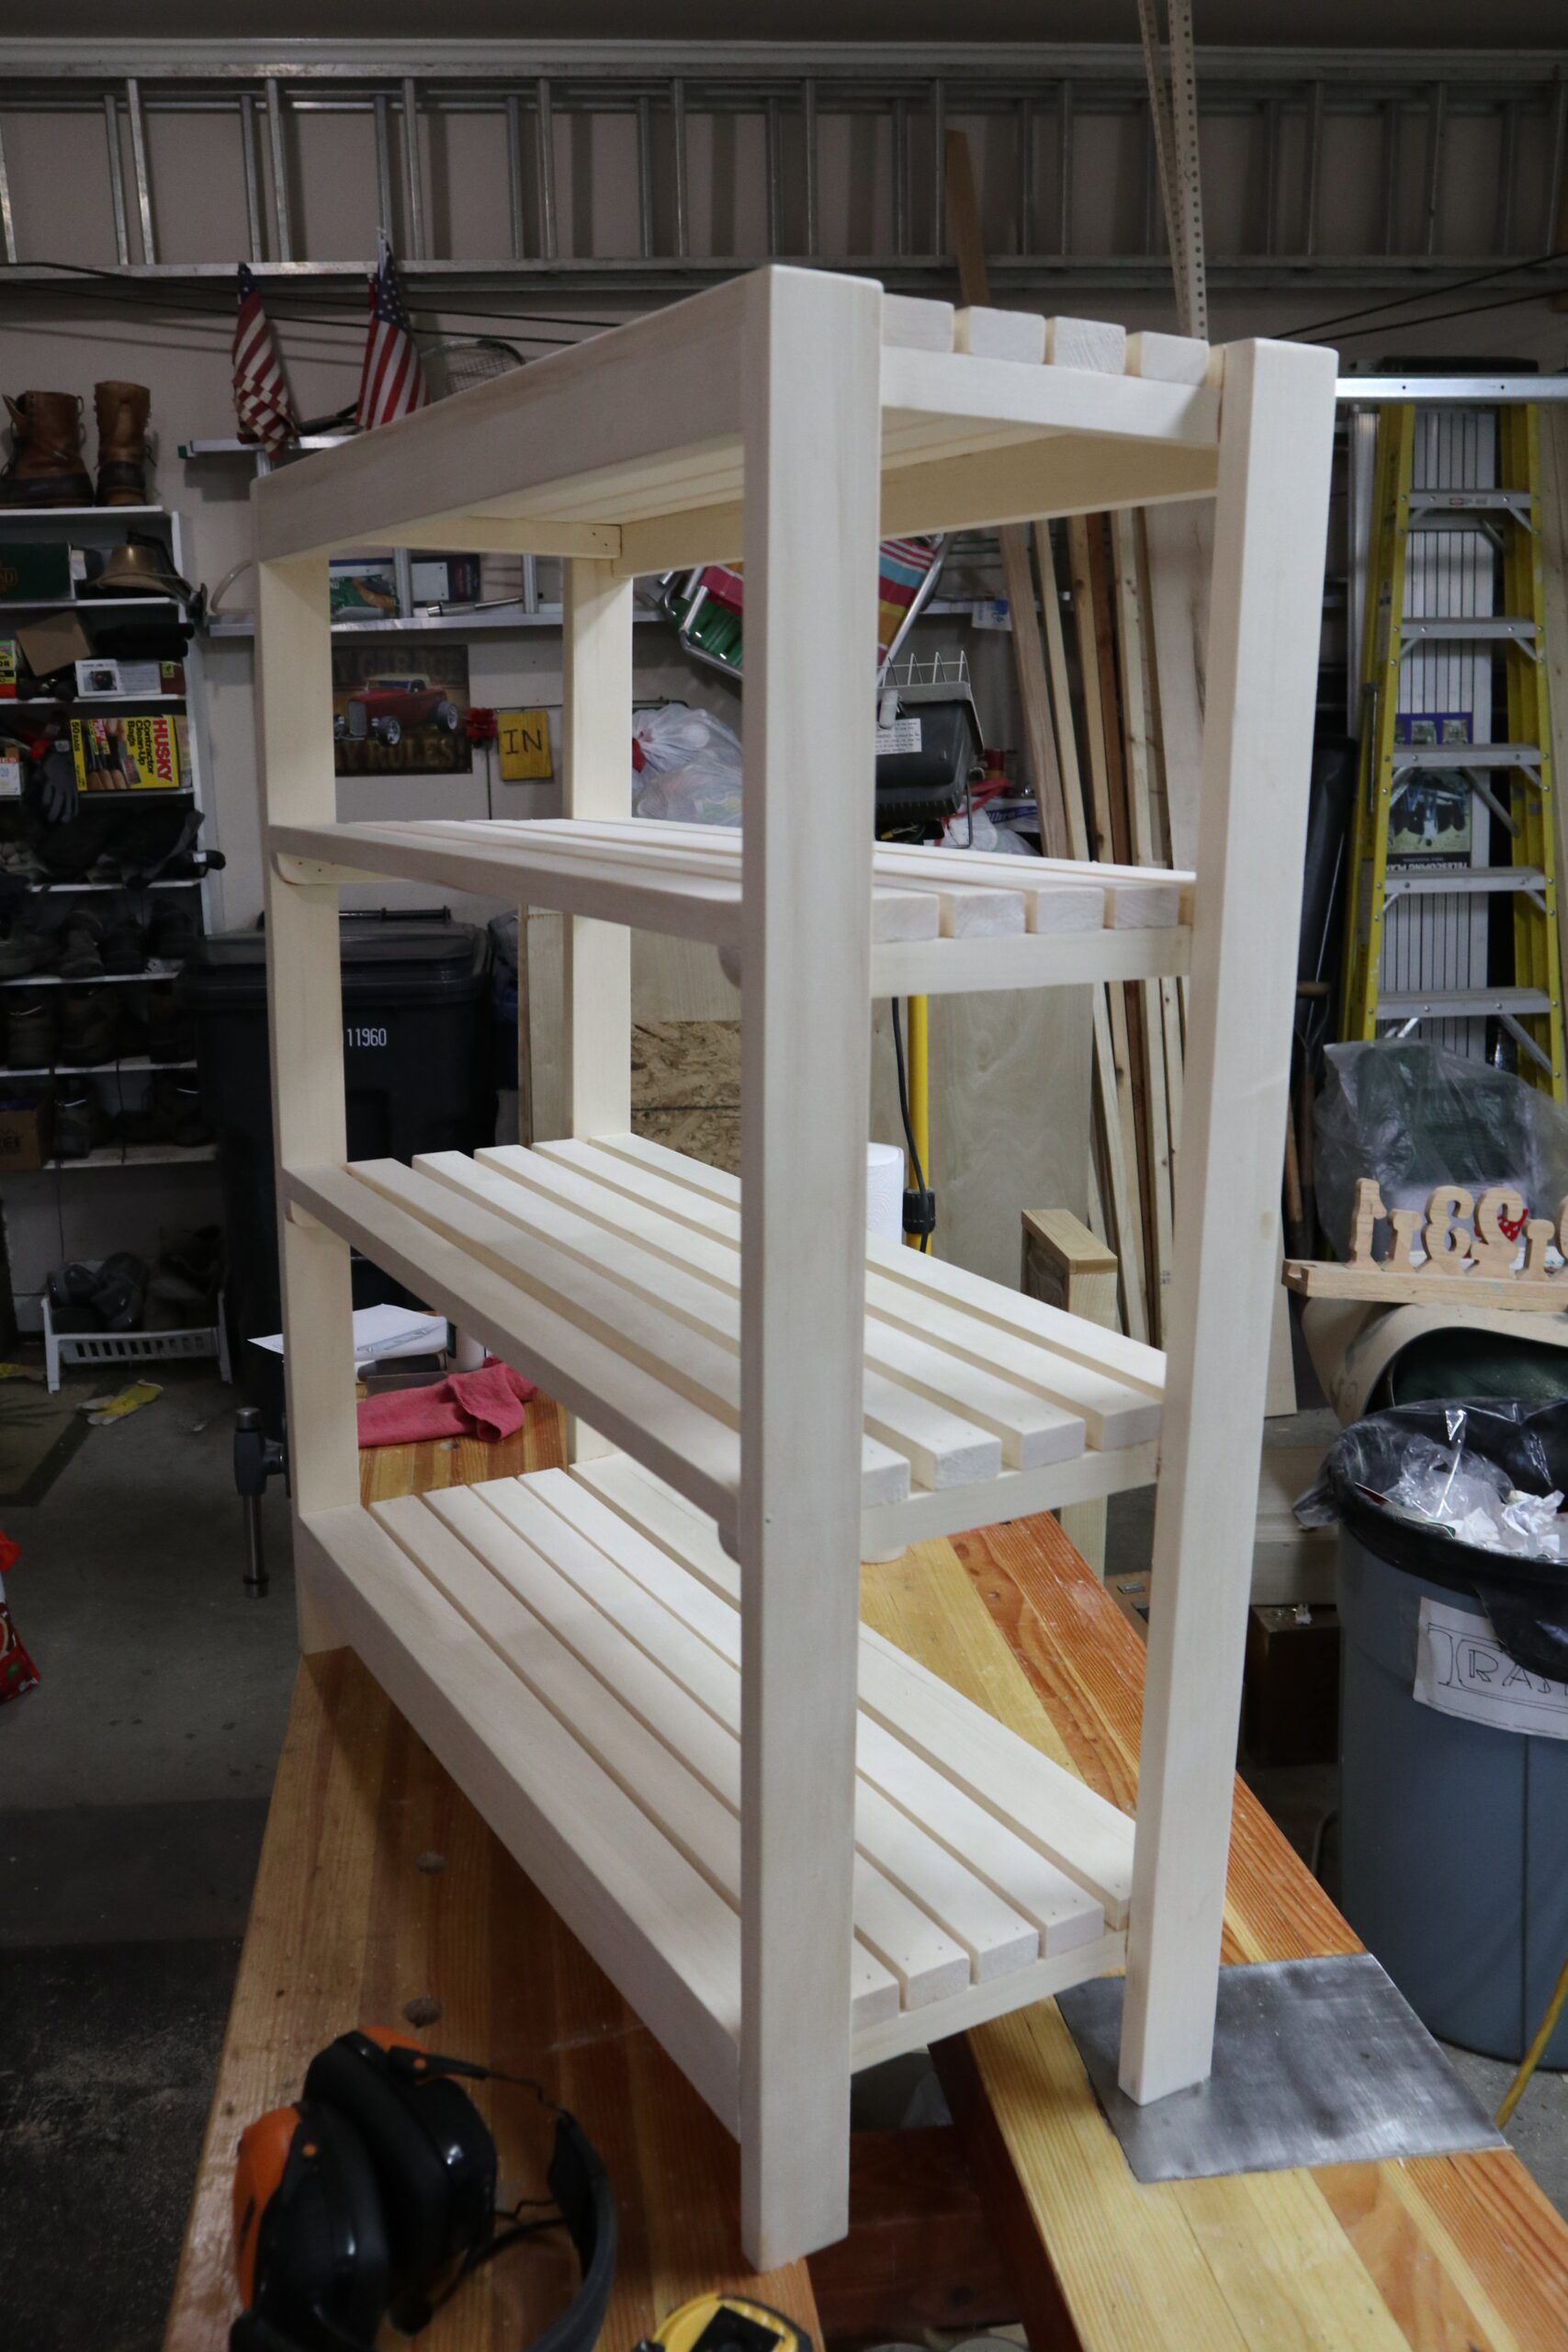
Assembling the Shelves
Assembly for the bathroom towel shelf is pretty straightforward. If you watch my video you’ll see I put the sides together and then what about attaching the shelf slats. However I don’t recommend that. It would be much easier to assemble each of the shelves and then put the legs on afterward. I probably could have cut 30 to 40% of the assembly time out of the project. But, live and learn. To start the assembly process you’ll need to glue up the front and back edges for both the top and bottom shelf. These form a “L” which provides strength and stability to the entire shelf. The “L” on the bottom is in the event someone puts their foot on it it provides extra support. The “L” on top provides extra support if someone leans on the shelf.
Begin by assembling the shelves. Apply glue to all the contact points and nail each shelf slat into position on the support. Be sure that the shelf assembly is square (very important) and all the slats are flush with the edge of the support. When you’re finished you should have a completed shelf with everything square and flushed on the ends and the edges. If it is not flush you may need to sand it flush. Repeat the process for all shelves.
Now that you have all the shelves created all you have to do is glue and nail on the legs. Again apply glue to the contact points on the shelf legs. I recommend you turn the top shelf upside down and glue and nail the legs. Then turn it on its side and install the remaining shelves with glue and nails. Use the 1-1/2″ nails here to give them a good grip.
Assembling the Legs
Now that you have all the shelves created all you have to do is glue and nail on the legs. Again apply glue to the contact points on the shelf legs. I recommend you turn the top shelf upside down and glue and nail the legs. Then turn it on its side and install the remaining shelves with glue and nails. Use 1-1/4″ nails and nail from the inside so the nail holes won’t be seen. The pictures below show you how I did it.

Finishing
My version of this bathroom towel shelf did not get any finish. It’s going to my daughter, and she will do all that work herself. If you’ve made this out of pine Poplar or Aspen I’d suggest you paint it in whatever color to match your bathroom decor. I also suggest that you use a gloss paint which will make it easier to clean and make the towels and linens slide on and out much easier. If you made it out of oak Maple or some other wood, you probably want to use a really good spar varnish. Spar varnish will stand up much better do the humidity in your bathroom. While you’re applying you’re finished be sure to look for and wipe up any drips painting between the slats is not an easy job.
Wrap up
The bathroom towel shelf project is complete. I have delivered this to my daughter and she’ll be applying her own finish to match your bathroom. I’m looking forward to seeing this project in use next time my goal over there.

If you do make this project, congratulations on a job well done. And do me a favor and post it on my Facebook page (see link below).
Hope you got something out of this and if you did, do me a favor, hit like and subscribe. I’d appreciate that a lot.
Thanks for reading and until next time Good Making!
Bill
Visit my Etsy Store at www.etsy.com/shop/30MinuteWoodshop
Facebook https://www.facebook.com/30MinuteWoodshop
Links to my Videos and Blogs
Create Your Own Dice Vault https://30minutewoodshop.com/?p=1226
DIY Whiskey and Cigar Butler https://30minutewoodshop.com/?p=550
Farmhouse Key Rack https://youtu.be/I65FGq4dKYY
Create Your Own Lazy Susan https://30minutewoodshop.com/?p=491
Tools and Materials you may need
Titebond III Wood Glue https://amzn.to/3pzOm4G
26” Western Crosscut Saw https://amzn.to/3O0ukts
Warrington Hammer https://amzn.to/3QcTCGl
Compressor Combo Kit w/ 3 Nailers https://amzn.to/3rkvlE8
DEWALT Router Plunge Base Kit https://amzn.to/3LKkJEK
Starrett Cobination Square https://amzn.to/3XpbrDN
WoodRiver Low Angle Block Plane https://amzn.to/3pkNvos
Milwaukee M18 Jig Saw Kit https://amzn.to/3FAWXsS
BOSCH Compound Miter Saw https://amzn.to/421A1vl
Minwax Fast Drying Polyurethane https://amzn.to/3V5h0pO
PPE Gear
3M N95 PPE Mask https://amzn.to/3x4NGEu
ISOtunes Bluetooth Earmuffs https://amzn.to/3lpj1iA
*affiliate links