
Here is a great project for any beginner. You only need a few tools to actually make this work and it’s an excellent project if you drink wine and have that special bottle of wine you want to display. It’s also great for parties and particularly for weddings. You could make several of these and put them on the tables as gifts for the attendees. By the way these also make great corporate gifts too.
Tools and Materials
So materials are pretty straightforward you really only need a piece of half inch thick hardwood that’s about four feet long in 5 1/2 inches wide. Personally I suggest you use Maple for this or possibly Cherry. Either of those will look really really good on the table. And the light color of the Maple will complement a dark wide and the dark color of the Cherry will complement a white wine.

I used western red cedar because the ones I’m making are going for a rustic evening. As far as tools you could do it all with hand tools like always but I suggest power tools. Specifically the table saw, a sliding miter saw, a router, and an orbital Sander. You also need a 1/8 inch round over bit and some 220 grit sandpaper as well as glue.

Layout

Cutting
Your first step is going to be mark and crosscut all your pieces.

Milling to Thickness
Because I wanted half inch material I had to mill the western red cedar down from 5/8 inch to 1/2 inch. For me this was easy because I have a thickness planer. I would suggest that you purchase already dimensioned lumber a 1/2 inch thick. That saves you some steps and an expensive machine.

More Cutting
The next step is to rip all pieces to the correct width. Then cut the 45° support. After Set your table saw up for a 45° cut the bottom edge of the bottom.


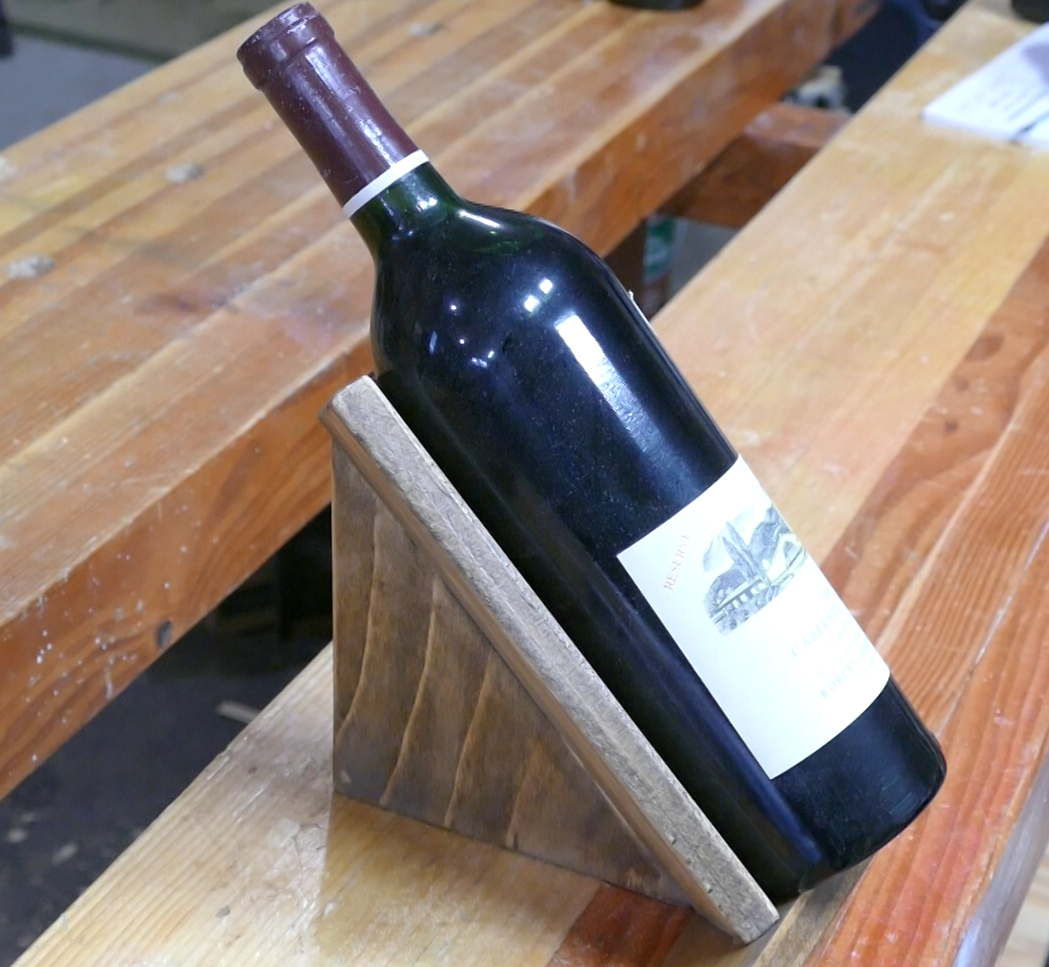
Assembly
There is not a lot as far as assembly goes for this particular project. The first thing you need to do is to assemble the cradle. This depend on the glue to hold the project together. Once the two cradle pieces are dry, be sure to let it dry for at least two hours, set your table saw to 45 degrees and trim off the bottom corner to give yourself a ½” flat. This flat spot will sit on top of the 45° base. Glue the base to the cradle and then glue the end to the cradle and let everything dry for several hours. .

Sanding
I didn’t say it at the appropriate time, but my suggestion is that you sand all the parts immediately after you’ve cut them all to length and ripped them to width. This will make it far easier to sand and get a really nice finish. The way I did it, I end up having to do a fair amount of hand sanding. Use your orbital Sander with 220 grit sandpaper and it will make short work of all your sanding

Routing
Coming up on your final steps you’re going to want to route all the edges with a 1/8 inch roundover bit. Once you’ve completed rounding all the edges I would suggest you go back with some sandpaper, again 220 grit and dust all the rounded edges. This will make for a nice clean soft edge.

Finishing
Like always finishing it’s up to you. I would say if you’re using Maple and there’s any figure to it I would stain it first and then apply a hand-wiped varnish. With Cherry I would suggest you apply a hand wipe Boiled Linseed Oil. Be sure to let the finish dry and sand in between coats with 320 grit sandpaper and then I would top everything off with a coat of paste wax.

Well, I have to say I had fun working on this project. I’m making several of these for an event where the wine will be displayed and then given as a table raffle prize. This project goes together fast and easy it will definitely provide a centerpiece for any party or event that you’re having.

Hope you got something out of this and if you did, do me a favor, hit like and subscribe. I’d appreciate that a lot.
Thanks for reading and until next time Good Making!
Bill
Visit my Etsy Store at www.etsy.com/shop/30MinuteWoodshop
Facebook https://www.facebook.com/30MinuteWoodshop
Links to my Videos and Blogs
6 Tools to Start Woodworking https://30minutewoodshop.com/?p=3391
Create Your Own Dice Vault https://30minutewoodshop.com/?p=1226
DIY Whiskey and Cigar Butler https://30minutewoodshop.com/?p=550
Farmhouse Key Rack https://youtu.be/I65FGq4dKYY
Create Your Own Lazy Susan https://30minutewoodshop.com/?p=491
Tools and Materials you may need
Milwaukee M18 Fuel 2-Tool Combo KIT https://amzn.to/4l7vAsc
Milwaukee’s M18 Compact Router https://amzn.to/4oh0pxm
Milwaukee M12 Detail Sander https://amzn.to/46I6tss
Milwaukee M12 Rotary Tool https://amzn.to/4lDpz6Z
Bostitch Nailer and Compressor Combo Kit https://amzn.to/3HsfXO6
Bostitch 18 GA Brad Nails (900) https://amzn.to/3Hopnu4
Kreg K4 Pocket Hole Jig https://amzn.to/45bxFgQ
Ridgid Oscillating Belt Sander https://amzn.to/45C3rTK
Starrett Combination Square https://amzn.to/3XpbrDN
Milwaukee M18 Jig Saw Kit https://amzn.to/3FAWXsS
BOSCH Compound Miter Saw https://amzn.to/421A1vl
Minwax Fast Drying Polyurethane https://amzn.to/3V5h0pO
PPE Gear
3M N95 PPE Mask https://amzn.to/3x4NGEu
ISOtunes Bluetooth Earmuffs https://amzn.to/3lpj1iA


