Laminated Wood Coasters are a quick and easy project that can help you reuse a lot of your offcuts. This is a Kid Friendly Project for kids of almost any age. And this are a great gift give to Mom and Grandma for Mother’s Day and Birthdays. These are also an excellent item to sell at craft fairs and on Etsy.
And follow this link to my Video to see how it is done. VIDEO LINK
Tools
You only need a pencil, square, sandpaper, clamps, and a saw.
Materials
You will need 12” to 24” long pieces of various hardwoods like Maple, Walnut, Yellowheart, Paduk, etc. They need to be about a ½” thick and anywhere from 1/16” to about ¾” wide in random thicknesses. You will need enough of these strips to be 3-1/2”-5” wide when stacked side by side. I would also recommend a waterproof glue like Titebond III

Cutting and Laying Out Strips
If you don’t have strips grab a couple of pieces of 1’ to 2’ long hardwood and cut off 1/2” strips then size them to some where between 1/16” to 3/4” (wider if you like).
[strip picture]

Glue Up and Clamping
Lay your strips out in a pleasing pattern. Whether symmetric or asymmetric, lay enough to make the appropriate width somewhere between 3-1/2” to 5”. Be generous with glue and if you watch my video, you will see my slide the pieces during glue up. The sliding insures consistent distribution of the glue across the entire surface.
Grab your clamps and add some pressure. Be sure that you don’t crush the joint and squeeze the glue out.
[picture of the layout]

Scraping, Sanding, Planing
Once you pop the piece out of the clamps then the hard stuff starts. I’d recommend starting with a Card Scraper. If you are not familiar with one, then check out this short video on Card Scrapers. It will pop off all the small glue beads in a few minutes – far faster than sandpaper. Next you may want to plane the high spots. I used a 100 year old No. 5-1/2 Bailey. A plane will flatten most of the high spots and shorten your sanding. Finally, sand. Depending on the surface you may need to start with 80 grit to smooth and even the surface. Then you will need to work the grits down to 220. I used a “Lunch Box” Planner which gave me a ready to go surface and I only needed to break the edges.
[picture of laminate coming off planer]

Cutting
Next you will crosscut to size so that they coasters are square. You can, at this point, knock off the corners and make the coasters octagons. I used a Radial Arm Saw with a Stop Block that ensured all my cuts were exact.
[picture of the cut parts]

Easing the Edges
You have a lot of choices in your edge treatment. Choose you edge based on your tooling and router capabilities. I chose a 45 degree bevel. I have a link below for a set of ¼” bits.
[edge choices pic]

[Picture of router table]

Sanding
Hit all the surfaces with a light sanding using 220 grit sandpaper. The bevel can be sanded by wrapping a piece of sandpaper around. a a flat piece of wood. Be sure you ease (round them over a bit) all the corners. Then wipe everything down. Be sure you sign your work!
Finishing
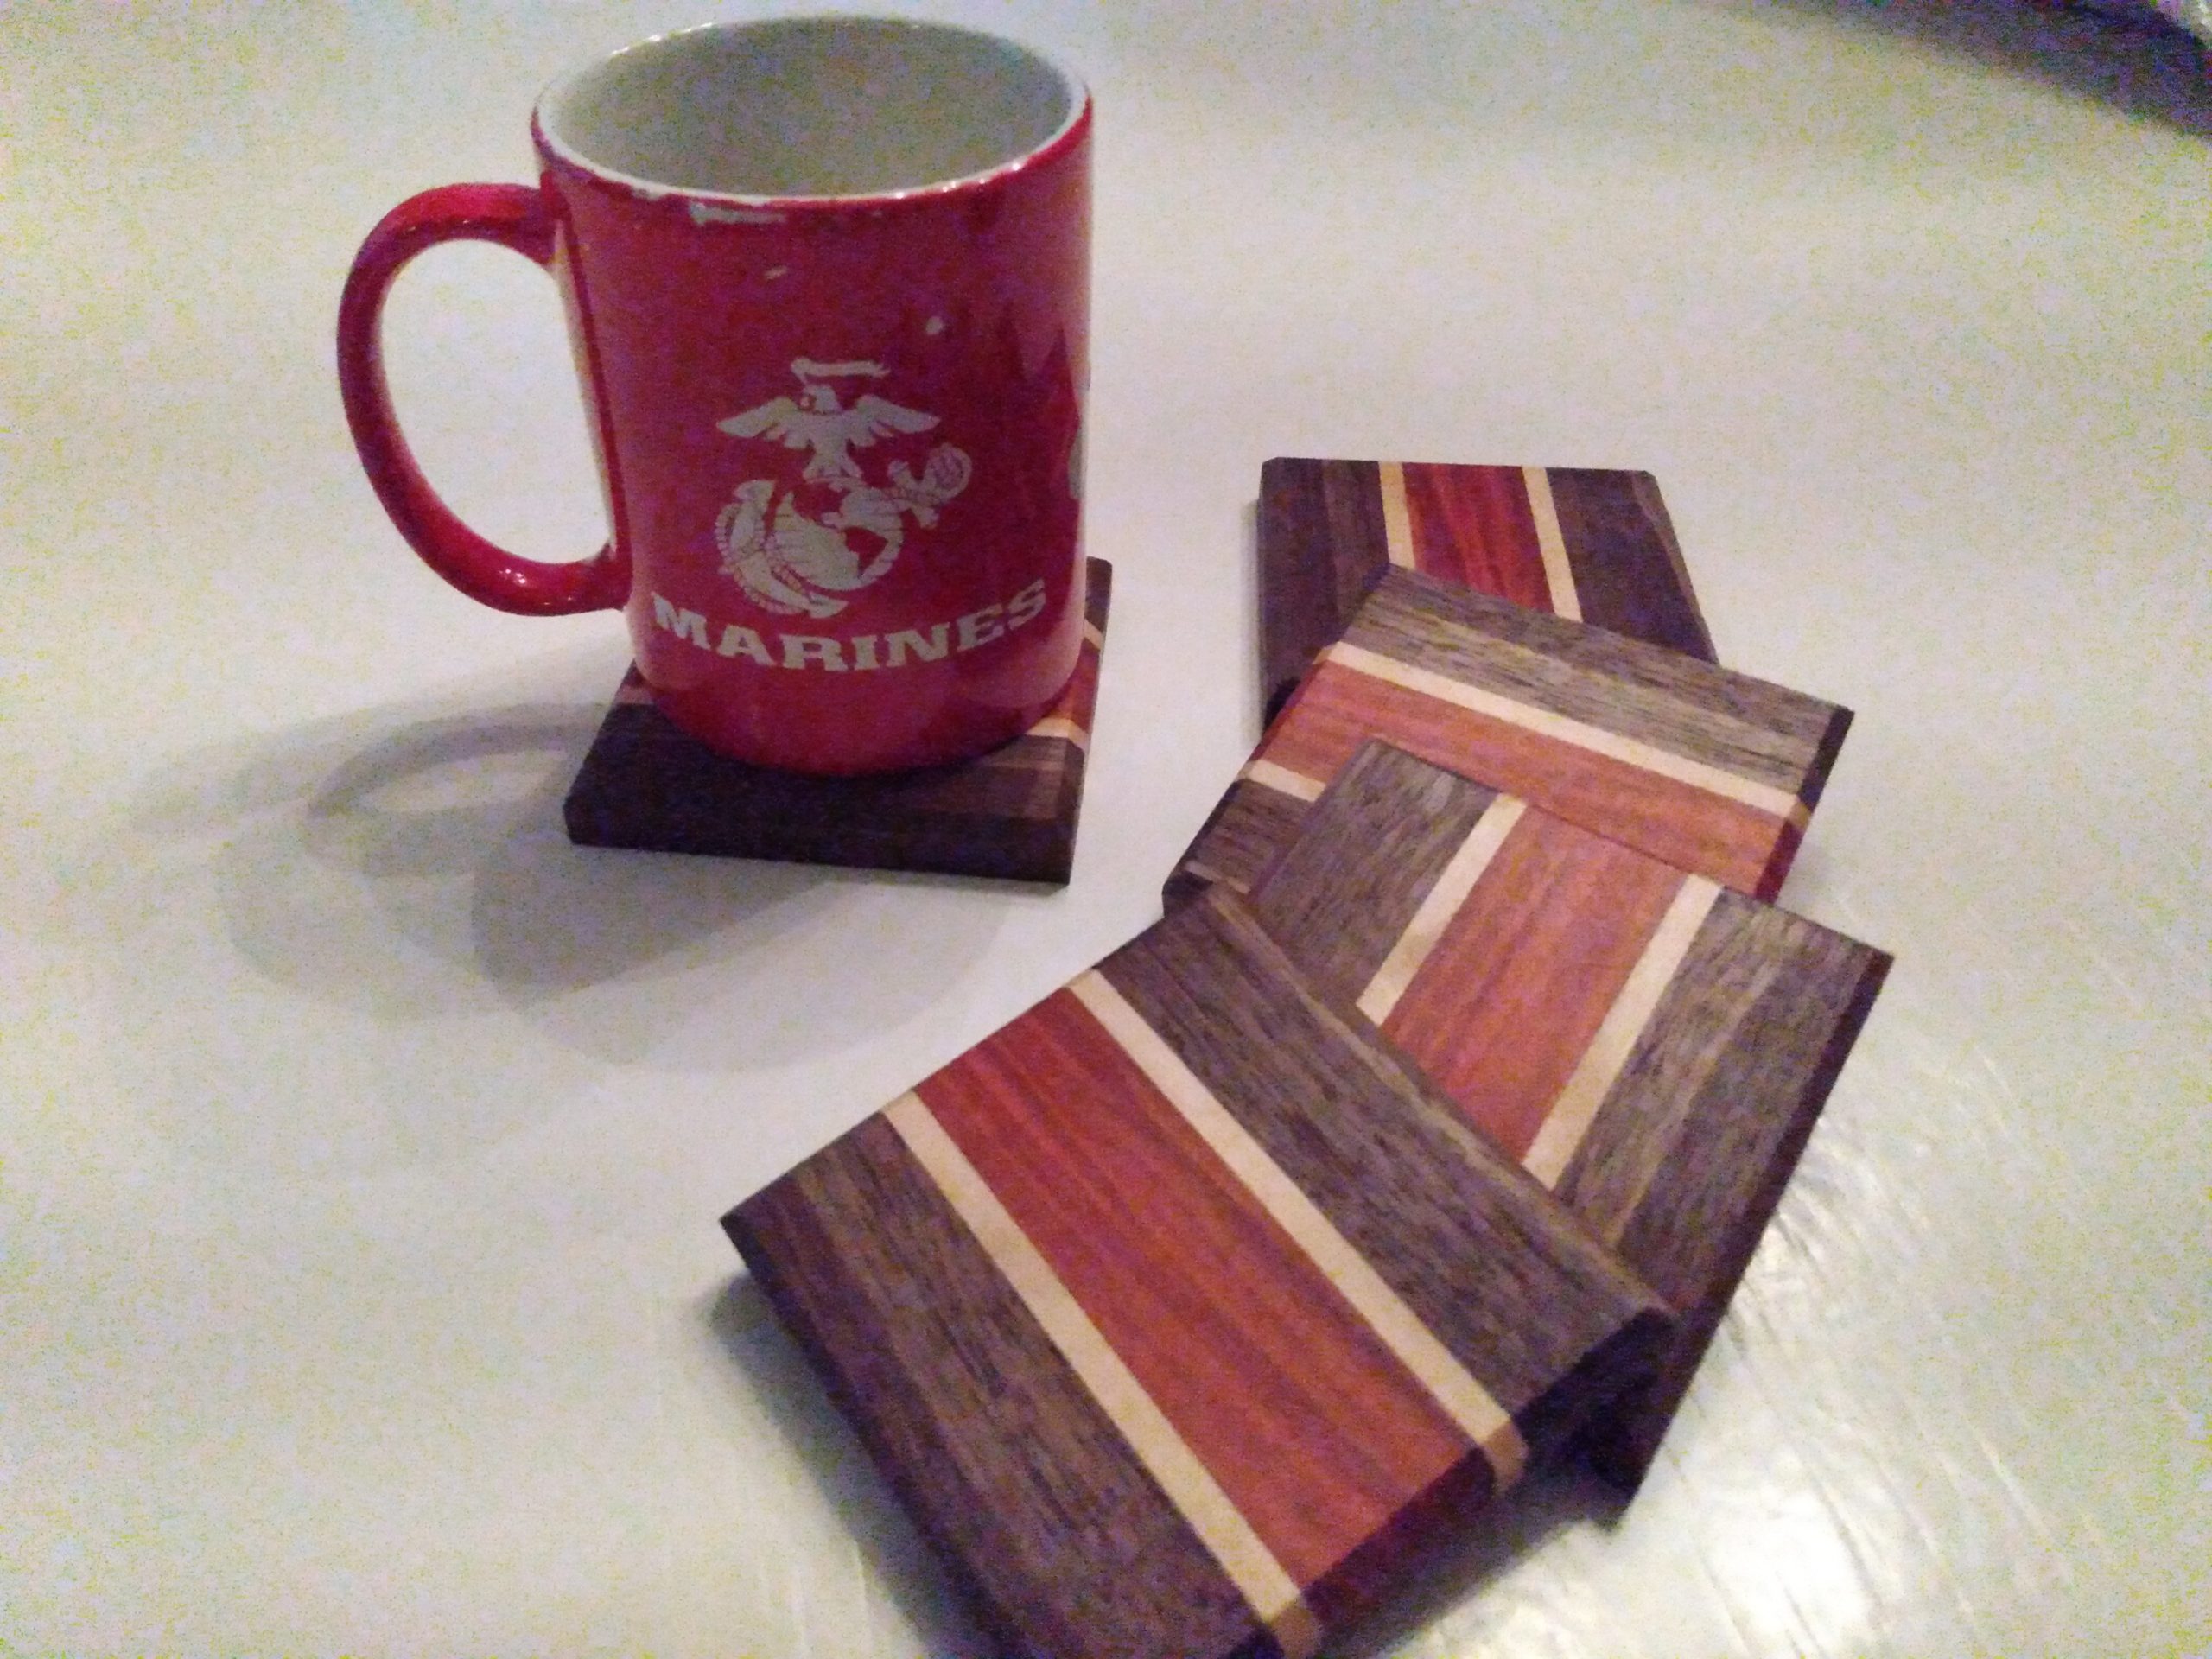
Choose your finish. I picked Varathane Polyurethane as these need a thick film to protect against moisture. Then finish off with wax – you are done!!
[Picture of finished project]

Thanks for reading and until next time Good Making!
Bill
Project Links
Link to Laminated Wood Coasters Video https://youtu.be/DcwpTAWKxA0
Link to EASY Wood Coasters – Kid Friendly Project Video https://youtu.be/wfHPH8RN49o
Link to One-Piece Wood Coasters – Kid Friendly Blog https://30minutewoodshop.com/?p=252
Tools you may need
· DEWALT Router Fixed/Plunge Base Kit https://amzn.to/34TeXzp
· Router Bits Sets of 24 Pieces 1/4 Inch Shank https://amzn.to/3I5SYU7
Affiliate Links
Special Links
Beer Coaster History https://www.eater.com/beer/2016/12/9/13885546/coaster-beverage-beer-cardboard


