
I love the guys who have a pristine shop. All their tools and racks everything’s put away everything looks great the woods all organized and everything’s beautiful. My shop is totally different. It’s always and continually a disaster. While I try and keep things picked up there are tools everywhere there’s boards stacked all over and I’m tripping over all kinds of things. So this project is to try and help me get better organized. I have a couple of crates of turning stock as well as off cuts and even some propane canisters that I want to get up off the floor so I don’t have to walk around these things all the time and have them spread all over. To that end I designed a rolling storage tower. Now this is really easy to put together it’s primarily 2 by fours and plywood there’s not a lot to it so it should go together fairly quickly. I am still using some scrap and off cuts to make this mostly because it’s available. Now I will say this is not a 30 minute project it’s not even a one our project. Took me about 5 hours to build this thing but totally worth the time.

Tools and Materials
Not a lot of tools needed for this particular project. I’m using my radial arm saw, my chop saw, air nailer, and that’s really about it. As far as actual materials I designed this to use a minimum of materials and still be strong. I’m using some leftover offcut 2 by 4 For the cross pieces and a couple 8 foot 2 by 4 that I’m cutting down to about 6 feet for the uprights. And then I have some left over OSB and plywood I’m going to use for the shelving.

Layout is really straightforward on this project. Mark your 4 verticals at 72 inches and then mark all your cross pieces. You will cut the shelving to fit after you’ve assembled the frame.

Cutting
So the bulk of this project is nothing more than cross cutting. You’ll be cutting all the pieces to the appropriate length as noted in the dimensioned sketch. For this step compound my miter saw it would work out really well. I decided to use my radial arm saw.

Drilling pocket holes,
once you have everything cut your next step is to drill pocket holes. This particular project uses a lot of butt joints. This type of joint is not super strong. So I decided to use both pocket screws and biscuits to help reinforce those joints. I happen to have a Kreg Jig to cut the pocket screw holes which made this a really fast and easy step. I put 2 pocket hole screws in each and of each cross piece.

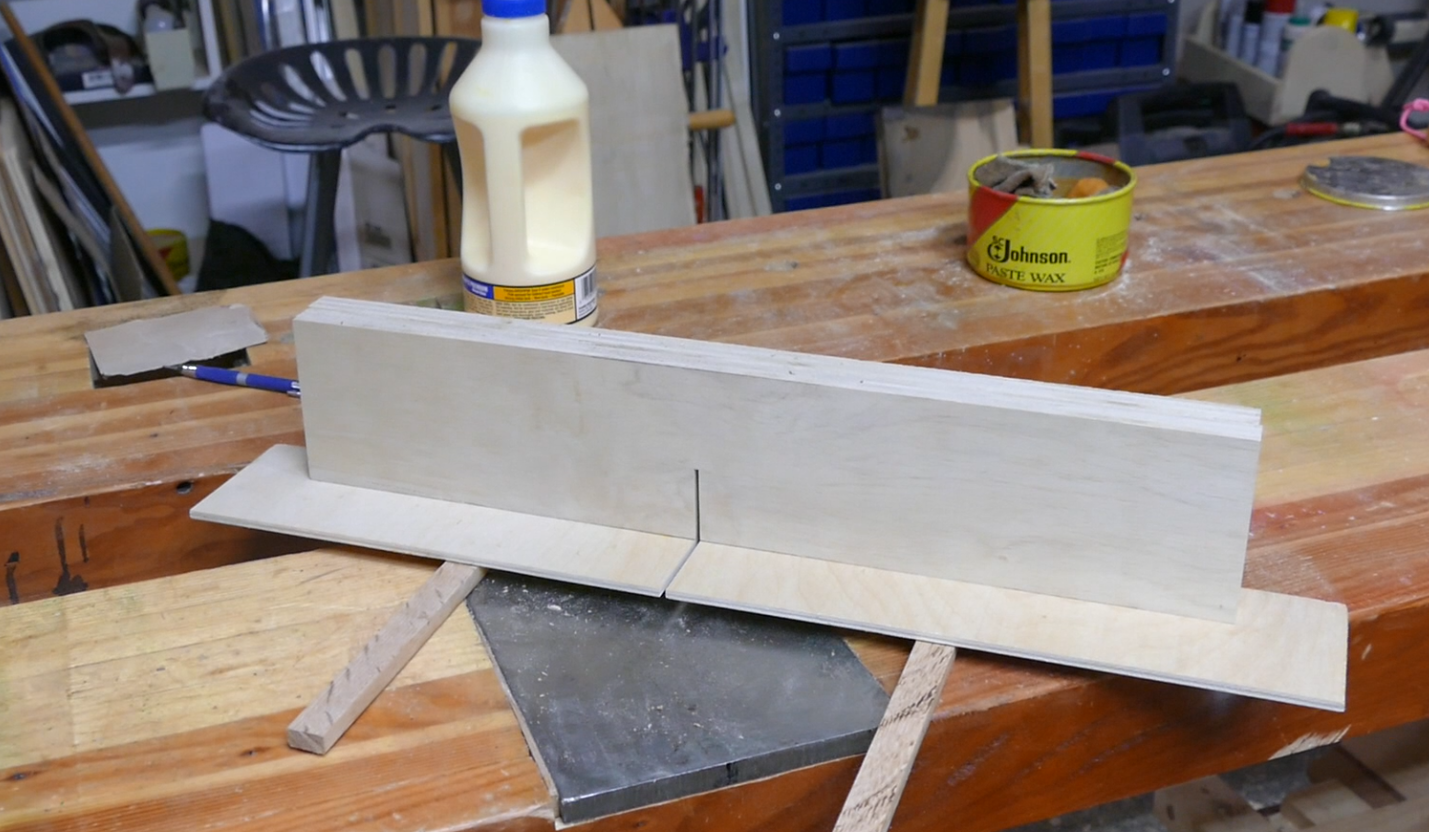
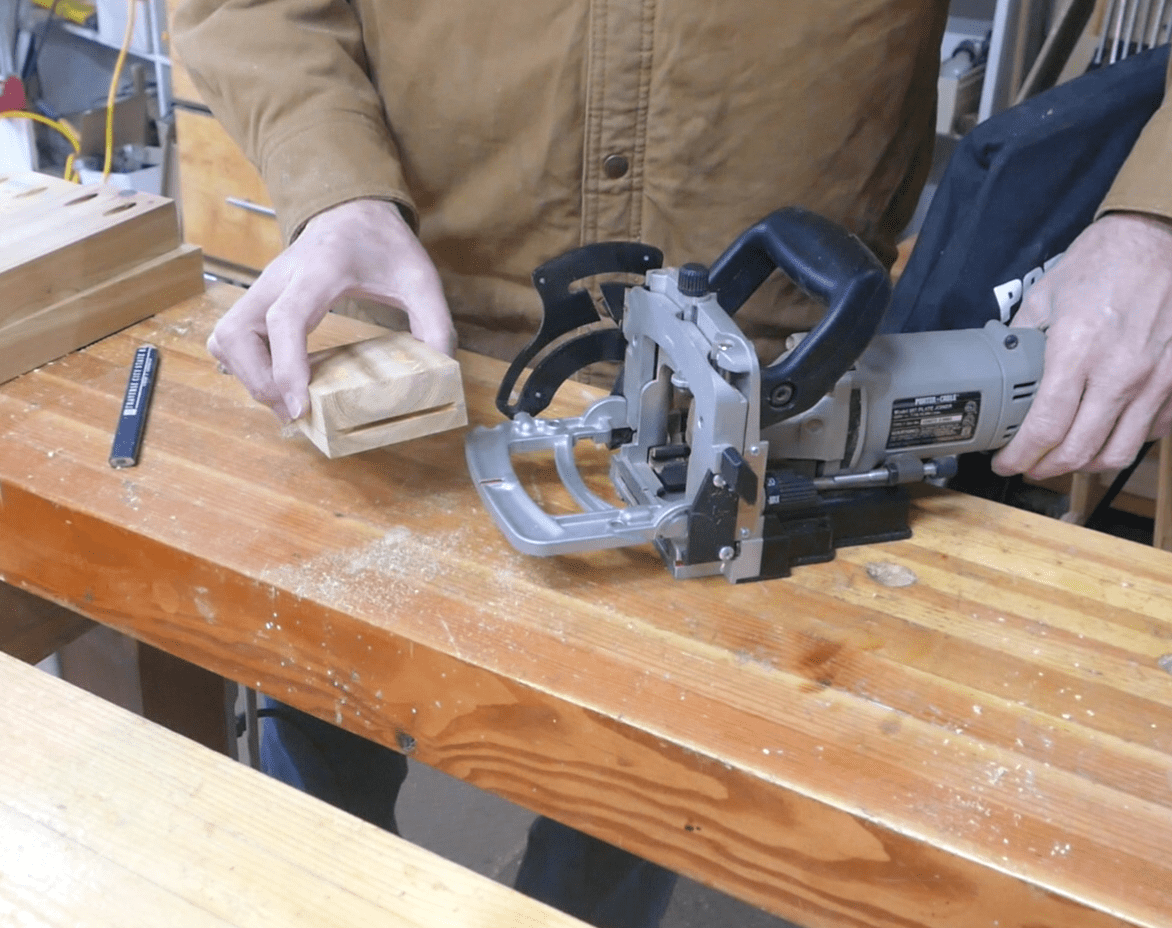
Biscuit joints
finishing up the pocket screw holes with the Craig jig I moved on to cutting the biscuit slots using my Porter cable plate joiner. Again this tool makes it very very easy to use and create the biscuit slots in all the correct spots.
Note: be sure you use pieces to set up for both the pocket holes and the biscuits. You really don’t want to put a pocket hole screw or a biscuit in the wrong place. Those can be fixed but they’re kind of painful.

Sanding
Just as a note I did not do any sanding on this at all. I didn’t see the point because all this is going to do is hold all my turning stock and short off cuts as well as a couple of LP gas canisters. Generally it won’t move around much so I don’t really care how it feels.
Assembly
The assembly of this storage tower is not that difficult but the process does take some time. Especially considering every joint has a biscuit and two pocket hole screws to hold it together and the best way to do that is to clamp each joint before you begin screwing things together. Be sure you lay out and Orient all the parts before you start applying glue to anything. Nothing worse than picking apart up putting glue on it and discovering it was the wrong part.
First thing you’re going to want to do is put it glue in biscuit slot put glue around the biscuit slot and then put glue on top of the biscuit and then put glue in the meeting part. Because we’re gluing and grain it will absorb a lot of glue so go ahead and be somewhat generous. I like to keep a wet paper towel close by to wipe up anything that squeezes out. With that done I clamped the pieces in position and drive the screws. For aesthetics purposes I put all the screws on the inside. You don’t have to do that.
While you are working through the assembly be sure to use a framing square so that everything is squared up properly. You really don’t want to have everything glued and screwed and discovered you now have a leaning tower for storage instead of a straight tower.


Screwing on the casters
I use 3 1/2 inch casters that are double locking. That’s probably a bit of overkill for this particular design but they were the first thing that I had available. What are the things they discovered was that there wasn’t enough touchdown room for the casters at the bottom. So in the picture below you can see I added in some small corner blocks. This gave me enough room to drive all four screws and secure the Castor properly. The corner blocks are both glued and nailed in position.

Shelves and Shelf pin holes
now that the frame is complete, you need to cut the fixed shelves. These shelves are custom fit because there may be variations when you started building this particular project. The Storage tower design has the bottom and the top as well as a mid-shelf that is fixed. This is primarily for stability by having all three of these there is very little chance that the tower is going to shift side to side. But this still left a huge open area that I wanted to put in adjustable shelling. The easiest way to do this or the cheapest way is to use shelf pins. So I have a jig from Rockler (see below) that is specifically made for drilling shelf pins. It makes the job very fast and very easy. I’ve used this on a number of projects and I absolutely love it.
I drilled the shelf pins in on each of the verticals top to bottom which gives me adjustments within one inch. With all the shelf pins drilled I measured and cut the intermediate shelves so that they were a snug fit. My plan was not to have much distance between the shelves for several reasons one is because of weight and the other is because I wanted to be able to provide separation for organization of my materials.

Finishing
Well, just like sanding, I did not put a finish on this because I didn’t feel the need. It is just hanging around my shop and is strictly for the purpose of organization
With the shelf pins in and all the intermediate shelves cut and placed all I did was load all the shelves from all the boxes and crates that I had of turning material. I got 95% of my turning stock onto this but there’s still a few more pieces that need to find a home.

But I have to say All in all this has been a great project. It’s really helped out in organization it’s moved a lot of things off the floor so I have a lot more room to walk and walk around and work and it’s also giving me the opportunity to actually see materials I have so that I can start using them. I absolutely love this storage tower.
Hope you got something out of this and if you did, do me a favor, hit like and subscribe. I’d appreciate that a lot.
Thanks for reading and until next time Good Making!
Bill
Visit my Etsy Store at www.etsy.com/shop/30MinuteWoodshop
Facebook https://www.facebook.com/30MinuteWoodshop
Links to my Videos and Blogs
Create Your Own Dice Vault https://30minutewoodshop.com/?p=1226
DIY Whiskey and Cigar Butler https://30minutewoodshop.com/?p=550
Farmhouse Key Rack https://youtu.be/I65FGq4dKYY
Create Your Own Lazy Susan https://30minutewoodshop.com/?p=491
Tools and Materials you may need
Rockler Shelf Pin Drilling Jig https://amzn.to/3IZmIYg
Milwaukee M18 Fuel 2-Tool Combo KIT https://amzn.to/4l7vAsc
Milwaukee’s M18 Compact Router https://amzn.to/4oh0pxm
Kreg K4 Pocket Hole Jig https://amzn.to/45bxFgQ
Ridgid Oscillating Belt Sander https://amzn.to/45C3rTK
Starrett Combination Square https://amzn.to/3XpbrDN
Milwaukee M18 Jig Saw Kit https://amzn.to/3FAWXsS
BOSCH Compound Miter Saw https://amzn.to/421A1vl
Minwax Fast Drying Polyurethane https://amzn.to/3V5h0pO
PPE Gear
3M N95 PPE Mask https://amzn.to/3x4NGEu
ISOtunes Bluetooth Earmuffs https://amzn.to/3lpj1iA