
Here’s a really simple Wood Lantern that you can make in a very short time. My DIY farmhouse style wood lantern is fast to make and will save you tons of money by making your own instead of paying more at the store. This project uses minimal tools and inexpensive wood. The truly great thing about this design is that you can upsize or downsize just by adding an inch or two to the dimensions. Read on to learn how to make your own custom farmhouse style wood lantern to add to your home decor.
And follow this link to my Video to see how it is done.
Wood Lantern Tools and Materials
You can complete this farmhouse style wood Lantern with only hand tools. For that you will need a is a saw, waterproof glue, a hammer, and nails. However, I recommend power tools to make this job really quick and really easy. A table saw with a good blade helps immensely, as does an air nailer, and a compound miter saw. You also need the usual tools such as a tape measure, combination square, and a pencil.

As far as materials for this project we’re using a 6’fence picket. I suggest you get a western red cedar fence picket. These are 6’ long by 5-1/2” wide and 5/8” thick. Western red cedar is soft, easy to work, and very easily cut. You’ll also need some nails and glue. I used Titebond III mostly because I had it on hand but it is waterproof so if you plan on using these outdoors be sure you use waterproof glue. You really do need nails in this project because the cross-sectional area is small and the end grain absorbs a lot of glue it’s pretty tough to get a good bond and expect it to hold lifetime of the Wood Lantern.

Layout the Wood Lantern Parts
This is a simple project so layout is very easy. First layout four pieces that are 8” long. Next layout one piece that’s 12-3/4 inches long. And a third piece that is 5-1/2” long. If you are laying these out one after the other be sure you account for the 1/8” saw blade thickness.

Cutting the Wood Lantern Parts
Your first step there’s to start by cross cutting the 8” pieces and the 5 ½” piece. Then crosscut the 12 inch piece.

Jointing and Glue up of the Top and Bottom
Start by making the base and the top. To do this you will need to glue two pieces together and to do that you will need to have a nice smooth edge. So I use a table saw to joint the edges. A hand plane will work very well in this application also. Run each of your pieces through so that at least one edge is smooth and flat.
Next apply glue to the jointed edge and clamp two pieces together you’ll do this for both the top and the bottom. This will give you two pieces that are about 11 inches wide by 8” long. Set these panels aside until the glue is dry.

More Cutting
The next step is to set your table saw to 5/8 of an inch. Cut as many 5/8” strips as you can out of the 12” piece of fence picket. With these pieces cut, set aside four, one for each corner. With the remaining pieces you will need to cut out eight pieces that are 6-3/4”, which are the tops and bottoms of the frames.
Now you will need to return to your top and bottom pieces that are glued up. Pull the clamps and set your table saw for 8 inches. Size the top and bottom to 8 inches by 8 inches. Accuracy here is pretty important because if you don’t get it right you will have to trim up the 6-3/4” pieces to fit. A little large is better than a little small.
Next cut a square that is 3-1/2” x 3-1/2” and one that is 1-1/2” x 1-1/2” for the finial on top.

Frame Assembly
Initial assembly of the frame is nothing more than gluing and nailing the small piece to the long piece. Apply glue to the end of the small piece and put it into long piece. Be sure it is flush all around. Then drive a single nail. The use of nails eliminates the need for clamps. Just make sure you put on enough glue. As these pieces are thin be very careful when nailing with an air nailer to keep your fingers clear. Use 1-1/4” nails and if you are hand hammering be sure to drill a pilot hole.
Once you have two frames done stand them up and glue and nail the additional cross pieces in. Check that everything is square. Allow the glue about two hours to dry. Then check all the joints to make sure they’re flush especially on the top and bottom. If they’re not exactly flush take some 60 grit sandpaper and level them up. This will make placing the top and bottom much easier.

Sanding
With the frame assembled and the top and bottom cut to size it’s time to do a little bit of sanding. This is primarily on the top and the bottom panels. Use 60 grit sandpaper and an orbital sander to even things out and flush everything up it will also help to remove any additional squeezed out glue. The 60 grit sandpaper helps retain the rustic look.

Final Assembly of the Wood Lantern Parts
Final assembly is very easy put some glue on the bottom of the frame place it over the bottom and be sure it is centered evenly. Drive in one or two nails on each side to hold it in place. When you drive these nails be sure to put them at a slight angle if you are using1-1/4” nails. Otherwise they may go all the way through. You can also choose to go to 1-1/8” or 1” nails.
With the base glued and nailed in place apply glue to the top of the frame and and turn it upside down on the top. Again be sure it’s centered and drive in two or three nails on each side. Now turn it over apply glue to the mid cap and center it in place put one nail in the center. Apply glue to the bottom of the top piece and place it in the center. No need to nail the last piece in the glue will be more than enough to hold it.

Finishing
The final step in this project is to apply finish. You have plenty of choices if you’re going for beach house style or farmhouse style a white or white wash would be perfect. You could also use varnish or in my case I used boiled linseed oil. Be aware that the western red cedar will absorb a lot of finish. It took several coats of the boiled linseed oil before the finish started to even out for me. If you are using boiled linseed oil or a wipe on varnish you will need to flood all parts and let it absorb several times.

Project Completion
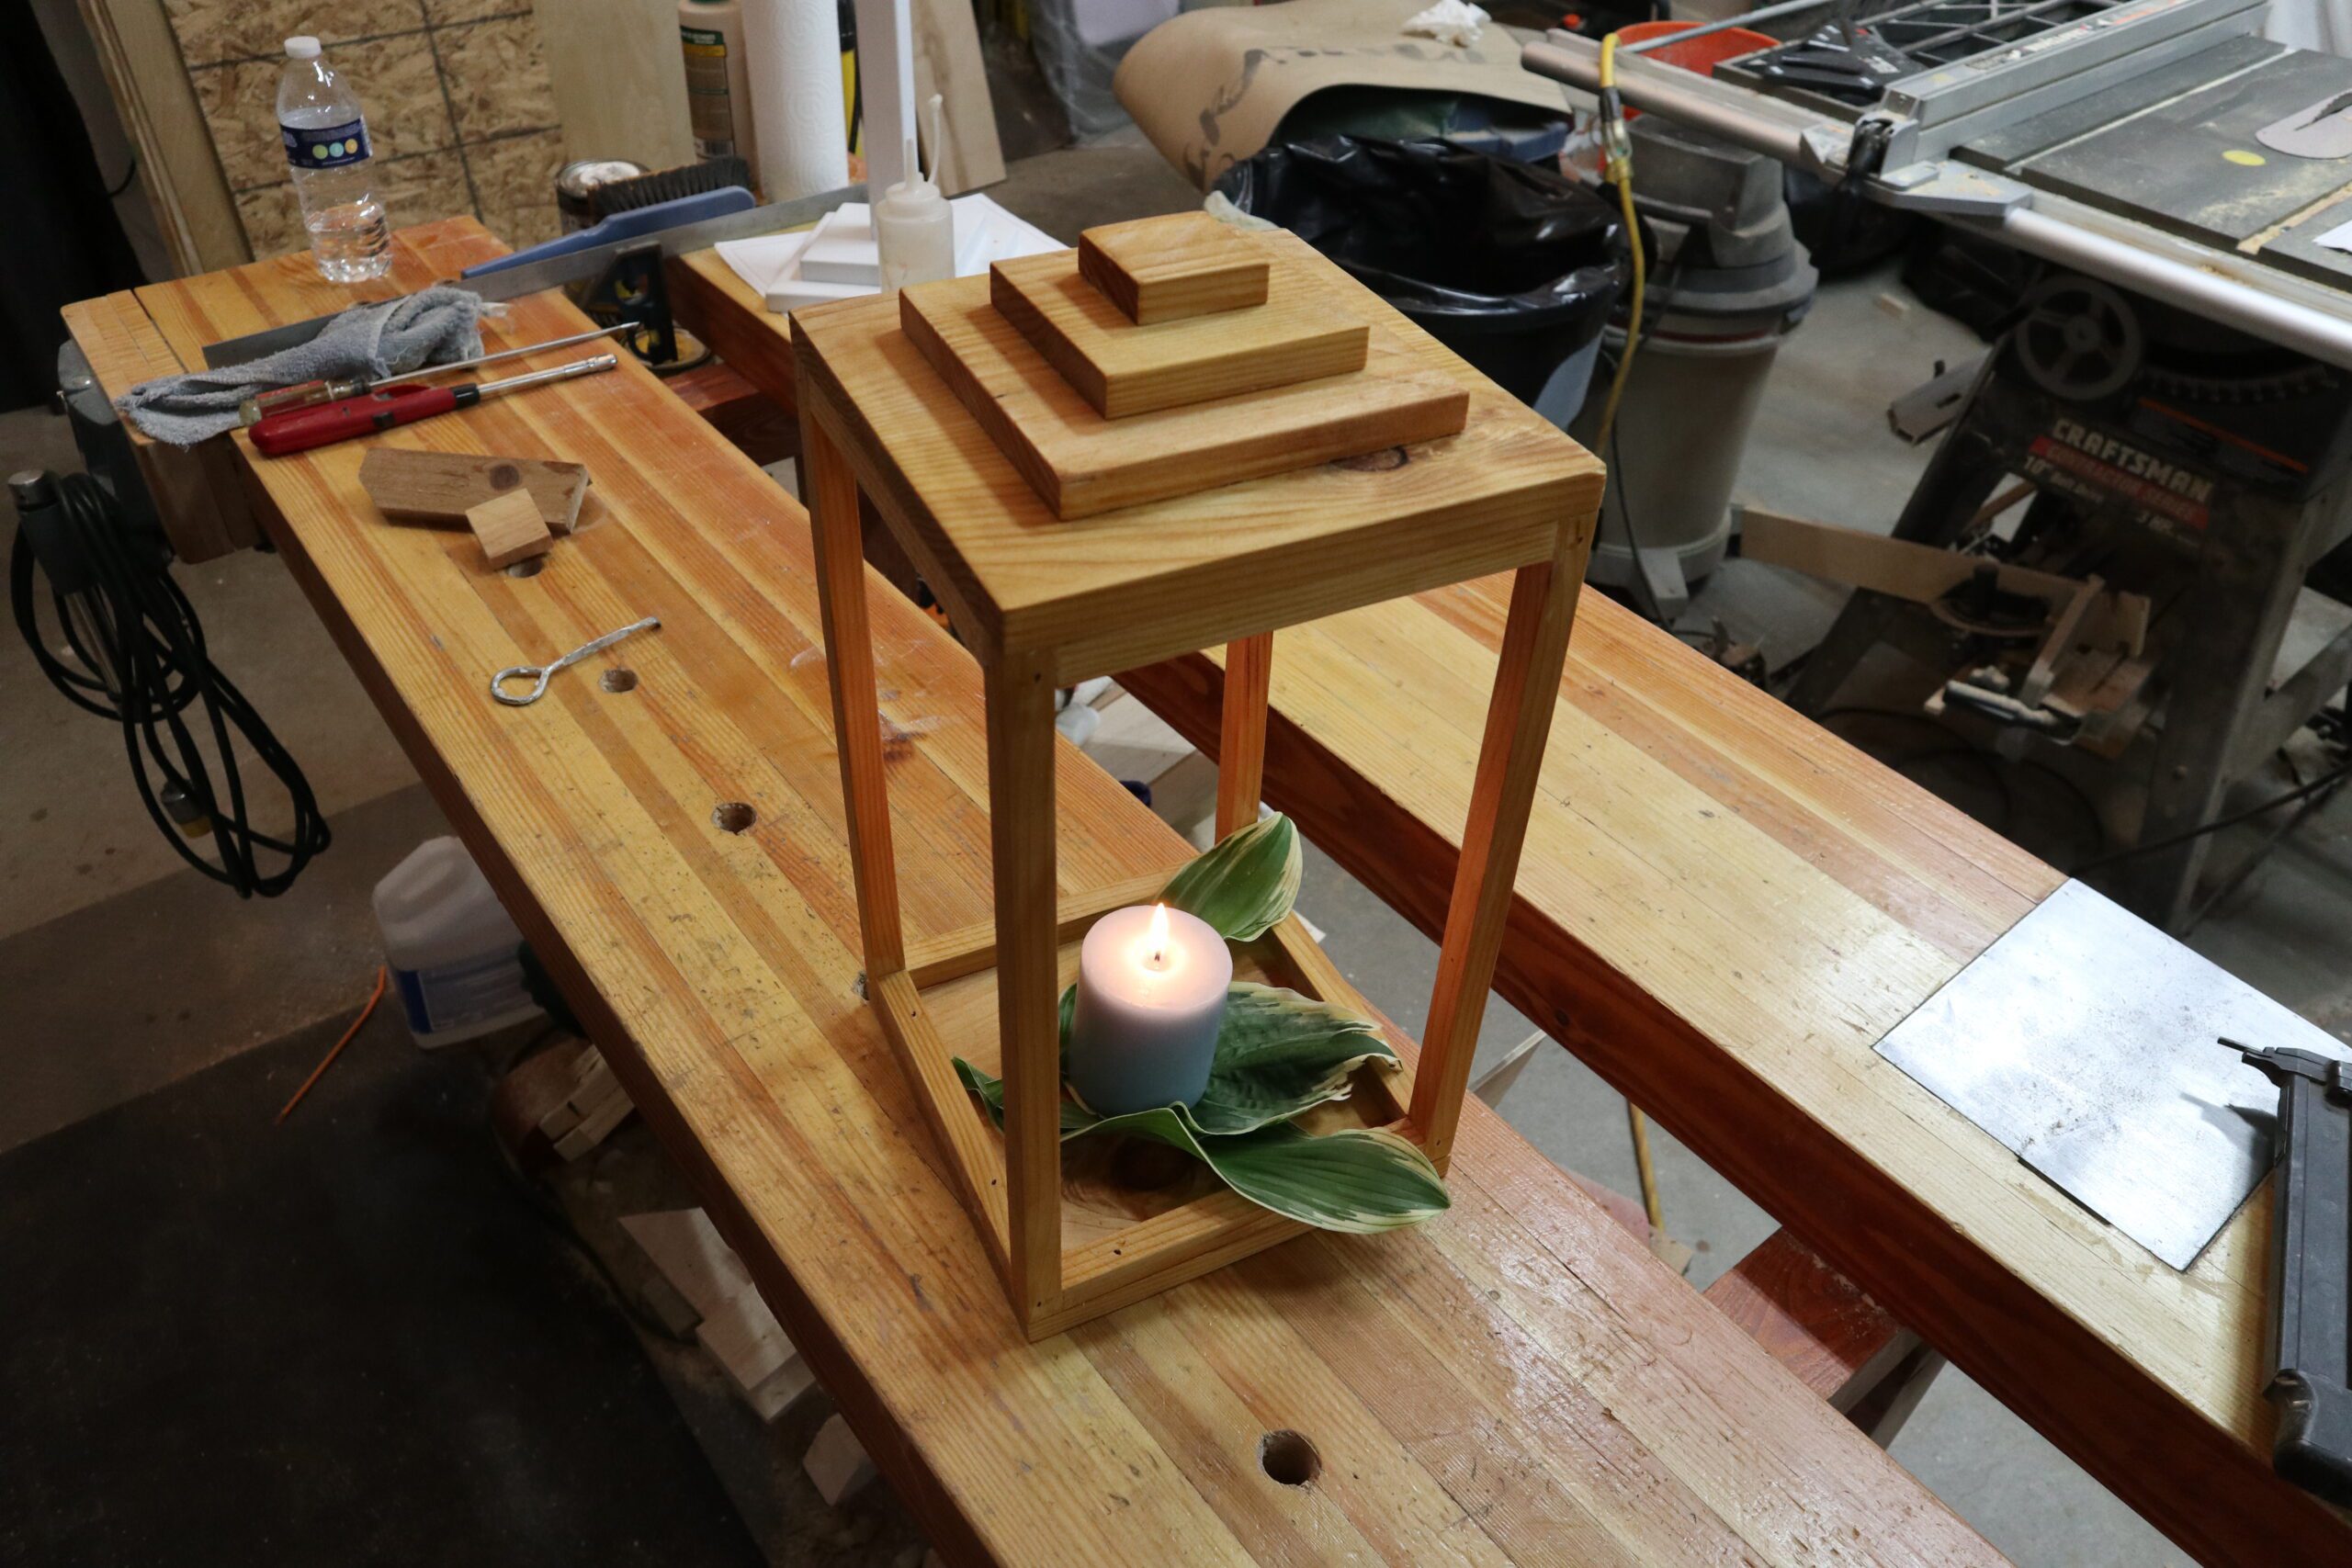
Well I have to say this has been an outstanding project. Really fast build and very cheap. For a few dollars I’ve been able to recreate a $50 decorator item. And it was a fun project too. It’s one of those that you could put together quickly and see a great result in a very short time.

Hope you got something out of this and if you did, do me a favor, hit like and subscribe. I’d appreciate that a lot.
Thanks for reading and until next time Good Making.
Bill
Visit my Etsy Store at www.etsy.com/shop/30MinuteWoodshop
Facebook https://www.facebook.com/30MinuteWoodshop
Links to my Videos and Blogs
Create Your Own Dice Vault https://30minutewoodshop.com/?p=1226
DIY Whiskey and Cigar Butler https://30minutewoodshop.com/?p=550
Farmhouse Key Rack https://youtu.be/I65FGq4dKYY
Create Your Own Lazy Susan https://30minutewoodshop.com/?p=491
Tools and Materials you may need
DEWALT Drill and Driver Combo https://amzn.to/42yybmy
DEWALT Router Plunge Base Kit https://amzn.to/3LKkJEK
Starrett Combination Square https://amzn.to/3XpbrDN
WoodRiver Low Angle Block Plane https://amzn.to/3pkNvos
Dewalt Jig Saw Kit https://amzn.to/47D3xv3
BOSCH Compound Miter Saw https://amzn.to/421A1vl
Minwax Fast Drying Polyurethane https://amzn.to/3V5h0pO
PPE Gear
3M N95 PPE Mask https://amzn.to/3x4NGEu
ISOtunes Bluetooth Earmuffs https://amzn.to/3lpj1iA


