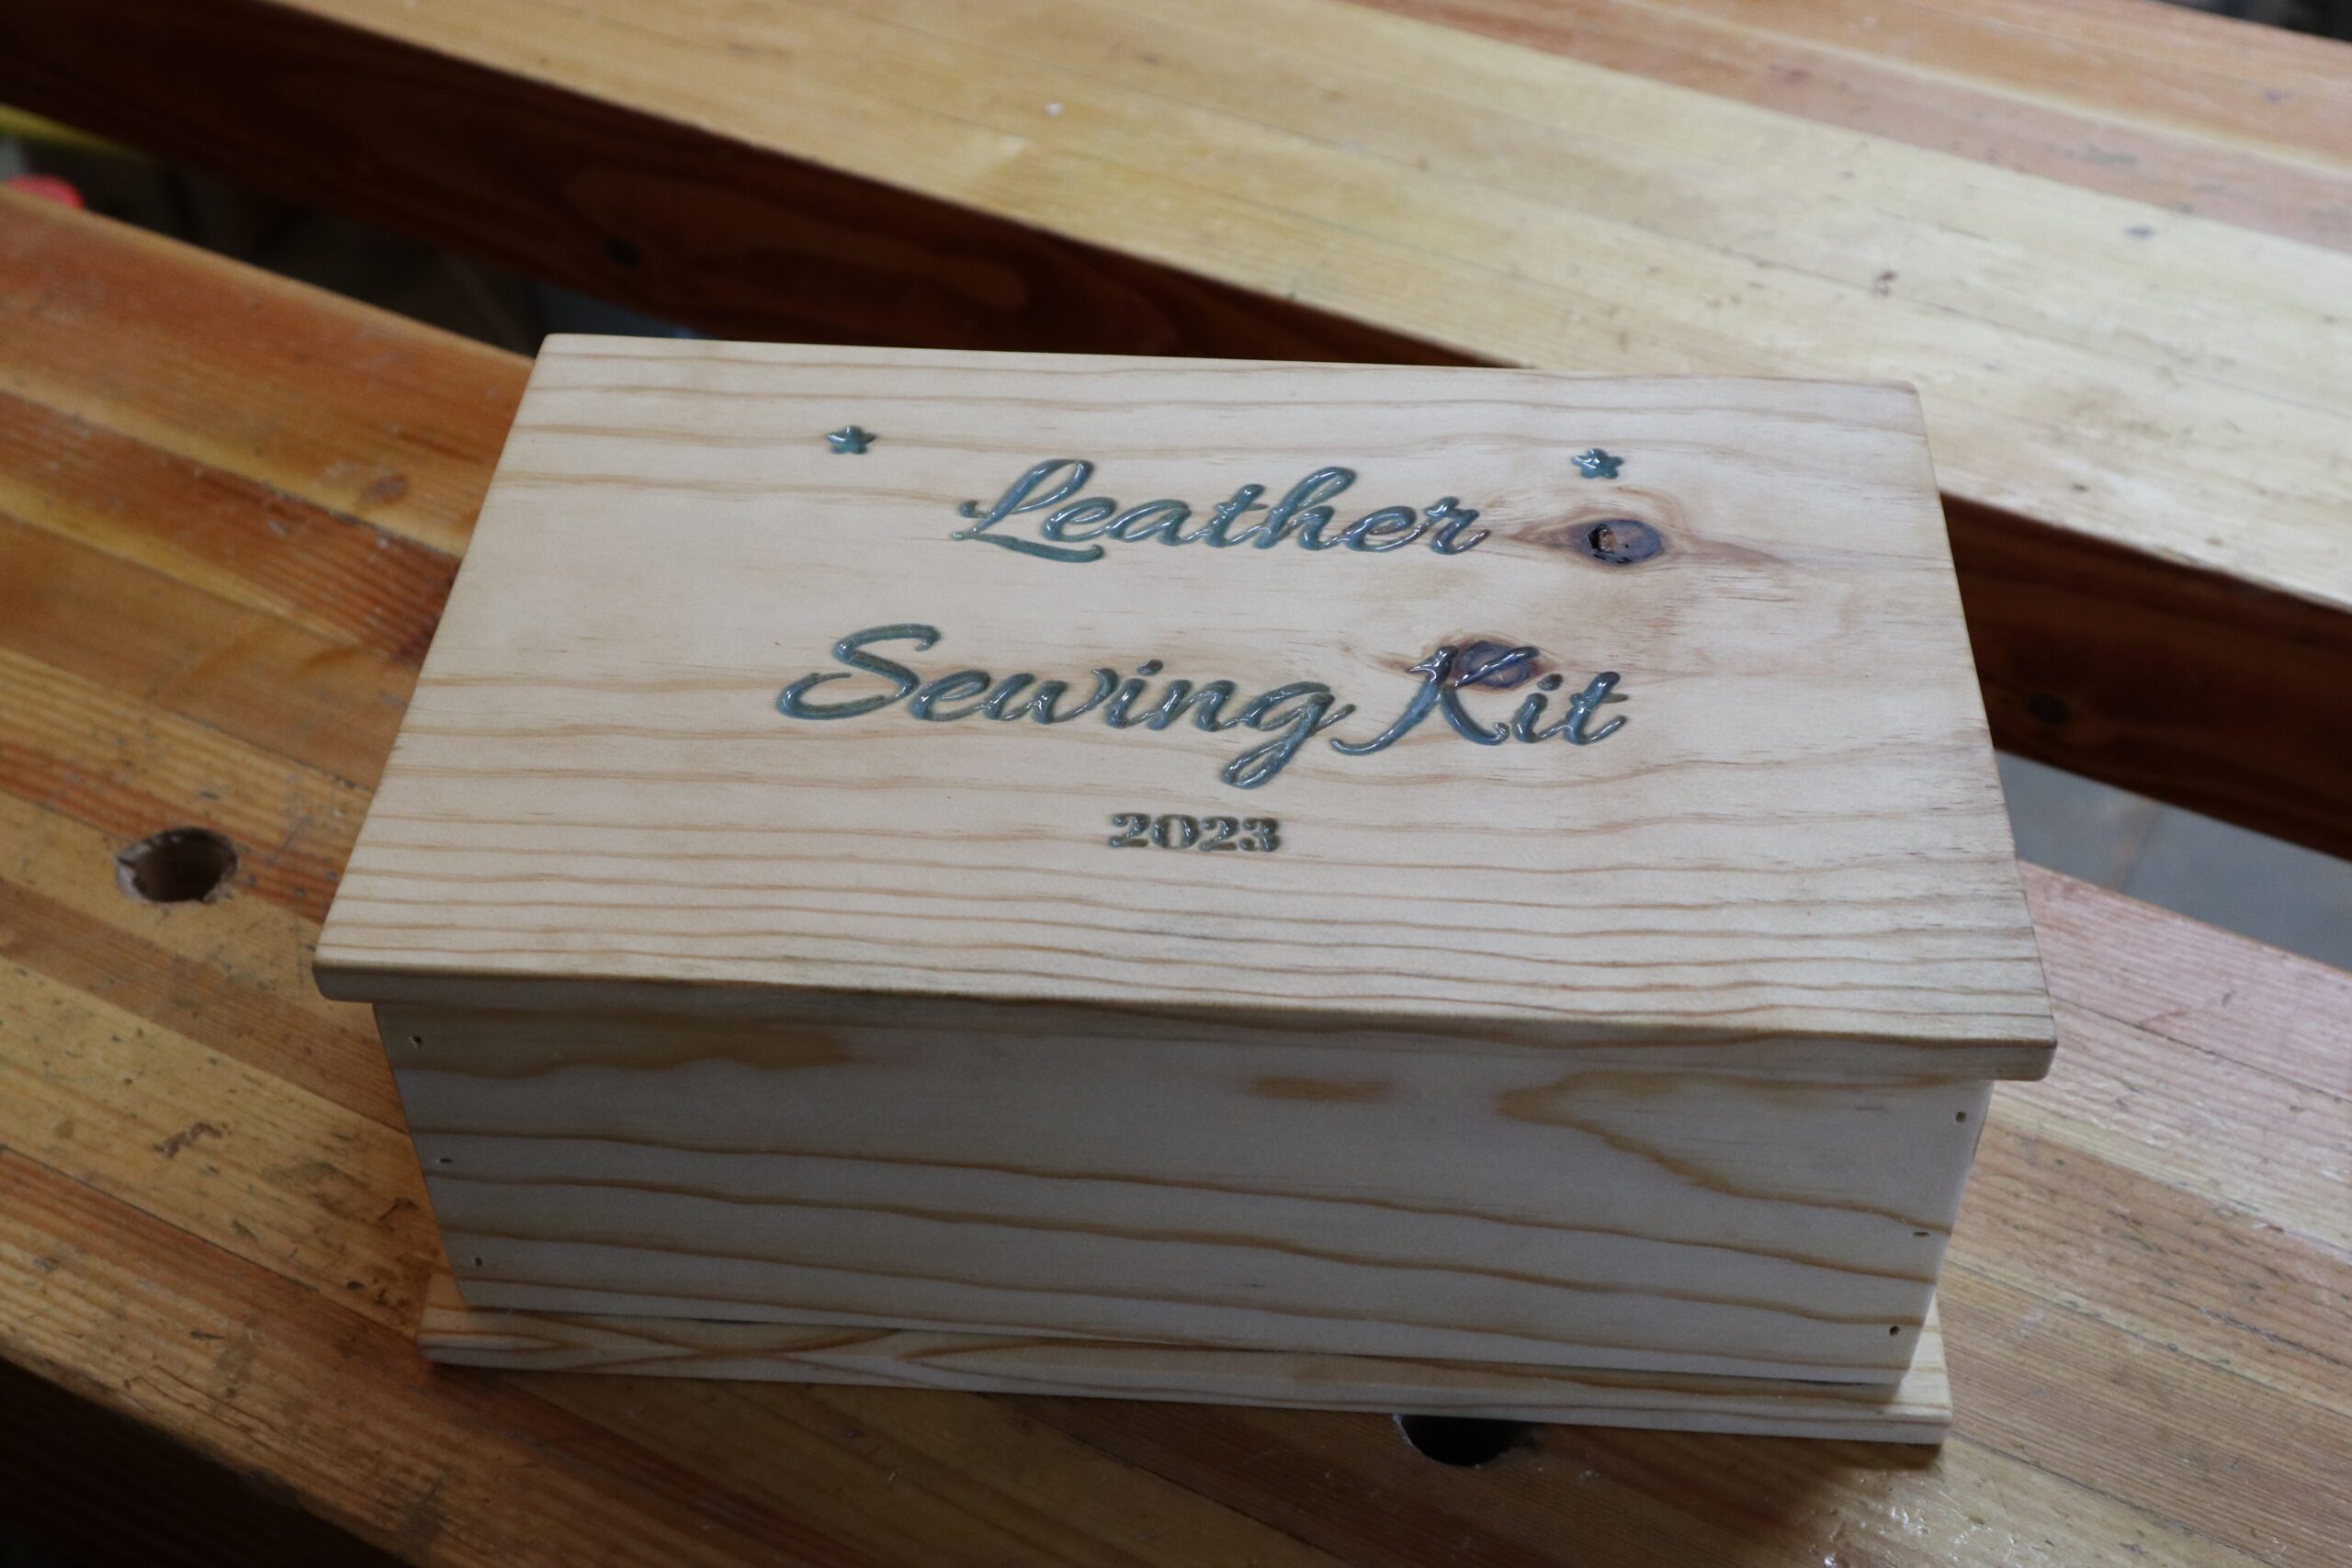
This is a nice small chest if you find you need to store things. With an overall footprint of 11” by 7” and just over 3-1/2” high, it provides 227 in3 storage in an easy footprint to fit most anywhere. This small chest takes advantage of stock ¼” material and the dimensions can be easily adjusted to fit your needs. I used my Fox Alien CNC to decorate the box but you can hand carve, paint, or put stickers on it as you choose. By the way this makes a great craft box for your kids crafting supplies. Make on for each of your kids with their name on it to help keep them organized.
Follow the video link to see how it is done.
Tools and Materials
The tools you will need for this project are pretty much the standard things we’ve used in previous projects. You can use simple hand tools, a handsaw, a square, a few clamps, tack hammer, and a #1 Phillips Screw Driver. Power tools will speed your build as will using stock material.
I’ll be using a table saw and a radial arm saw but a compound miter saw would work too, and the usual orbital sander, clamps and air nailer. The only special tool I used in this was my Fox Alien CNC. Which of course you don’t need. But it made for some fun carving.
The materials you will need for this project are about board feet of 1/4” stock in Pine, Poplar, or Oak. This translates into about 7 to 8 feet of 4 inch wide 1/4” stock. NOTE: 4″ wide stock is usually about 3-1/2″. If you’re using 4 inch wide stock however you will need to glue up panels for the lid and the bottom. I did have 5/16 inch stock that I milled from used lumber. I like to reduce, re-use, and recycle when possible. The inlays were epoxy. I used an art epoxy which is a faster setting thin pour material and I mixed in Rolio Pigment to create the inlays.

Layout
Layout from here is easy, first mark all of your crosscuts for the parts per the sketch below. Be sure to account for the blade width of your saw if you are marking the parts one after the other. If you’re gluing up the panels be sure to leave an extra 1/8” to 1/4” so you can trim off the edges after glue up.


Cutting
Your first step will be to crosscut all the parts.


Panel Glue Up
Next you will need to glue up the panels for the top and the bottom. Do not glue starve the joint when you apply glue. And clamp gently. You want to snug the clamp up not to squeeze all the glue out. About two to three hours for the glue to dry and then you can keep working. I used nails to hold everything together instead of clamps.
CNC and Epoxy Work
At this point I put my Fox Alien CNC to work and cut out the name of the box. I did this just for a bit of fun. And also I added a gorgon (medusa’s head) on the inside of the lid as a little suprise. With those cut into the lid I turned to an art epoxy which is a faster setting thin pour material. I mixed in Rolio Pigment and poured a thin line into the carving then waited 24 hours for it to fully cure. Flipped it and repeated the process.

Sanding
If you’re using stock lumber then you should only need to hit all the services with 220 grit sandpaper in your orbital Sander. This will give you hey nice finish with minimum work. I went through a lot more because of the epoxy. I did the 60, 80, 150, 220, and 320 grid sandpapers to achieve the final finish on the lid. Because I didn’t over pour on the epoxy this was a fairly fast sanding.
Box Assembly
While you’re waiting for the panels to dry you can assemble the box. This is a very straightforward process. All you need to do is apply glue to the edges of the ends then stand up the front and back to make the butt joints. Add 2 clamps to keep everything in place and get things adjusted to their right location. Be sure that the ends are flush, and the top edges are flush. Once everything is in place and flush use your air nailer to drive in two or three nails along each edge. Then you can remove the clamps. Be sure to check for squareness. Use your combination square on the outside of both opposite corners. If it is not square give it a little tweak. Then don’t touch it and let it dry. This will take two to three hours. You can skip the nailing and just let the glue dry if you want. I didn’t want to wait so I nailed to allow me to remove the clamps immediately.
Once the box is assembled put glue on the edge and place the bottom of the box on top. Adjust its location so that it is an even 1/4″ on all four sides. Press the box bottom in place and drive 4 to 6 nails to hold it together while the glue dries.

Finishing
You can apply any kind of finish that you choose this type of small chest works very well with just wax or an oil wax finish. Paint looks really good on it too. I chose to use boiled linseed oil (BLO) as my finish. It doesn’t offer significant protection but this box will sit on the shelf most of the time, so it really isn’t needed.
Final Assembly
The small chest is almost done. All we need to do is put on hinges. Because the lid is thin so we can’t just apply a hinge to the edge. What I did was screw the hinge to the inside bottom of the lid then screwed it to the outside of the box using a #1 Phillips Screw Driver. This worked out really well because it allows the lid to open 180 degrees with a minimum of stress on the hinge. But, you really should put a small chain or lid retention on it so it only opens to about 120 degrees. Long term this will save the hinge from being damaged. Now if you choose you can apply a coat of paste wax which will add a bit of protection.

Project Complete
The project is complete. In my case I’m using this for a leather stitching awl and it’s accessories. I’ve loaded this up and it works perfectly. If you make this box you can drop in anything you want like craft supplies, crafting tools, or anything else.

I hope you find the time or make the time to do this project. If you do make this project, congratulations on a job well done. And do me a favor and post it on my Facebook page. I’d love to see your work.
Hope you got something out of this and if you did, do me a favor, hit like and subscribe. I’d appreciate that a lot.
Thanks for reading and until next time Good Making!
Bill
Visit my Etsy Store at www.etsy.com/shop/30MinuteWoodshop
Facebook https://www.facebook.com/30MinuteWoodshop
Links to my Videos and Blogs
Create Your Own Dice Vault https://30minutewoodshop.com/?p=1226
DIY Whiskey and Cigar Butler https://30minutewoodshop.com/?p=550
Farmhouse Key Rack https://youtu.be/I65FGq4dKYY
Create Your Own Lazy Susan https://30minutewoodshop.com/?p=491
Tools and Materials you may need
Titebond III Wood Glue https://amzn.to/3pzOm4G
Small Hinges https://amzn.to/44x1AOZ
Epoxy Art Resin Crystal Clear https://amzn.to/3QjKXCh
Rolio Epoxy Pigments https://amzn.to/3q2cFsr
26” Western Crosscut Saw https://amzn.to/3O0ukts
Warrington Tack Hammer https://amzn.to/3QcTCGl
Compressor Combo Kit w/ 3 Nailers https://amzn.to/3rkvlE8
DEWALT Drill and Driver Combo https://amzn.to/42yybmy
DEWALT Router Plunge Base Kit https://amzn.to/3LKkJEK
Starrett Combination Square https://amzn.to/3XpbrDN
WoodRiver Low Angle Block Plane https://amzn.to/3pkNvos
Milwaukee M18 Jig Saw Kit https://amzn.to/3FAWXsS
BOSCH Compound Miter Saw https://amzn.to/421A1vl


