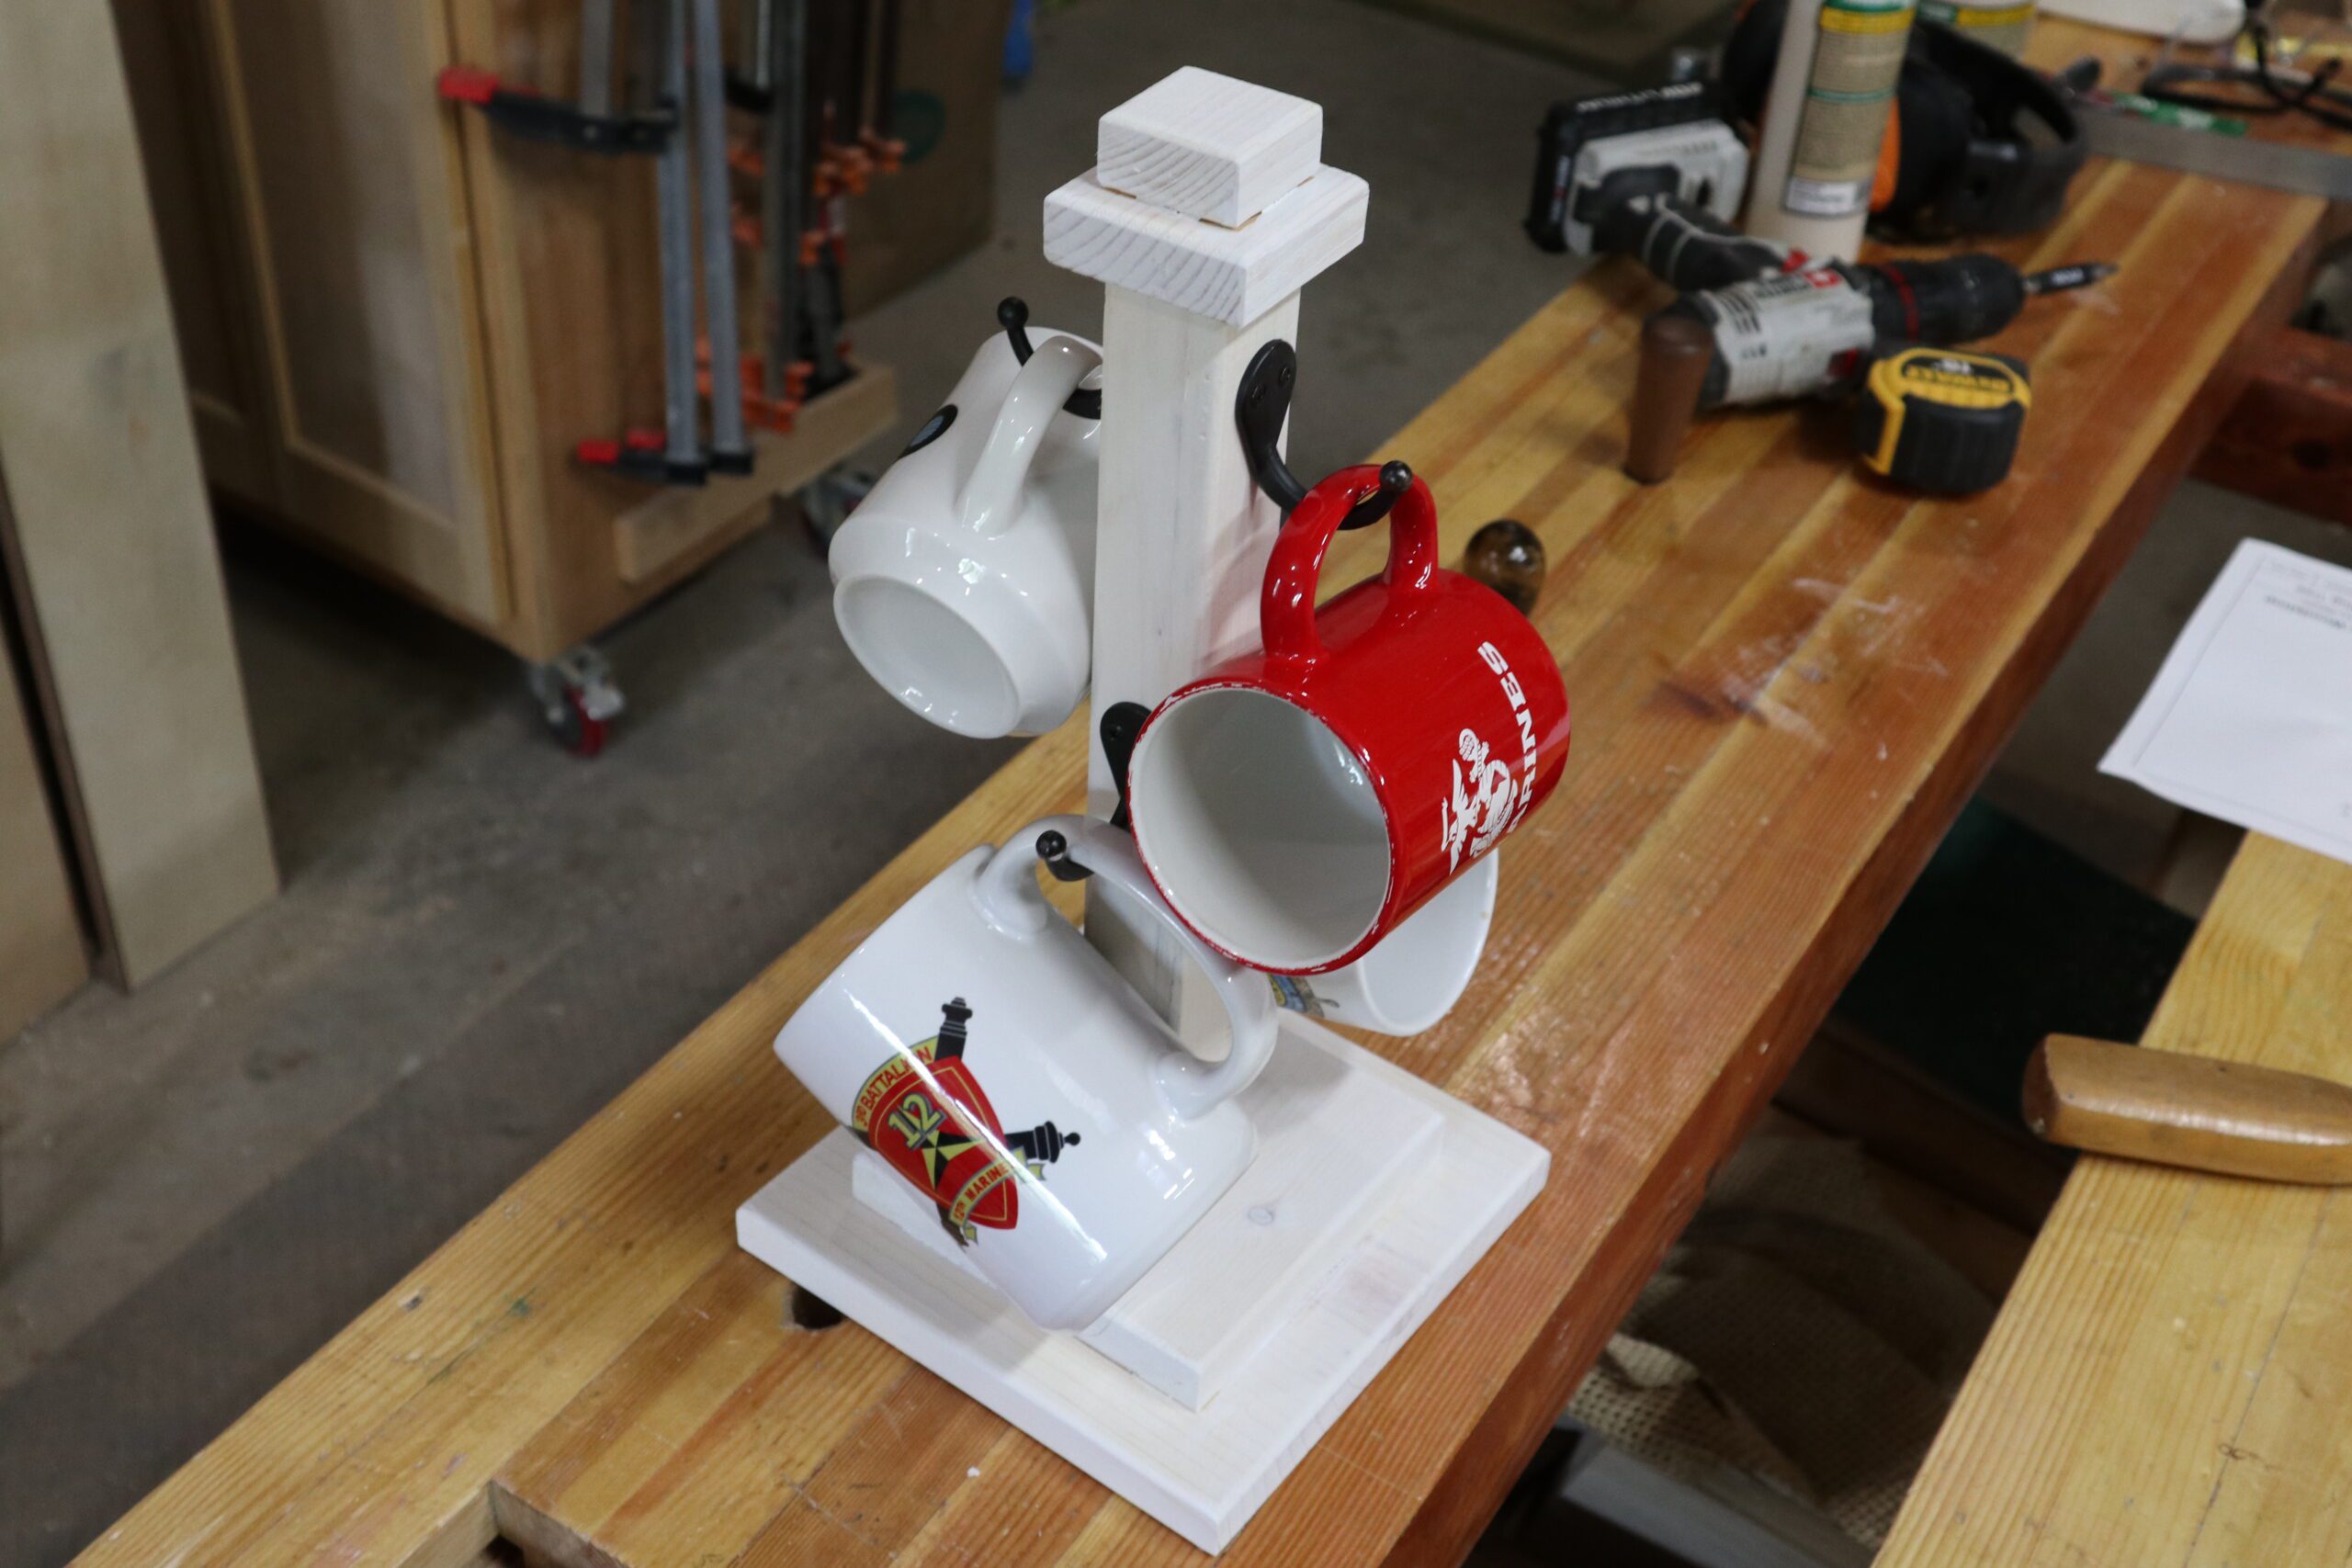
I drink a lot of coffee. And I have a lot of coffee mugs. I like to rotate those coffee mugs, so I got a chance to use them all. They’re really hard to get at stack three and four deep in the kitchen cabinet. So this coffee mug tree makes it really easy to rotate coffee mugs and display the ones I like. This is an easy project that uses very inexpensive wood that you can complete in easily 30 minutes. By the way this makes a great gift for grandmas and grandpas, aunts and uncles, and friends. It’s also easy enough that your kids can help you build it.
Follow this link to my Video to see how it is done.
Tools and Materials
You can do this entire project with hand tools because really all it takes is a saw, clamps, a screwdriver and possibly a #4 Hand Plane. Some power tools help, like a chop saw, table saw, compact router, air nailer, and a drill. I used my table saw, air nailer, compact router, drill, orbital sander, and radial arm saw.
The materials you need for the coffee mug tree are a 2-foot piece of 1 x 8 and a 12-inch piece of 2 x 2. And of course, you also need hooks and some glue. I used nails to hold it together instead of clamps which cut the total build time by quite a lot. By the way there is no need for you to use construction grade pine like I did. That material just worked well for the style I was trying to achieve. You can choose some really nice woods like Brazilian Cherry, Oak, African mahogany, or something like Osage Orange. This, however, will require more work on your part. As always don’t be constrained by either the materials that I choose, or the dimensions laid out in the sketch.

Layout
Start by laying out the base at 7 1/4” x 7-1/4” on the 1 x 8. Next, layout the upper base at 5-1/4” by 5-1/4”. On the scrap, mark out loser cap at 2-1/8” x 2-1/8” piece. And the top cap that is 1-1/2” x1-1/2”. Then a 12-inch mark on the 2 x 2 for the stand.

Cutting
Cut and size the base at 7 1/4” x 7-1/4” and then the upper base at 5-1/4” x 5-1/4”. Next cut the Lower cap and top cap to 2-1/8” x 2-1/8” and 1-1/2” x1-1/2” respectively. Last, cut the stand to 12 inches long. If you are using power tools, these cuts are fast and easy but remember to follow all safety precautions listed in each tool’s owner’s manual.

Edge Routing
Next, you’ll want to do something about the edges. You can sand all the sharp edges using 220 grit sandpaper in your orbital Sander (or by hand). I used an 1/8-inch roundover bit in my compact router. For me this worked out better and faster and provided a more consistent edge radius.

Sanding
Sand all the parts the coffee mug tree smooth. Because I was using construction lumber it was fairly rough and I had to start with 80 grit sandpaper, move to 150 grit sandpaper and then 220 grit sandpaper. I did all that with an orbital sander which left a very nice finish ready for paint.

Initial Assembly
Assembly of the coffee mug tree is super easy, start by applying glue to the upper base then center it over the lower base and either clamp or nail it in place. I chose to use nails because that meant I didn’t have to wait for it to dry. Just make sure you don’t put any nails directly in the center. We will be using that later.
Next flip it over and mark the center. Drilling 1/8” hole through both pieces. Insert a three-inch deck screw and drive it so that the point it’s just sticking out. On the 12-inch stand piece mark the center and place the center on the tip of the screw. Apply glue then drive the screw through the base into the stand. This will secure the vertical piece pretty well permanently. Last apply glue to the top of the stand and put the lower top on be sure it’s centered and then the top. Again, I nailed them in place, so I didn’t have to wait for the glue to dry. If you’re not nailing, you will need to wait about two hours until everything sets.

Finishing
Depending on the wood you choose and the way you want it to look you can do all kinds of things with the finish. I chose to do a wash of white to give it a cottage, beach, or farmhouse style look. All I did was take some gloss white latex paint and cut it about 50/50 with water. Then it wiped on two coats. Both these coats dry very fast. I did not do any sanding in between the coats.

Final assembly
With the paint dry all you have to do now is attach the hooks. Be sure when you do this they are centered. The lower hooks should be about 5-1/2 inches to where the cup hangs (bottom of the hook). And the upper hooks should be about 10 inches. This kind of depends on the cups that you are using. Larger cups obviously need more room. So adjust the dimensions to meet your needs.

Project Complete
I love doing useful projects. And this is, for me, a really useful project. Tomorrow morning I’ll be pulling my first cup of coffee using a mug directly off this coffee mug tree. I hope you take the time or make the time to build this project. It’s one I’m sure you’ll get a lot of use out of in the coming years. By the way this makes a great gift for grandmas and grandpas, aunts and uncles, and friends. It’s also easy enough that your kids can help you build it.

If you do make this project, congratulations on a job well done. And do me a favor and post it on my Facebook page (see link below).
Hope you got something out of this and if you did, do me a favor, hit like and subscribe. I’d appreciate that a lot.
Thanks for reading and until next time – Good Making!
Bill
Visit my Etsy Store at www.etsy.com/shop/30MinuteWoodshop
Facebook https://www.facebook.com/30MinuteWoodshop
Links to my Videos and Blogs
Create Your Own Dice Vault https://30minutewoodshop.com/?p=1226
DIY Whiskey and Cigar Butler https://30minutewoodshop.com/?p=550
Farmhouse Key Rack https://youtu.be/I65FGq4dKYY
Create Your Own Lazy Susan https://30minutewoodshop.com/?p=491
Tools and Materials you may need
Hanger Hooks https://amzn.to/3PXOkyj
DEWALT Drill and Driver Combo https://amzn.to/42yybmy
DEWALT Router Plunge Base Kit https://amzn.to/3LKkJEK
Ridgid Oscillating Belt Sander https://amzn.to/45C3rTK
Starrett Cobination Square https://amzn.to/3XpbrDN
WoodRiver Low Angle Block Plane https://amzn.to/3pkNvos
Center Finder Line Gauge https://amzn.to/3phRhPm
Milwaukee M18 Jig Saw Kit https://amzn.to/3FAWXsS
BOSCH Compound Miter Saw https://amzn.to/421A1vl
PPE Gear
3M N95 PPE Mask https://amzn.to/3x4NGEu
ISOtunes Bluetooth Earmuffs https://amzn.to/3lpj1iA
* affiliate links


