
It’s Pinewood Derby season.
This is the big event for Cub scouts throughout the US. Kids love building Pinewood Derby cars and they love to race them. In the following I will give you some of the tips, tricks and I’ll at the end I’ll even give you some secrets on how to put your son’s car or daughter’s car into the winners circle.
Let’s start with the very first thing.
Number 1, Aerodynamics Do Not Matter.
Don’t worry about aerodynamics. You can put a solid block of wood down the track and still win. With that in mind, let your son or daughter do whatever they want to do and have fun. Let them experiment with the shape and if Aero is what they want then do it. Work with them to cut out the car body and help them decorate with paint, markers, or stickers, however they like – make it fun. I will say that having a small benchtop bandsaw helps out immensely in cutting out the body though. I have a link at the bottom for a small bench top bandsaw that is well worth the money and you can sell it to a new incoming parent once your son of daughter moves on to Scouts.

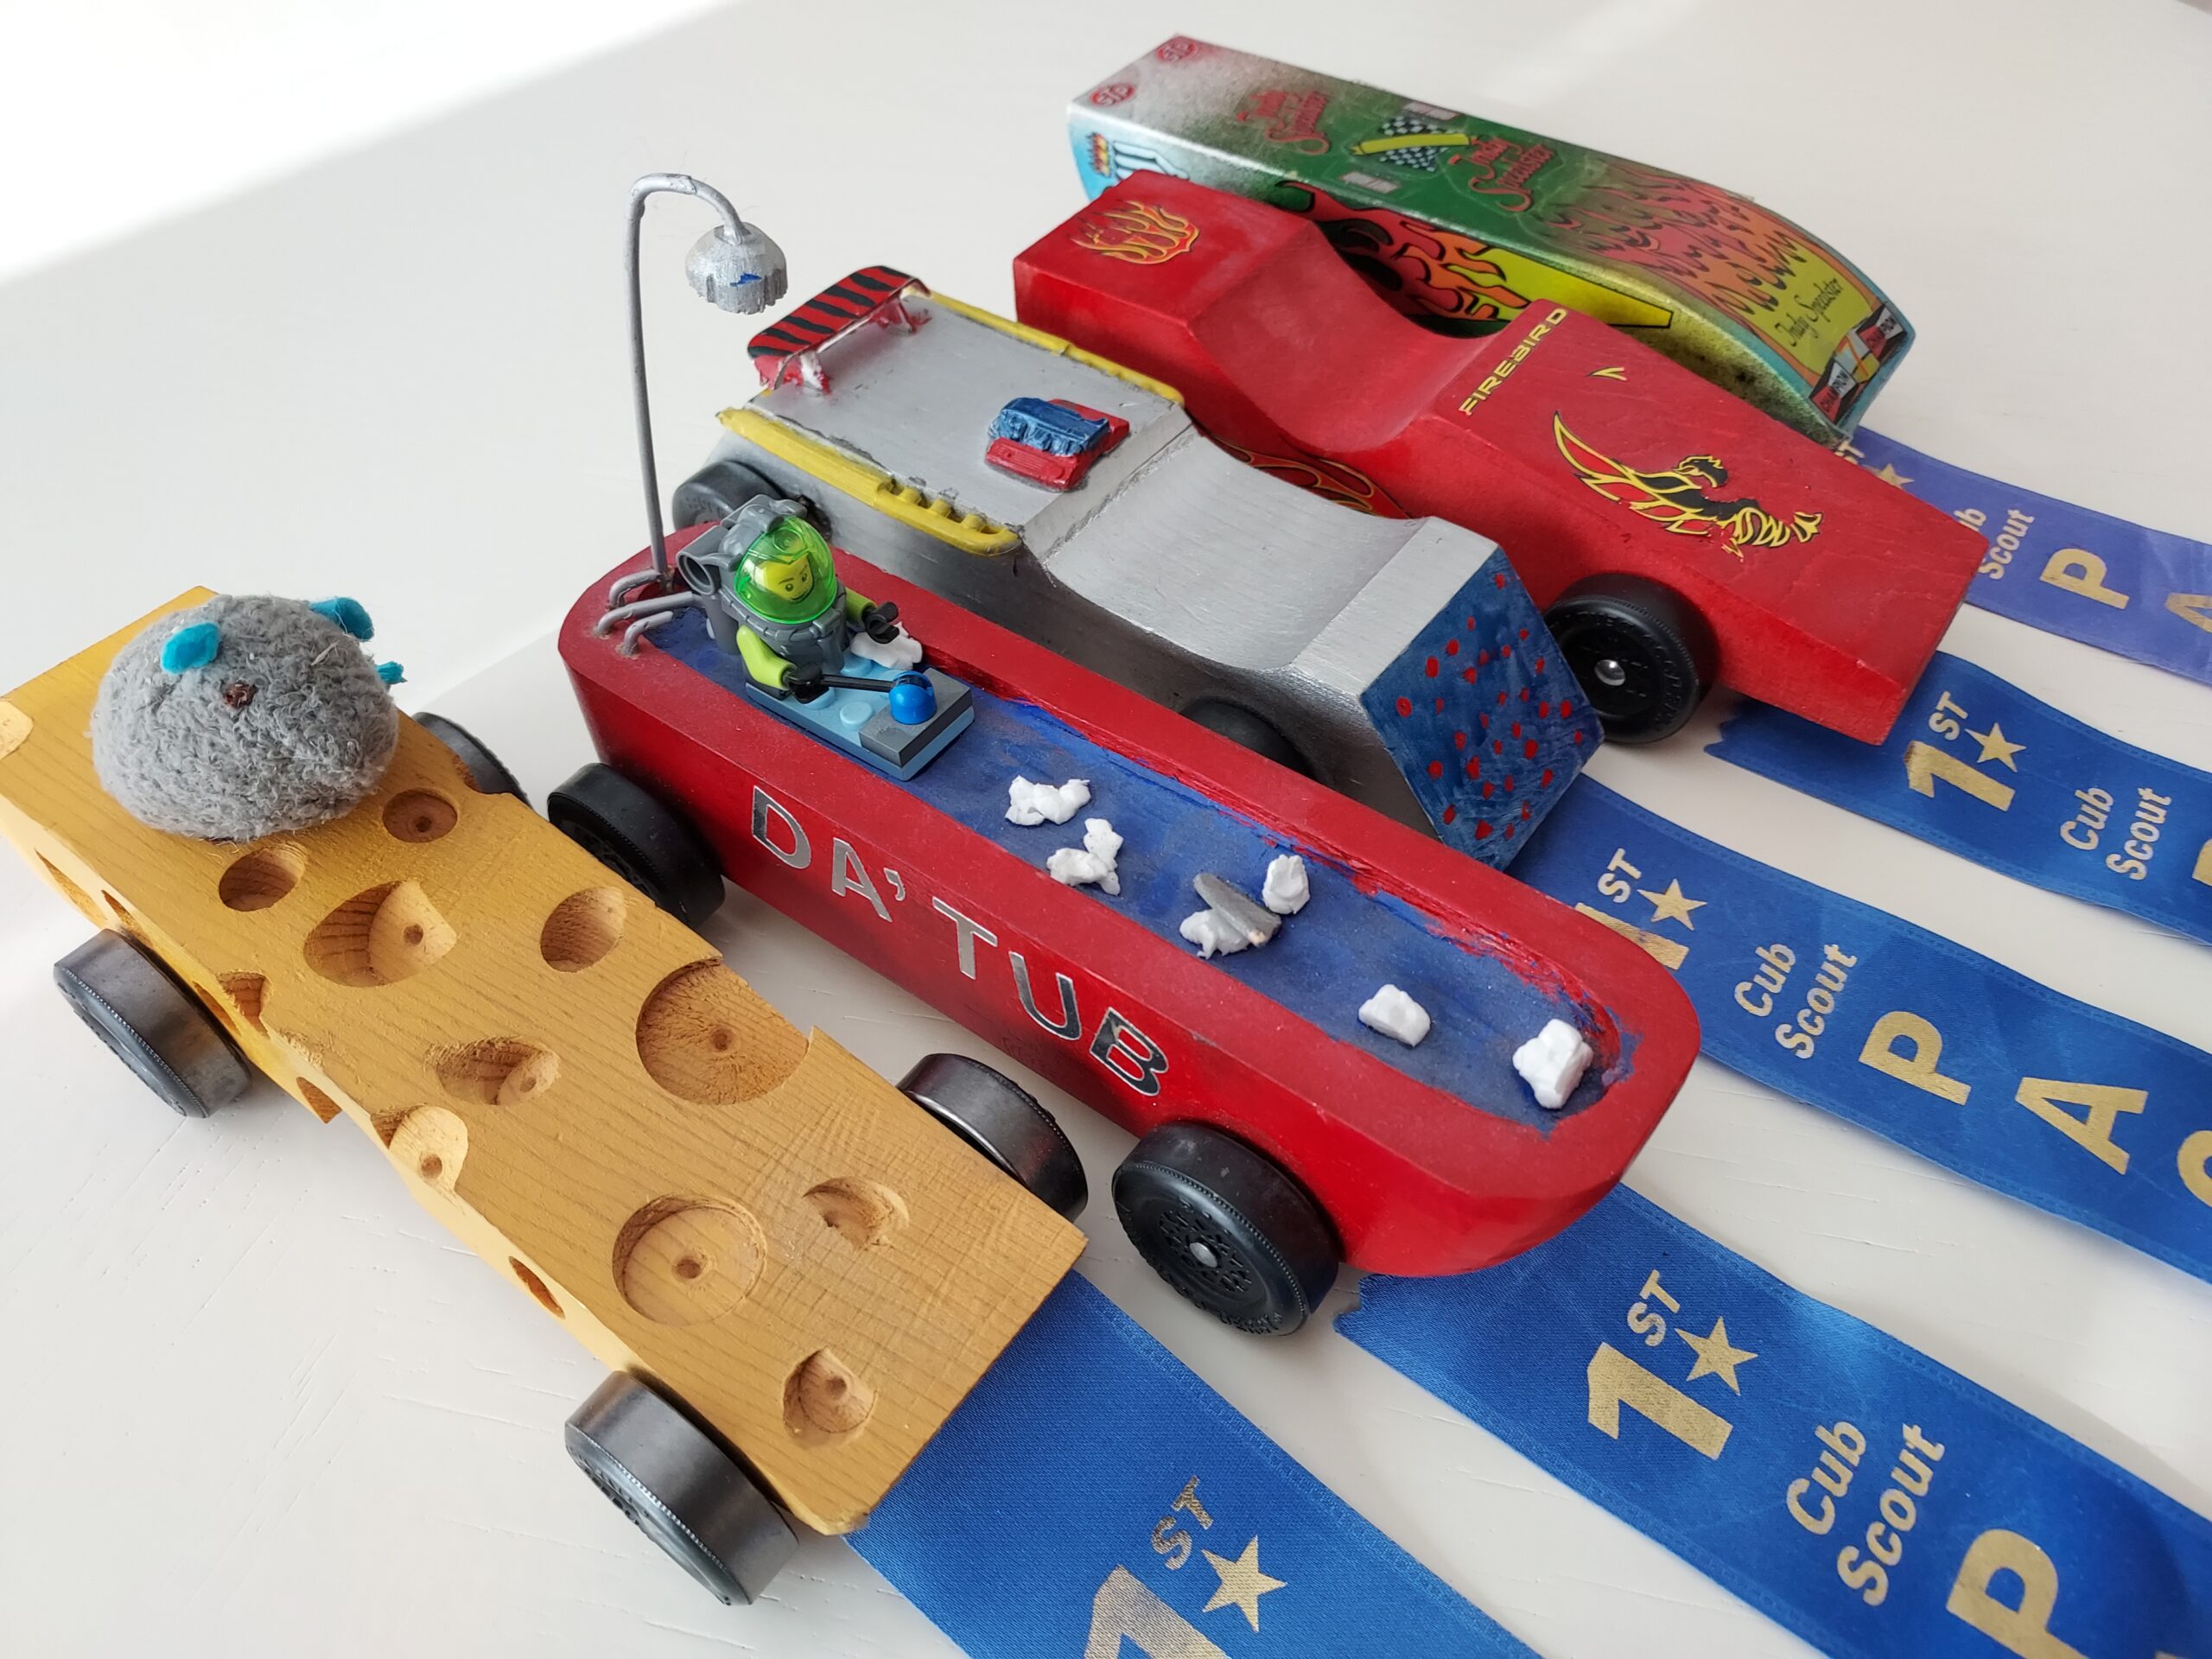
Here are my son’s cars from Tiger Cub through Webelos 2. They’re all 1st place winners. And they all follow the same principals I outline below.

Here’s his very first car and this is as Aero as he got – he won. In making these, all I did is help him guide the wood through the bandsaw just to give a little bit of a curve. The most fun he had was spray painting it and then had even more fun selecting and putting the stickers on. He spent more time choosing and slapping the stickers on than he did anything else.

The Second is Weight.
Here’s where you as the adult can come in and help him out or her out. The car has to be at 5 oz or 4.9 oz or 4.89 oz, or as close to 5 oz as you can get. That’s where your energy and speed is. Basically it’s potential energy. The more weight you have and the further back it is, the higher the speed car will have when it hits the flat spot on the track. Buy standard weights and drill 3/8” holes to slip them into. Hole them in place with Medium Thick CA (super) Glue
NOTE: I suggest Tungsten weights. These are environmentally friendly compared to lead. And let’s face it, sometime in the future your child’s Pinewood Derby car will be in the dump and the lead will leech out into the ground water. Tungsten will eliminate that problem.

If you’re serious about this, you need to get a digital scale. These things are pretty cheap. I’ll put a link in the bottom.

Now here’s number three.
The balance point of the car needs to be about 7/8” to 1-1/4” forward of the rear axle.
The reason is this, you want as much weight as possible to the rear of the rear axle. But you want enough weight up front so that when it’s going down the track it doesn’t start bouncing and jump off the track. If it jumps off, you’re going to be disqualified.
To get that balance point set up, there’s several tools out there you can buy. A balance point tool will increase the edge the 5 oz weight provides. You could also use a paint stick on edge – just hold it very steady.

Number 4 is the wheels.
You can go out and buy new specially turned wheels and not use the ones that come in the kit. But the ones in the kit are just fine – they just need some work.
You will need to do a few things to make these into speed wheels. First, feel the edges of the wheels for any burrs, little lumps, or flashing. If you find something like flashing, you’re going to take some sandpaper and gently sand it off following the curve of the wheel. Start with 800 grit, then 1200grit, and finally 2000 grit sandpaper.

If you find a burr that’s a little bit sharper and sticking up, you may have to go to a Swiss pattern makers file. I’ll put a link to the bottom of these things too.
Take the file, and just rub it gently over the burr 3 or 4 times, until it is smooth. Make sure you keep the curve of the wheel. Then come back with the 800 grit, the 1200 grit and the 2000 grit and smooth it out.
Next, check the inside hub where it will rub on the body and do the same thing.
Number 5 the axles.
Your axles generally are pretty darn good coming out-of-the-box. But check for burrs under the head and around the outside. If you find any use the file to gently file them away. Remember no flat spots. This process will take a minute or two for each axle.
And of course, you can buy speed axles but you don’t really have to. Next, take the axle and chuck it into your drill. And with a narrow strip of 1200 grit sand paper wrapped around it pull the trigger very gently. This will sand the surface. Do it for about a minute then move on to 2000 grit and finally 3000 grit.
You’ are doing two things. One, it’s smoothing the surface and getting rid of any excess friction from any rough spots and two, you are leaving very fine scratches. Those scratches will carry the flakes of graphite when you start lubricating the wheel and axel assembly.
NOTE: Don’t buy bent axles. These will cause excess friction inside the hub and against the body. I beat these guys every time. You can too.
NOTE: I have never seen anyone successfully remove and reuse speed axles that were installed the previous years. Let me know if that works for you.
Wheel Burn In
Now you can Put the wheel on the axle. Then put it back in the drill. Between the axle and the wheel in the center hub, dump as much Graphite as you can. And then right here underneath the hub.
Hold the wheel and gently pull the trigger so the axel spins in the wheel nice and slow. You don’t want to go very fast because you don’t want to melt the plastic and you don’t want to distort the plastic at all.
Run it for about 30 seconds, 40 seconds. Then put more graphite in, do it again. Add more more graphite. Keep doing this for about 3 minutes.
What that’s doing is pushing the graphite into the plastic of the wheel. That means you’re pre-lubricating the wheel and leaving graphite on the shaft.
Now keep the axle and wheel mounted together. And repeat for the other three.
Your wheels are all set.
Wheel Installation
What you want to do now is you want to go ahead and push the axles in. Next, use a business card to set the wheel hub spacing. Take a business card and slide it alongside the body between the body and the inner wheel hub. Set all four wheels the same.
Next, is to use this card again, to make sure your wheels are 90 degrees.
You don’t want camber or twist in the wheels. If they are twisted either way, you want to give them a gentle twist and get them back into alignment.
A note: some guys will tell you you’ve got to put a little kick to them and that you get less friction because it’s only part of wheel is touching. Don’t do that. The reason you don’t do that is because now you’ve introduced friction at the hub. You want the wheels to be as perfectly aligned as possible. But, if you really want to give bent axles a try here is a link.
Wheel Assembly Burn In
Once you have them aligned turn the car over. You or your son or daughter are going to squirt graphite in between the body and the wheel. Now use your finger and flick the wheel so it spins. Go ahead watch TV and spin the wheels. Every minute or so add some more graphite. You’re doing two things here. You put more graphite inside the wheel, but you’re also putting graphite against the body so as the wheel rubs against the body, that’s lubricating it. Just keep doing this for 3, 4, or 5 minutes a wheel.
Once you’ve got to the point where you think you’re done, grab a stopwatch or watch the clock and do this. Flick the wheel and see what the rundown is. The rundown from the time you hit it to the time it actually stops moving should be someplace between 15 and 22 seconds.
My son’s cars are still running at 18-19 seconds after being banged around since 2005.
If you’re in 15 second range, you’re an ok car. If you’re in that 19 to 22 seconds you probably have a winning car.
Pretty much the weight, the weight location, removing the burrs and off the wheel and polishing the axles and now you’ve got the rundown.
Your car is ready
NOTE: You can buy readymade wheels and axles coated with graphite and save your self some work.
PINEWOOD DERBY SECRETS
Here’s the Pinewood Derby secret that I didn’t learn until my last year in Cub Scouts – Graphite your tires!! People aren’t always very forthcoming about how to win. Look at the wheels below. They are no longer black but graphite color. That’s because they are loaded with graphite. The reason you rub graphite into the actual tire is because if the wheels for some reason are not turning, the wheel will still slide across the track.
Just put a bunch on there and rub it in well. Get a tissue and rub, rub, rub, until it no longer looks black. Or you can buy a set.

PINEWOOD DERBY CHEAT CODE
Now let me give you a cheat code.
You need to look at your track and find out whether the track release pin drops forward or it lifts up. If you look at my son’s Tiger Cub car notice how the front is cut back down underneath. The track we raced on was a flip down release. As the pin starts to swing down and release, the car is going to start moving immediately. Usually ahead of the rest of the pack. This cutback will you gain ¼” to a ½” jump on the competition. You will need to cut it back 35 to 45 degrees which should be good enough.
After that, it’s up to you and your son or daughter what kind of paint you want, what kind of decals you want, heck, go have fun with it.
This car, “Da Tub”, was his best one. He thought of the design and made it by himself. I did give him a few pointers on how to use my carving chisels.


We beat the guys who bought wheels, bought the lathe cut axles, and you know he did it all and was very proud of himself.
Closing Thoughts
I hope you got something out of this. I always have fun doing these things.
A couple closing thoughts. You’re going to need some tools and I have a list at the bottom. You really should have a bandsaw for about a $160. And you need to have a scale. You don’t want to show up on weight night guessing what your weight is. You will need Swiss files and sandpaper. And, when your child transitions to Scouting you can sell everything to a new parent.
Hope you enjoyed it.
And if you did, do me a favor, hit like and subscribe. There are links in the bottom you can explore. Check those out, might find something useful.
Hey, until next time, good making.
Bill
Tools you may need
WEN 9” Benchtop Bandsaw https://amzn.to/42G7Tzj
Sandpaper, 90 Pcs 400 to 3000 Grit https://amzn.to/40mQIRI
18Pcs Pattern Makers File Set https://amzn.to/3ns8bcU
3.75oz. Tungsten Weights https://amzn.to/3niZ0eC
Starbond 4 oz. Medium CA Glue https://amzn.to/3KfzJuW
Precision Digital Scale https://amzn.to/40FpoxD
Center of Gravity Balance Tool https://amzn.to/3ZsKGgV
Pinewood Car Graphite Powder https://amzn.to/3FTjst9
Graphite Coated Speed Wheels https://amzn.to/42PqB7J
Pinewood Speed Axles https://amzn.to/3Ke1W5c
Derby Car Sticker Set https://amzn.to/40mT8zM
#pinewood derby #pinewood derby tips #how to win pinewood derby #pinewood derby car


